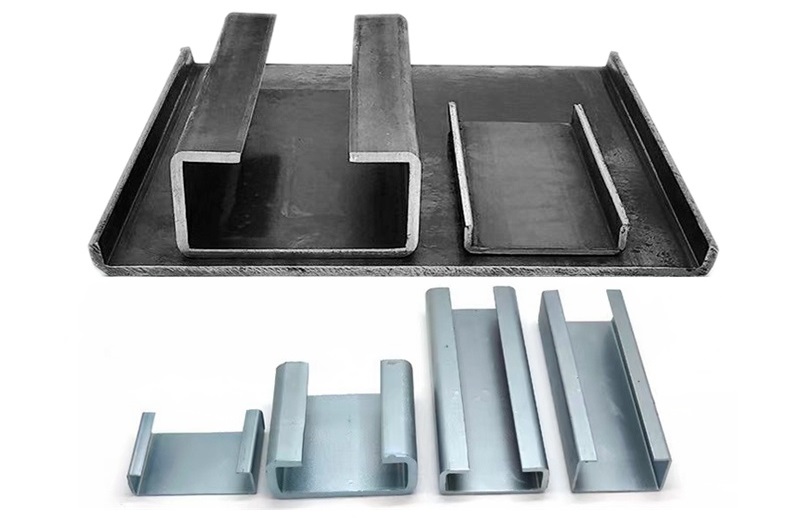
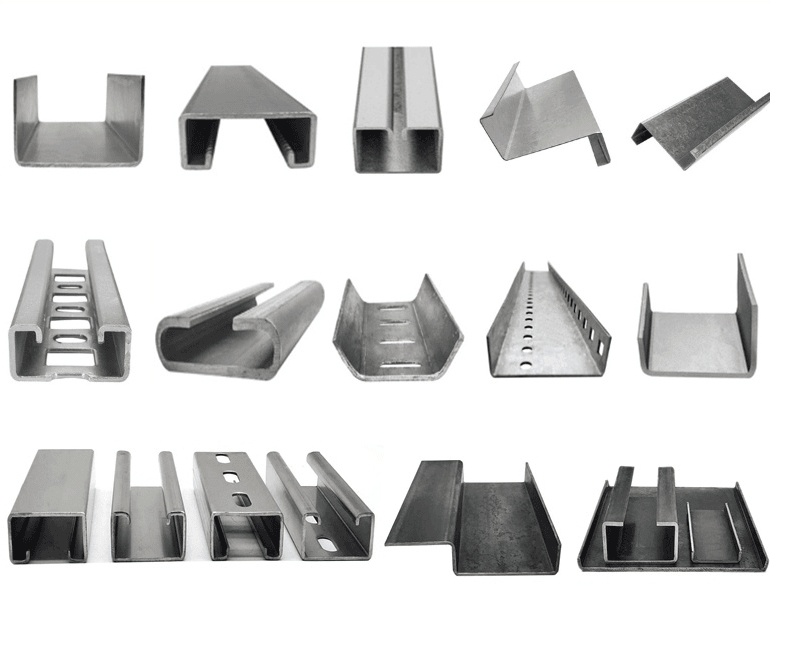
- 1.0What Is C Purlin?
- 2.0Are C Purlins the Right Choice for Roofing in Metal Buildings?
- 3.0Summary: Are C Purlins Suitable for Roofing?
- 4.0C Purlins — Applications and Recommendations
- 5.0How to Select the Right Purlin Size? C Purlin Dimensions and Lengths
- 6.0How to Choose the Right C Purlins for Your Project
- 7.0What Are Traditional Metal Purlins?
- 8.0Metal Purlin Structural Principle
- 9.0Purlin Installation: Metal Purlin Installation Guide
- 10.0Metal Purlin Materials and Surface Treatment
- 11.0C Purlin Section Dimensions and Structural Properties – Metric Units
1.0What Is C Purlin?
C purlin (also called Cee purlin) is a structural member with a C-shaped cross-section, widely used in metal buildings as a support beam for walls, roofs, and floors. Known for its excellent strength-to-weight ratio, the C purlin has become a popular choice as a secondary structural component in both industrial and commercial constructions.
C purlins are typically manufactured using a purlin roll forming machine, which ensures precise dimensions, consistent profiles, and high production efficiency. This automated forming process enables manufacturers to meet the structural demands of modern steel buildings with reliable and cost-effective purlin production.
1.1C Purlin’s Structure and Functions
- Profile Shape: C-shaped section with two parallel flanges, ideal for single-span applications, delivering strong structural stability after installation.
- Material: Mainly made of galvanized steel or cold-formed steel, offering strong resistance to corrosion and harsh environments.
- Placement: C purlins are typically installed horizontally along roofs or walls to carry and distribute loads from roof panels, cladding, or mezzanine floors.
- Framework System: Often used together with Z purlins to form a more robust structural solution.
1.2C Purlins for Metal Buildings: Load Transfer, Stability, and Support
- Load Transfer: Effectively transfer loads from the roof, cladding, snow, or wind down to main structural beams or columns.
- Lateral Support: Provide additional resistance against bending, warping, or distortion when teamed with other structural elements.
- Panel Mounting Base: Provide a reliable base for securing wall or roof panels, ensuring structural tightness and stability.
- Weight Distribution: Proper installation helps evenly distribute the load across the entire structure, strengthening its stability.
1.3Key Advantages of C Purlins
- Customizable Size:Depth, thickness, and length can be tailored to match your design requirements, offering strong adaptability.
- Lightweight and Cost-effective:Compared to other profiles, C purlins maximize material utilization while reducing weight, transportation, and installation costs.
- Excellent Structural Performance:Provides strong stiffness and stability — especially for small to medium spans — and is a reliable solution for both wall and roof structures.
- Easy Installation:Open-profile design makes it convenient to connect with bolts or welds, reducing installation time and labor.
- Galvanized Coating for Corrosion Resistance:Hot-dip galvanization prolongs service life and protects purlins from external corrosion in outdoor environments.
1.4Possible Limitations of C Purlins
- Open Section May Accumulate Dirt or Become a Nesting Site:
The C-shaped opening may attract birds or debris, requiring additional maintenance. - Additional Support May Be Needed for Large Spans or Loads:
Support structures, such as bracing or additional columns, may be necessary under heavy-load or long-span conditions. - General Limitations under Extreme Conditions:
C purlins may show reduced structural resistance under strong winds, heavy snow, or high temperatures.
2.0Are C Purlins the Right Choice for Roofing in Metal Buildings?
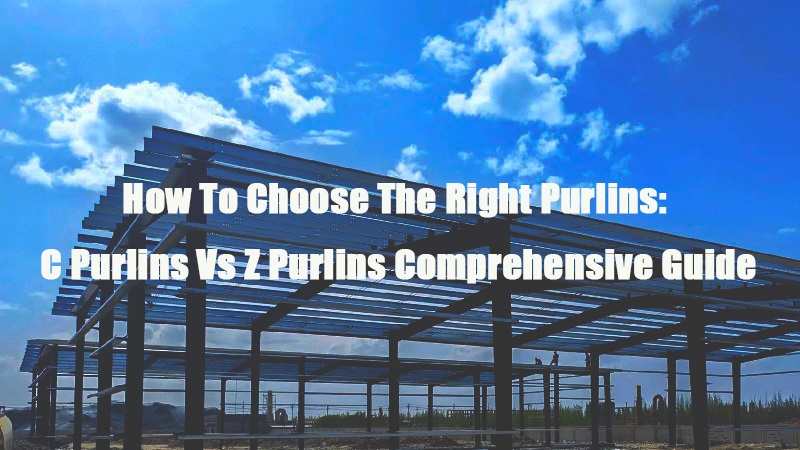
In lightweight steel structures, C purlins and Z purlins are the two most commonly used purlin types. They are widely used to support roof panels and wall cladding and serve as key secondary structural components in metal buildings. Understanding their performance and applications can help you determine whether C purlins are a suitable choice for your roof structure.
2.1Key Difference Between C Purlins and Z Purlins
- C Purlins: C-shaped cross-section; symmetrical and easy to install; frequently used for wall structures and small to medium-span roofs.
- Z Purlins: Z-shaped; can be overlapped by rotating 180°, offering greater structural continuity and stability; typically used for large-span or sloped roofs.
In practice, C purlins and Z purlins can be used individually or in combination to form a stable roof framing system, supported by rafters, steel beams, or wall structures.
2.2Possible Limitations of C Purlins when Used in Purlin Sheds
While C purlins are simple in structure and convenient to install, there are some limitations:
- Strength Limitations:
Compared to Z purlins, C purlins perform less well under heavy-load or large-span conditions; additional bracing or supports may be needed. - Not Suitable for Heavy-load Applications:
Installing heavy equipment (such as forklift trucks) under purlin sheds with lightweight columns may compromise structural safety. - Poor Fire Resistance:
Most C purlin systems do not come with fire-proof coatings or wrapping, making them prone to structural instability or collapse under high temperatures. - Limited Connection Rigidity:
Usually connected to the foundation by welding or bolts, C purlins may be more susceptible to vibrations, thermal expansion, and contraction, affecting their stability.
2.3Are C Purlins Suitable for Roofing?
C purlins are well-suited for light-load and small to medium-span roofing systems, such as:
- Small industrial sheds
- Logistic canopies
- Temporary storage buildings
- Agricultural metal structures
But for large-span, heavy-load, or high-risk environments (such as high temperatures or strong winds), Z purlins or more robust framing systems are recommended.
3.0Summary: Are C Purlins Suitable for Roofing?
Yes — but it depends on your project’s requirements.
| Project Type | Recommendation | Description |
| Small Shed or Temporary Building | Highly Recommended | Light, quick, and cost-effective |
| Medium Industrial Workshop | Suitable | Combine with appropriate structural supports |
| Large-span Roofing | Limited | Z purlins or specialized trusses are recommended |
| Large-load or Harsh Environments | Not Recommended | C purlins may compromise structural safety and stability |
3.1C Purlins vs Z Purlins — A Structural and Application Comparison
| Aspect | C Purlins | Z Purlins |
| Cross-section shape | C-shaped with symmetrical flanges | Z-shaped with asymmetrical flanges and slanted edges |
| Flange angle | 90º | Less than 90º — more flexible |
| Splice ability | Not designed for overlapping | Allows overlapping — ideal for large spans |
| General application | Wall supports, floor beams, doors, and side railings | Primary purlins for roofs, wall purlins |
| Load-bearing capacity | Suitable for medium and light-load structures | Higher load-bearing capacity — ideal for heavy-load structures and large spans |
| Installation | Simple, convenient; for single-span structures | Requires careful alignment and overlapping; for agricultural and industrial buildings |
| Structural stability | Higher rigidity due to symmetrical profile | More flexible; greater bending resistance — especially for sloped roofs |
| Cost-efficiency | Lower material and installation cost | Higher strength but slightly more expensive in both material and installation |
| Typical applications | Commercial wall structures, mezzanine floors, window and fence framing | Large-span industrial roofs, agricultural buildings, structures with greater slope |
3.2Summary of C Purlins vs Z Purlins — Characteristics and Applications
| Aspect | C Purlins | Z Purlins |
| Application | Wall and floor joists | Support for roofs and wall purlins |
| Flange angle | 90º | Less than 90º — more flexible |
| Splice ability | Non-overlappable | Continuous overlapping for large spans |
| Roof slope | Suitable for low slopes | Suitable for steeper slopes with greater bending resistance |
| Load-bearing capacity | Lower | Higher — designed for heavy-load structures |
| Installation | Simple — ideal for single-span structures | Requires careful alignment and overlapping; typically used in agricultural and industrial buildings |
| Typical applications | Wall supports, floor beams | Large-span roofs, industrial warehouse structures |

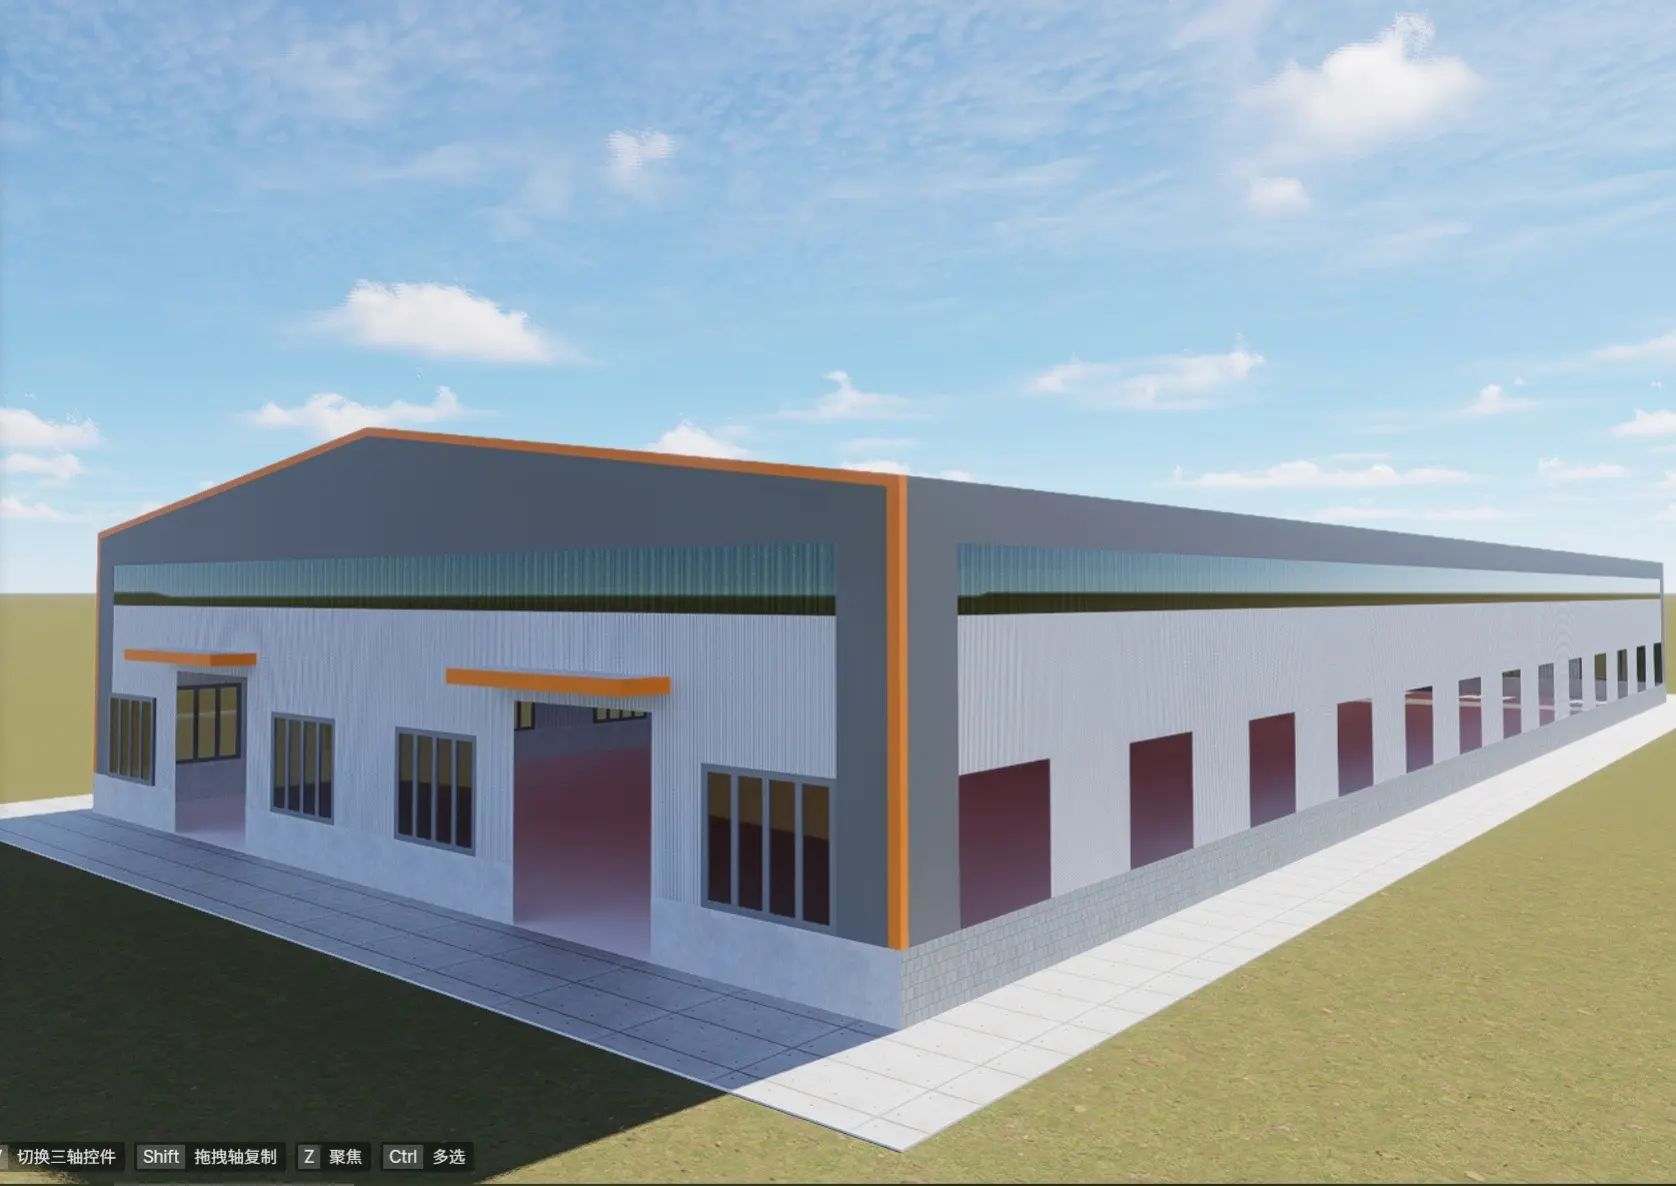
4.0C Purlins — Applications and Recommendations
C purlins are particularly well-suited for scenarios requiring high structural efficiency, medium load-bearing capacity, and short construction periods. They are frequently used in industrial buildings, warehouses, carports, and lightweight steel structures due to their lightweight, high strength, and ease of installation.
For lightweight or temporary structures, purlin sheds constructed with C purlins provide several key benefits:
- Cost-effective: Suitable for structures with spans less than 12m — low manufacturing and installation costs with high cost-efficiency.
- Easy installation: Rapid connection to main structures using bolts or screws — faster on-site assembly and reduced construction time.
- Light and durable: Cold-formed purlins are lightweight yet strong, convenient for transportation and installation, while retaining structural stability.
- Versatile and adaptable: Readily available in many regions (such as Chennai, Chhattisgarh), C and Z purlins can be quickly sourced and deployed.
Recommended applications:
- Mezzanine floor support structures
- Wall secondary framing
- Small-span metal roof framing
- Door and window framing and trim structures
Not recommended for:
- Large-span roof structures
- Applications under heavy snow, high winds, or heavy equipment load.
| Application | Functional role | |
| Roof support | Support for roof panels, transfer of gravity load to main structure | |
| Wall support | Horizontal bracing within wall framing | |
| Floor joists | Support for mezzanine floors, adding stiffness and stability | |
| Door and window framing | Structural members framing doors and windows | |
| Decorative elements | Parapets, eaves, railings, or finishing details |
C Purlins vs Z Purlins — Selection Guidelines
| Situation | Recommended | Reasons |
| Small span, simple structure | C purlins | Fast installation, structural stability, low cost |
| Large span, strong winds, heavy-load conditions | Z purlins | Continuous overlapping and greater bending resistance |
| Wall framing | C purlins | Symmetrical profile, convenient for installation |
| Large roof slope | Z purlins | Better bending resistance with growing slope |
| Mezzanine floor framing | C purlins | Easily connectable to main beams and columns |
| Large, multi-span structures | Z purlins | Continuous overlapping forms a more unified structure |
5.0How to Select the Right Purlin Size? C Purlin Dimensions and Lengths
5.1Key Factors in Selecting Purlin Size
The purlin’s size and installation directly affect the safety and stability of your structure. When choosing purlins, consider the following:
- Type of framing structure
- Distance of purlin spans
- Loading conditions (wind, snow, equipment)
5.2Common Framing System Types and Their Impact on Purlin Selection:
- Single-span System: Purlin spans the entire length without additional supports — requiring greater stiffness.
- Double-purlin System: Purlins placed at both ends and in the center — adding additional support and stability.
- Double-overlap System: Purlins overlap at the center — increasing load-bearing capacity.
- Continuous-overlap System: Multiple purlins are evenly spaced and supported — ideal for long-span structures.
5.3Calculating Number of Purlins:
Determine purlin spacing based on framing configuration.
Common purlin spacing is 16 inches (approx. 40 cm) for evenly distributed load.
5.4Recommended C Purlin Dimensions and Maximum Spans:
| Purlin Height | Max. Span |
| 4 inch | 12 feet (approx. 3.6 m) |
| 6 inch | 18 feet (approx. 5.5 m) |
| 8 inch | 25 feet (approx. 7.6 m) |
| 10 inch | 30 feet (approx. 9.1 m) |
When selecting purlins, make sure to match their dimensions to your building’s span and load requirements for a strong, stable structure.
6.0How to Choose the Right C Purlins for Your Project
Selecting the appropriate C purlins is a key step in ensuring the performance and safety of your metal building structure. Here’s what you should pay close attention to when making your choice:
6.1Architectural Design and Loading Requirements
The size and spacing of C purlins should be determined by your building’s structural design.
Consider the following factors to make sure purlins can safely carry all applicable loads:
- Roof Slope
- Snow Loads
- Wind Loads
- Local Climate Conditions
6.2Material Specification
Choose steel material with the appropriate thickness and strength for your application.
Thicker purlins typically provide greater load-bearing capacity — but you should balance this against cost and ease of installation.
6.3Corrosion Resistance
Galvanized C purlins are the standard solution for resisting rust — especially in humid or corrosive environments.
The galvanization process prolongs purlin lifespan, reduces maintenance, and helps keep the structure stable in the long term.
7.0What Are Traditional Metal Purlins?
In traditional structures, purlins are horizontal members that carry the loads from the roof deck or metal sheet roofing.
These purlins are supported by main girders or beams — typically spaced about 10 feet (3 m) (depending on purlin size and other factors).
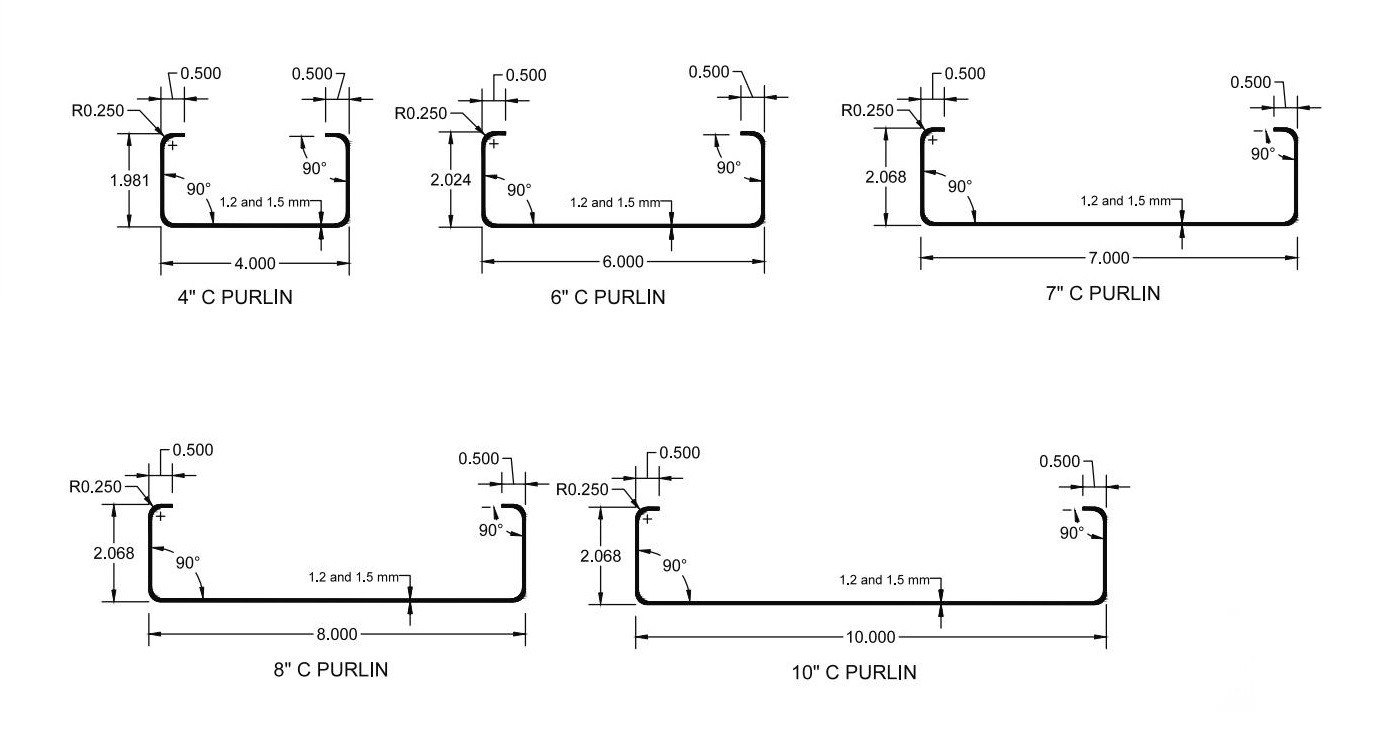
Usually, 4”, 6”, or 8” C purlins are used in these applications.
Sometimes, two 6” or 8” C purlins placed back-to-back can be used to form a lightweight structural system — especially when greater stiffness is desirable.
Additionally, Hat Channel purlins can be used when low profile purlins or tighter spacing is needed.
8.0Metal Purlin Structural Principle
- Cross-section: C and Z purlins (typically cold-rolled) combine high strength with light weight.
- Load Distribution: Purlins transfer loads from the roof or wall cladding down to the main structural frame.
- Connection Method: Usually connected by welding or bolting to provide a reliable load path.
- Spacing and Span: Determining purlin spacing involves a balance between structural stability and material economics.
- Deflection Control: Controlled deflection guarantees the structural integrity and service life of the building’s envelope.
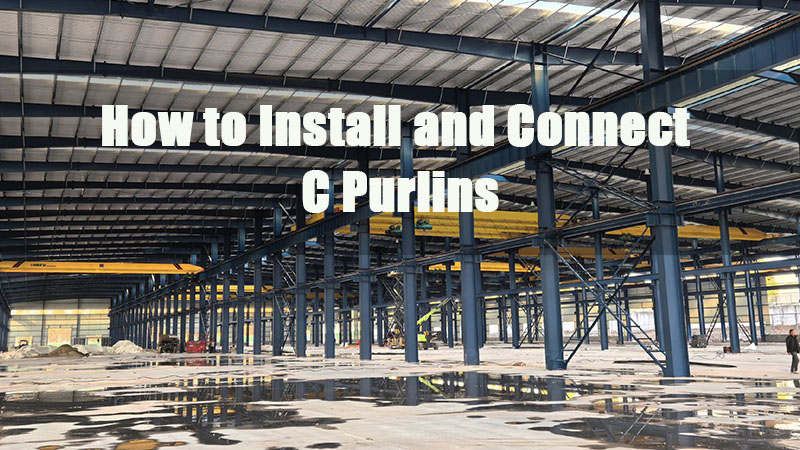
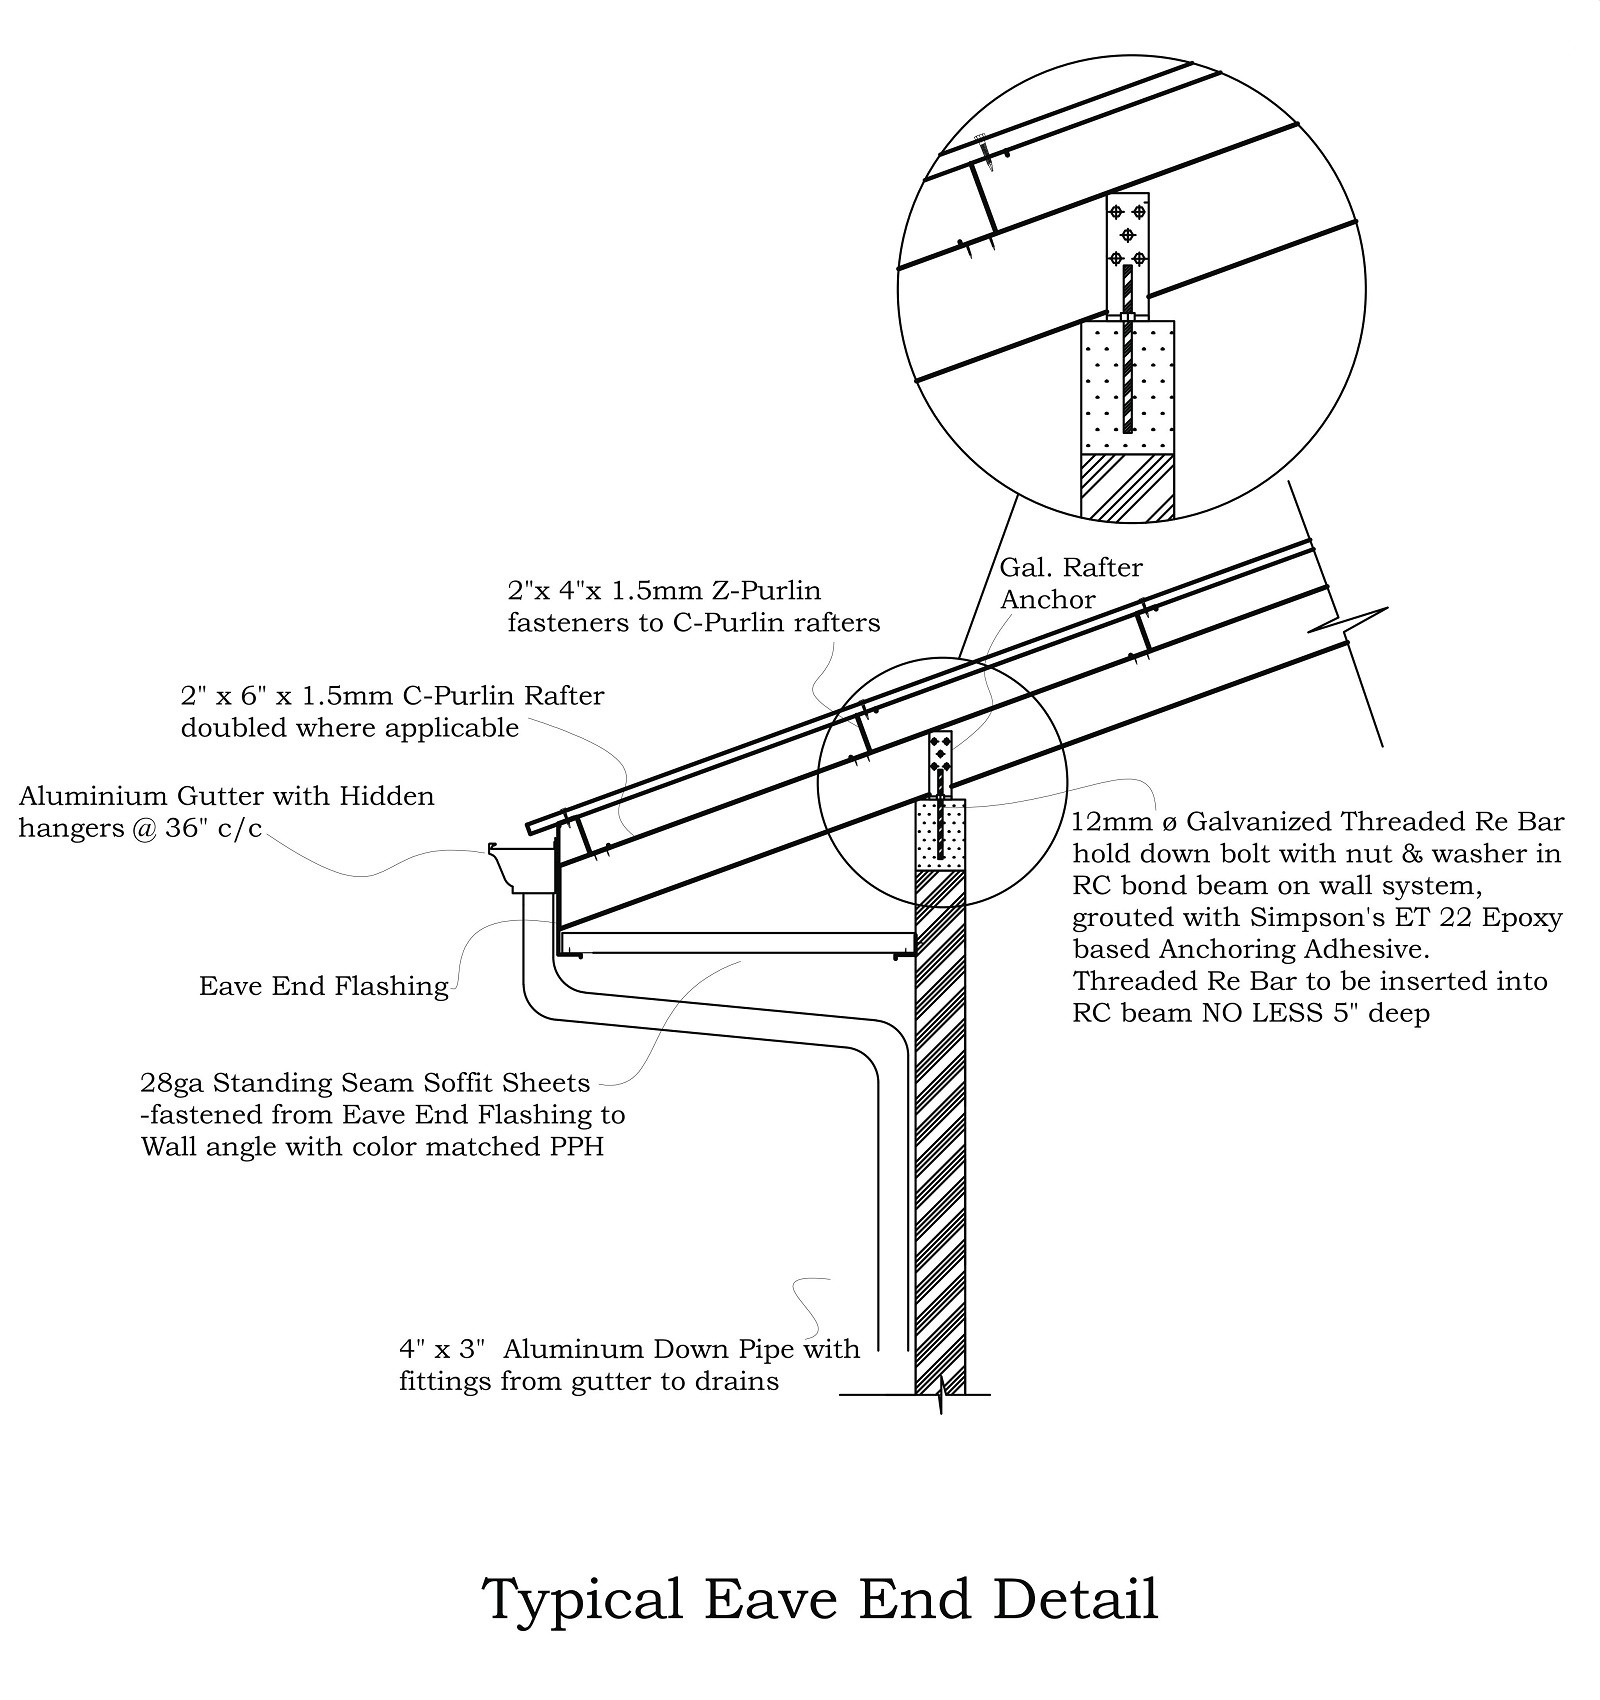
9.0Purlin Installation: Metal Purlin Installation Guide
9.1Purlin Fixing and Connection
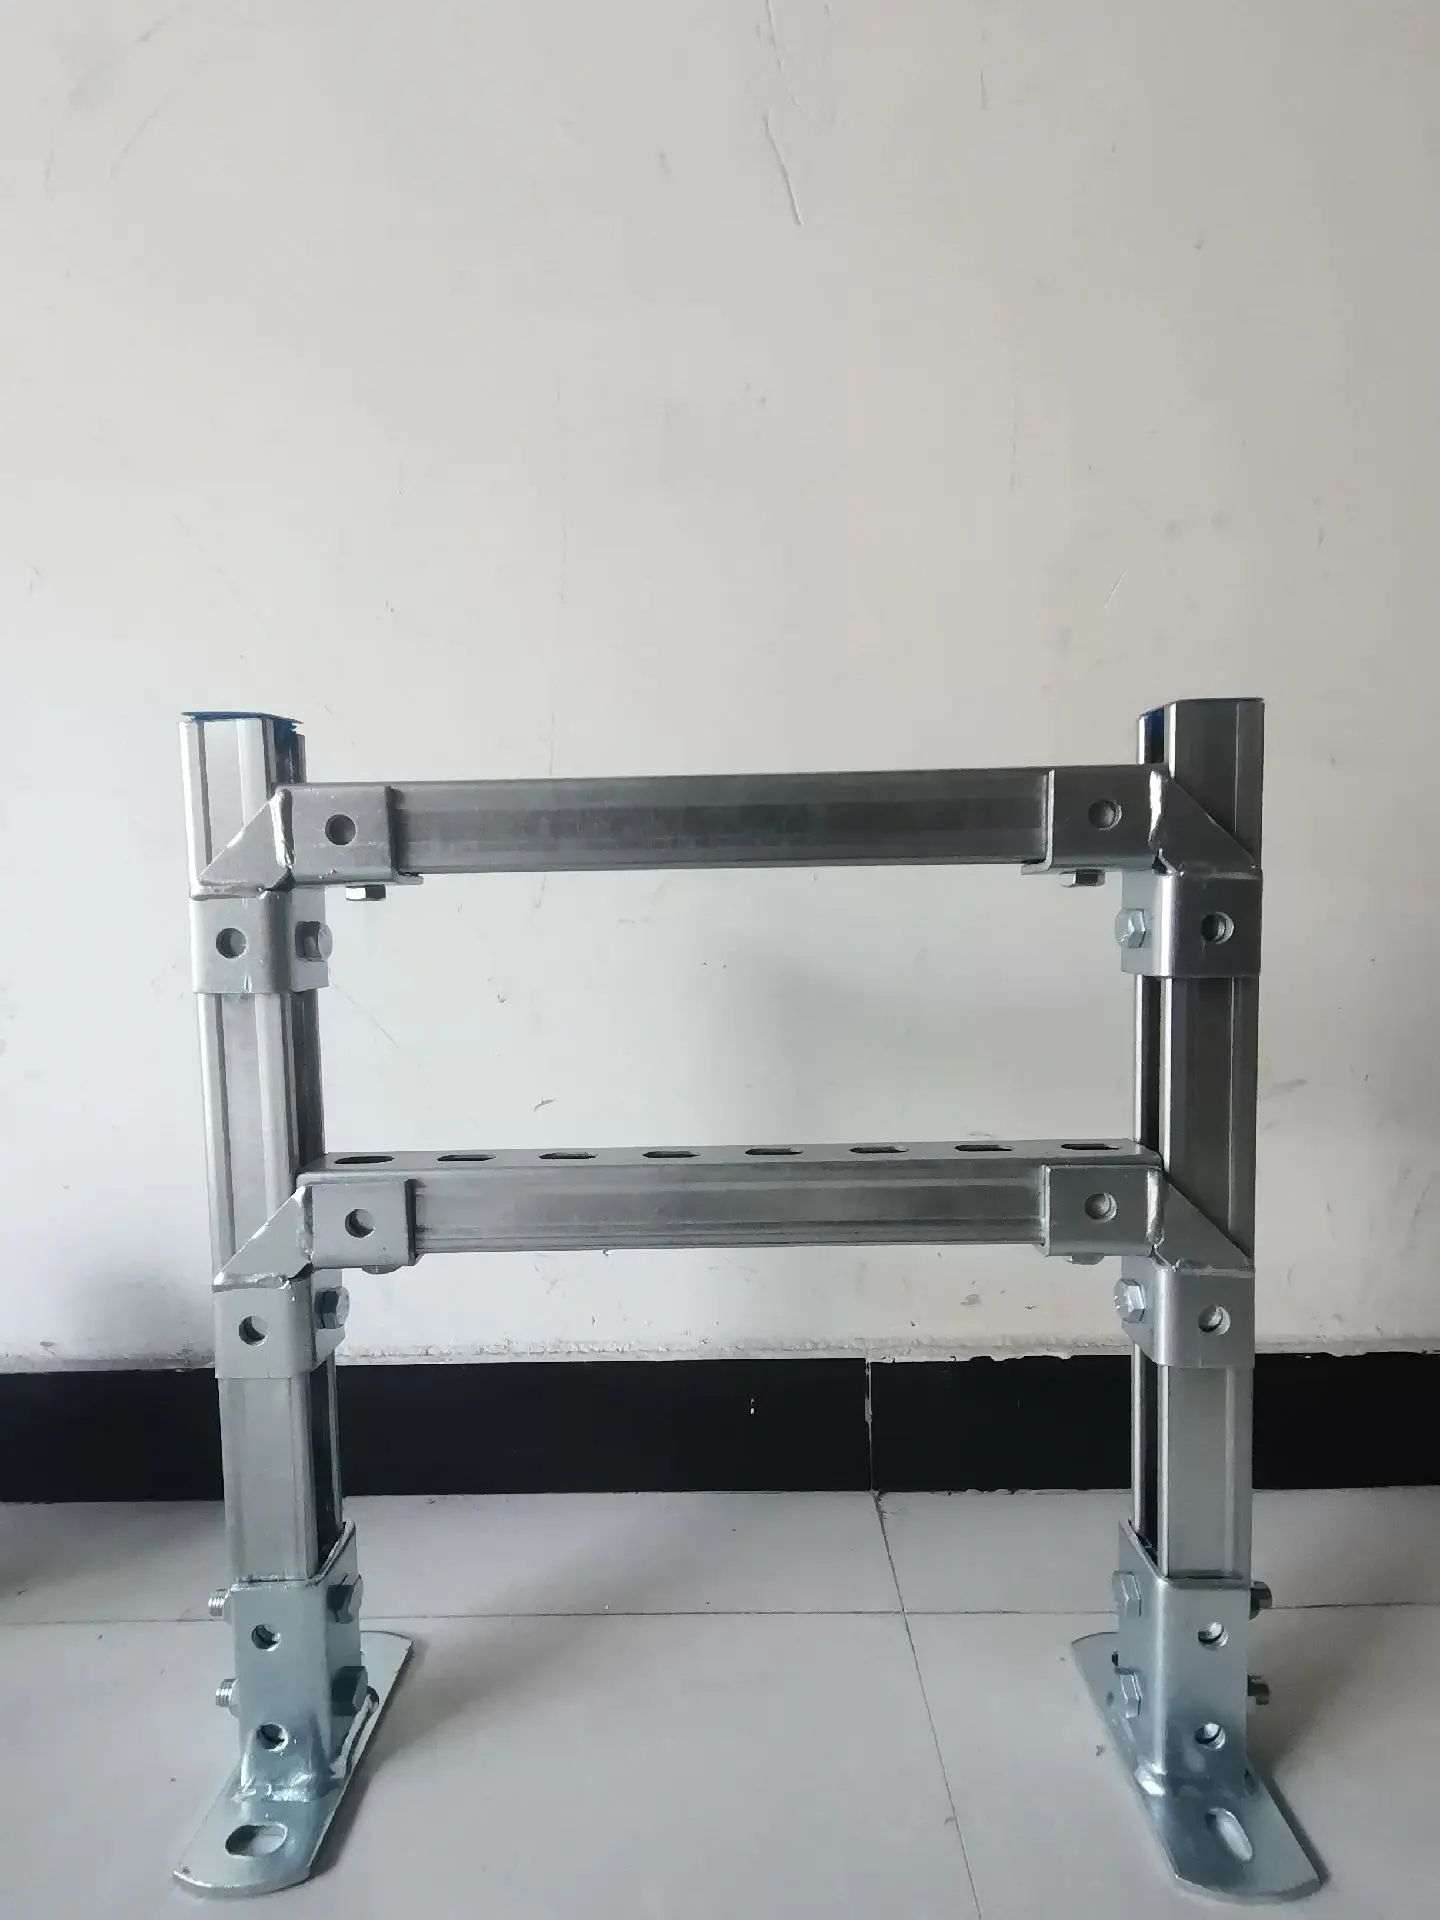
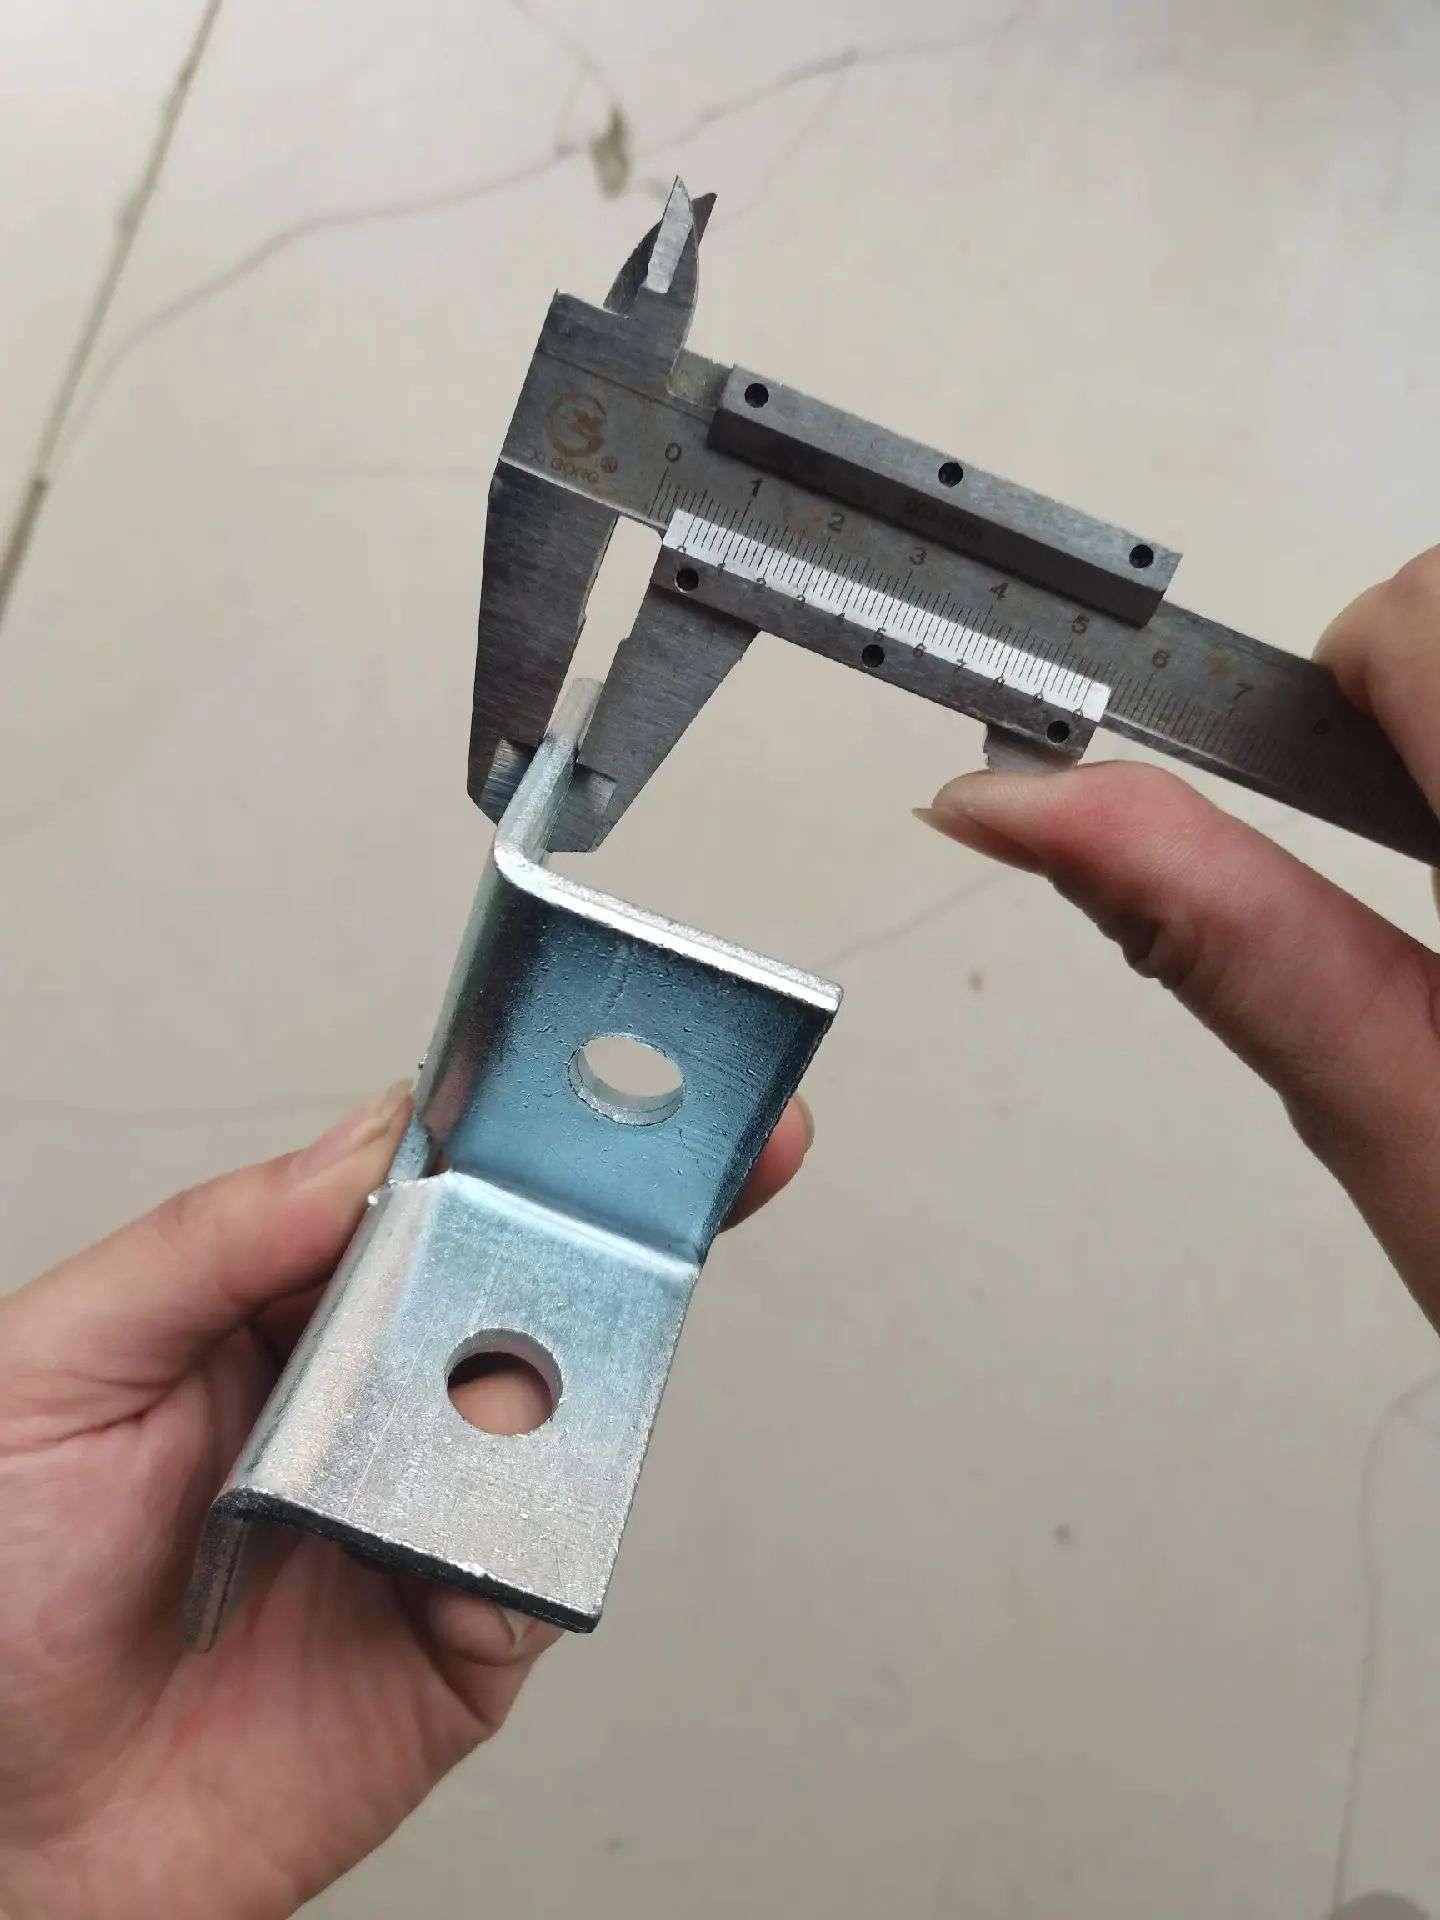
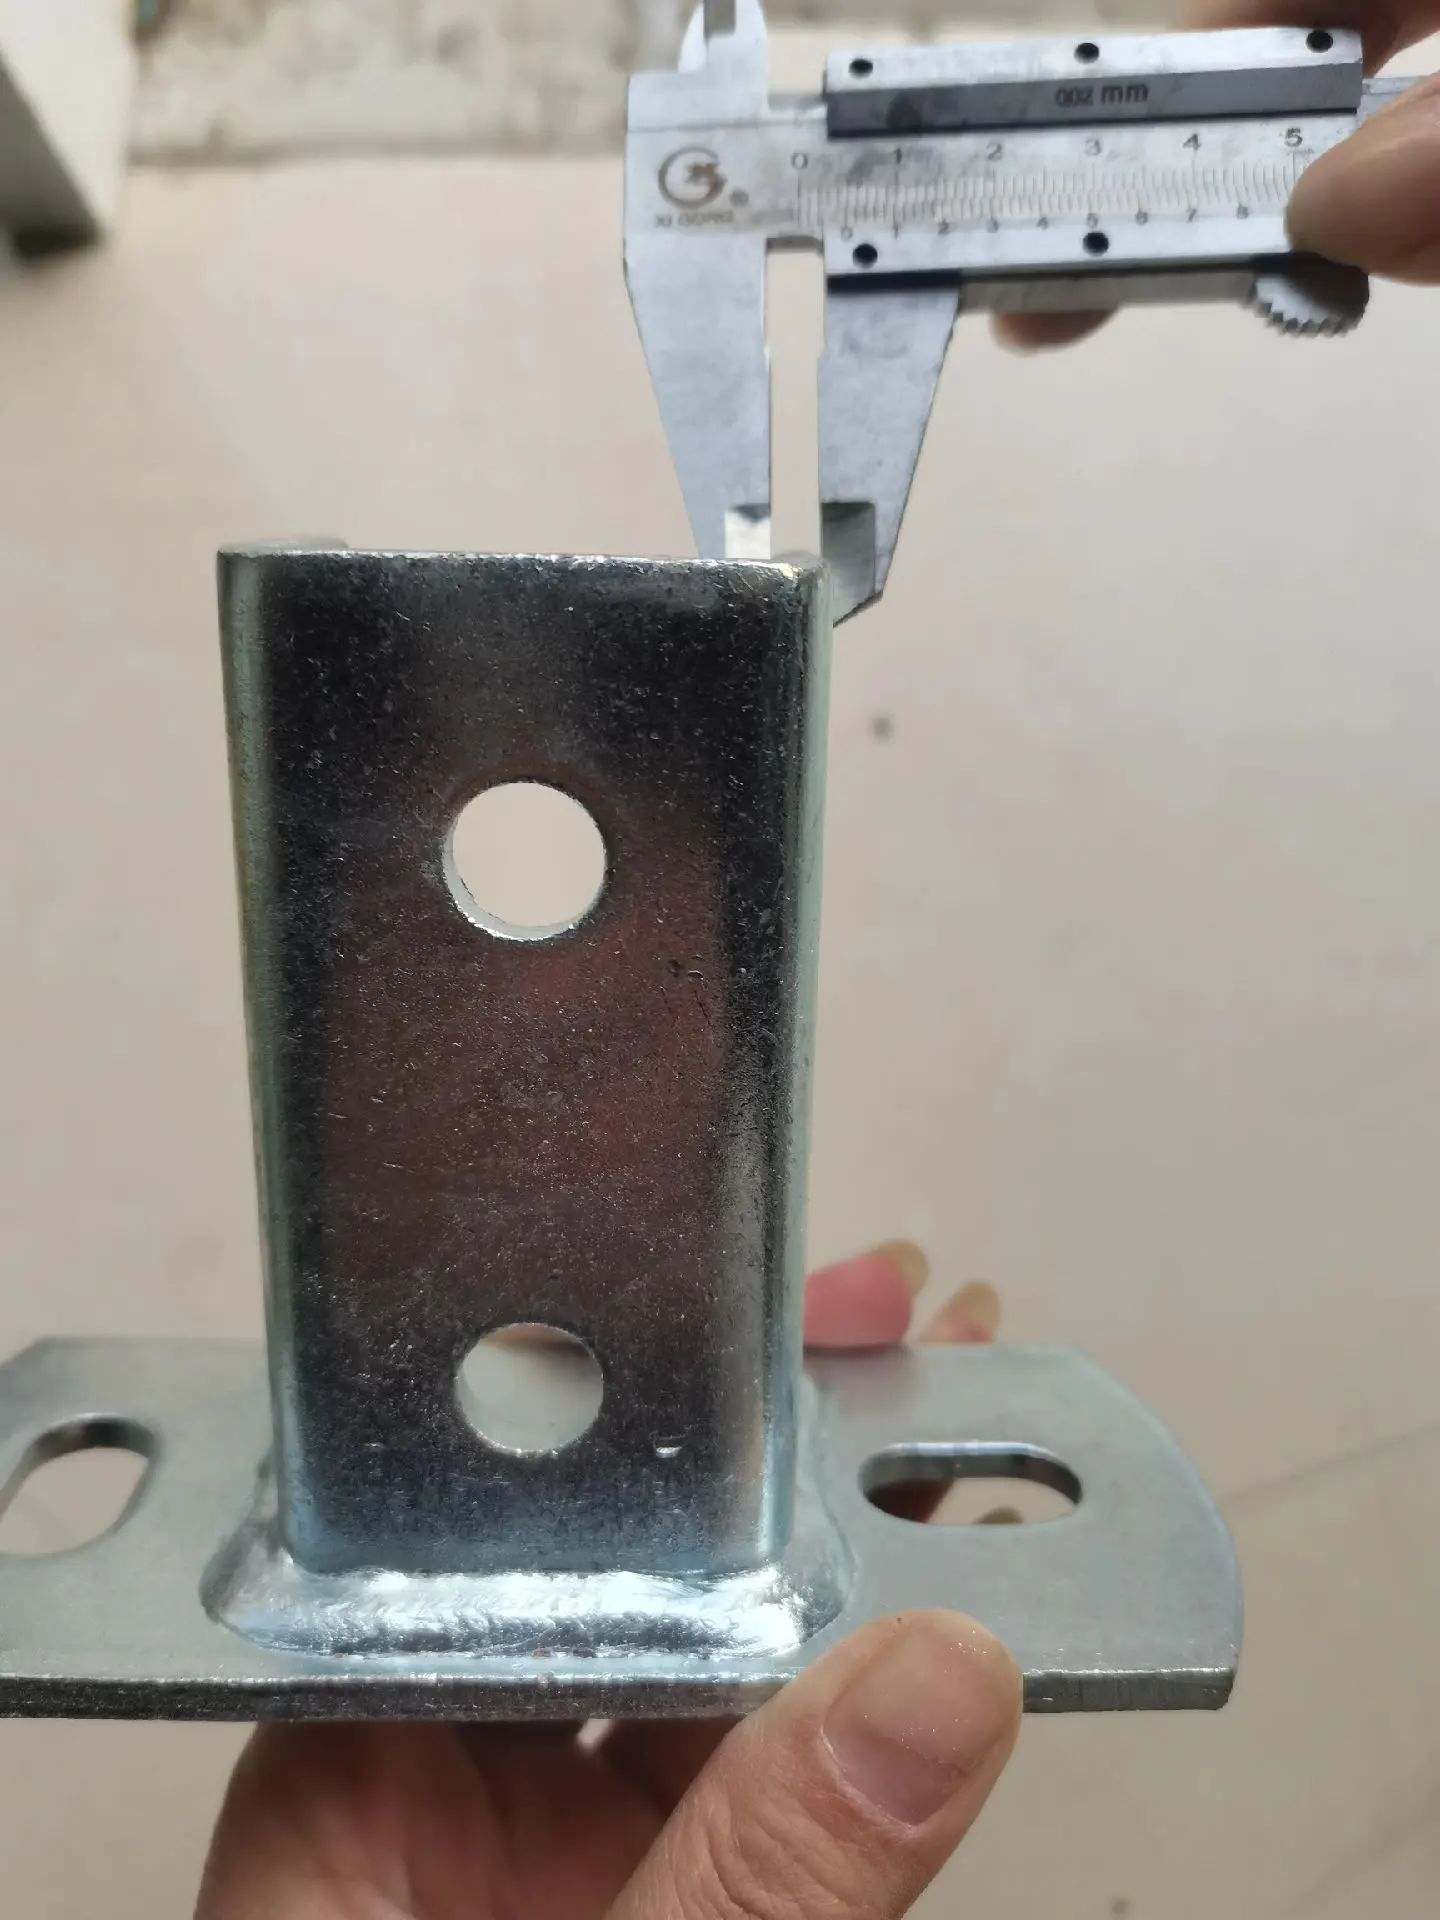
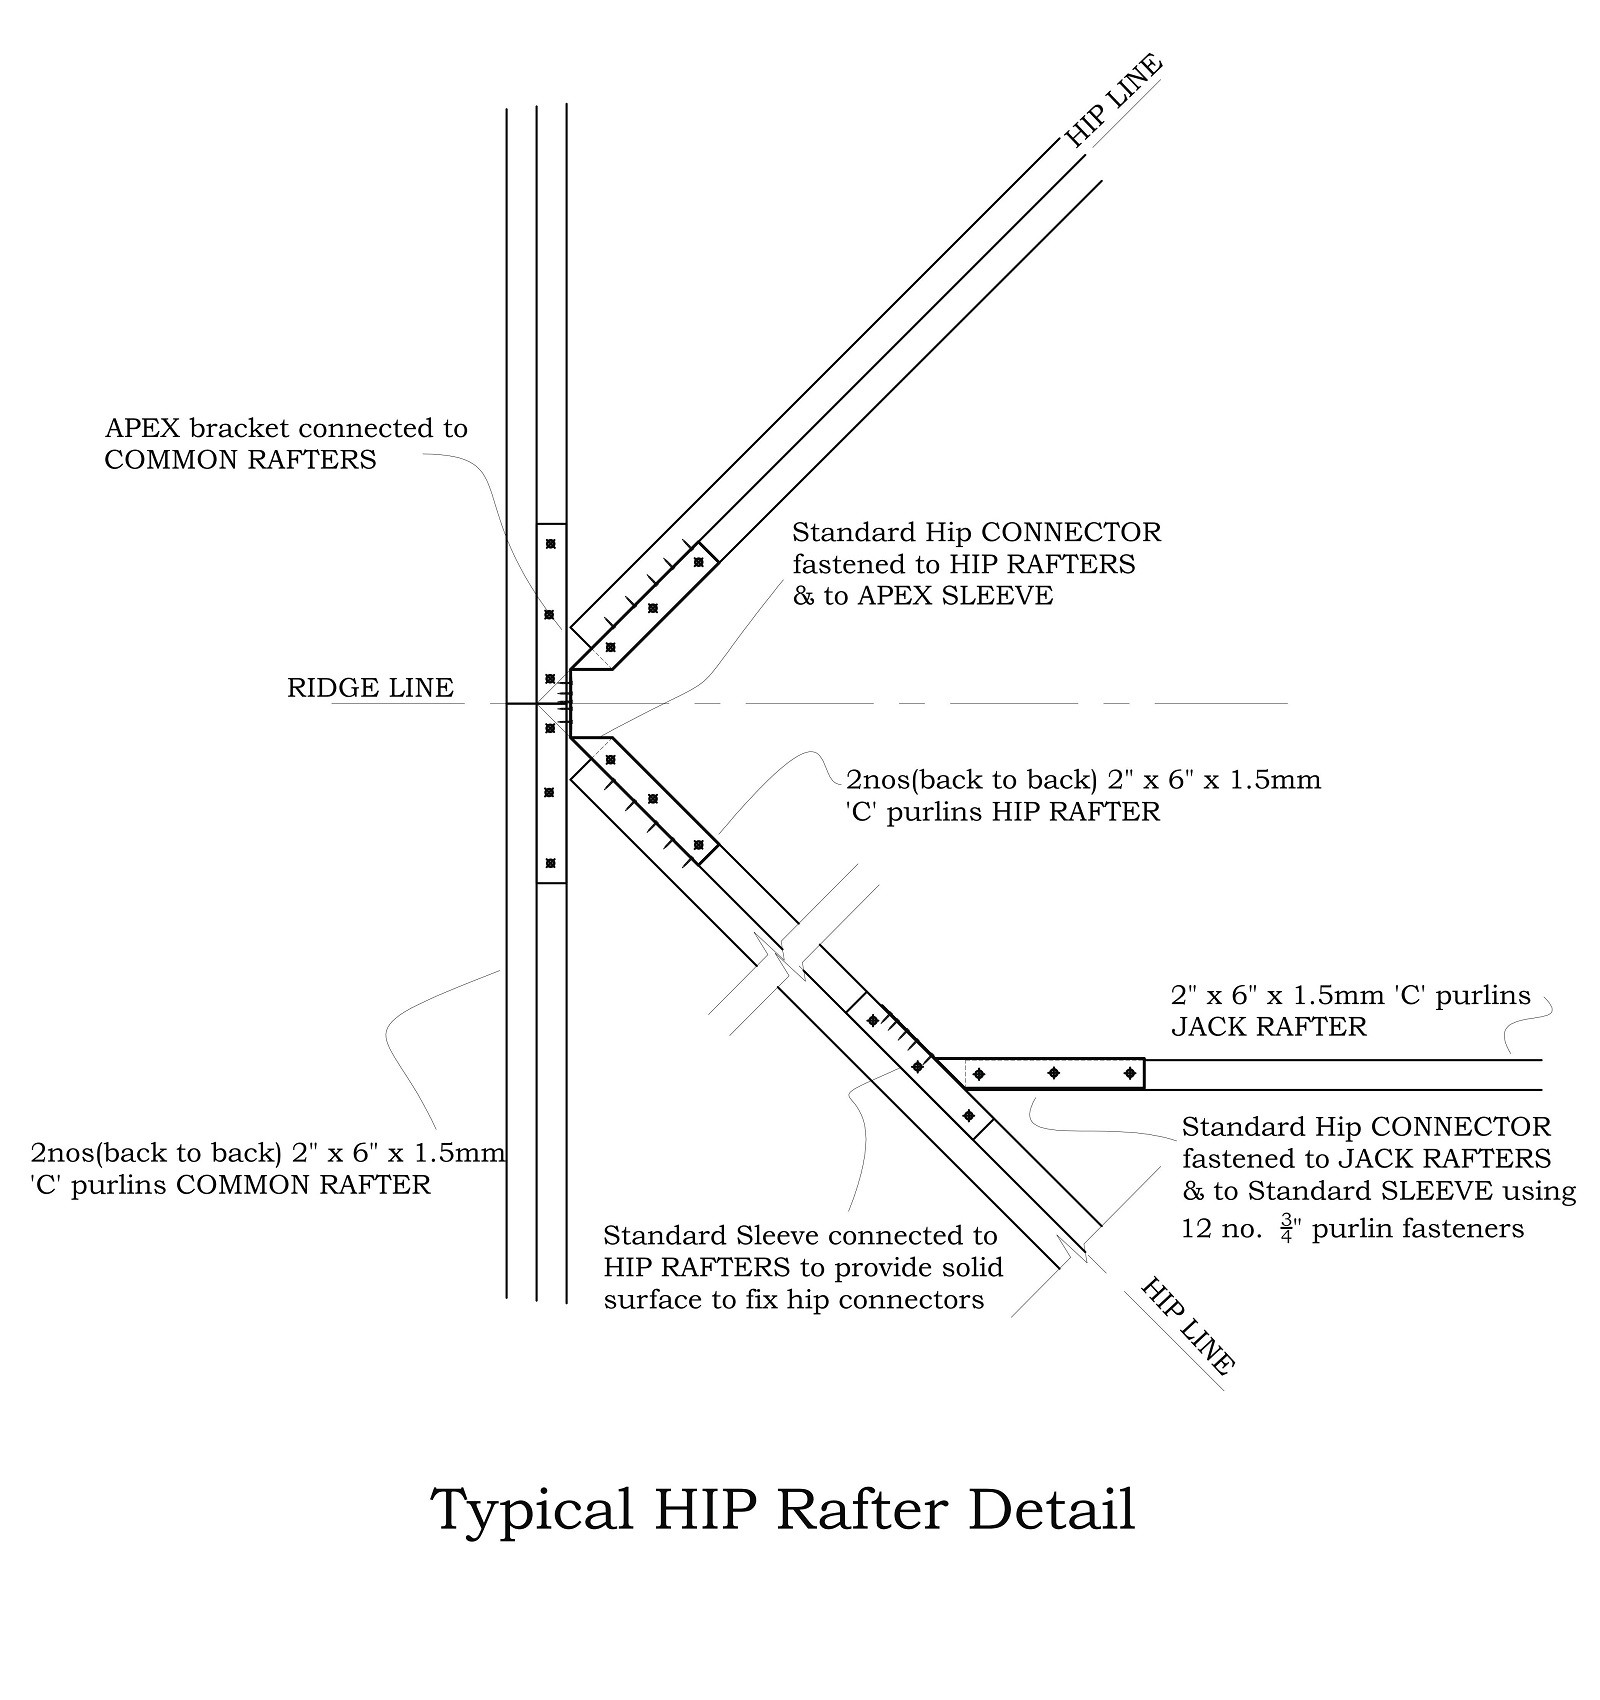
Metal purlins are typically fixed to the main structure frame using connection pieces (Cleats), which are usually welded by qualified steel structure manufacturers onto trusses or columns. The design of the connection pieces follows the AISC Standardized Structural Connection Handbook to ensure secure connections in compliance with regulations.
Bolt Requirements:
- Common Bolt Specification: M12 grade 4.6 bolts.
- Installation Method: Snug-tight installation to ensure effective connections.

Adjustment Space:
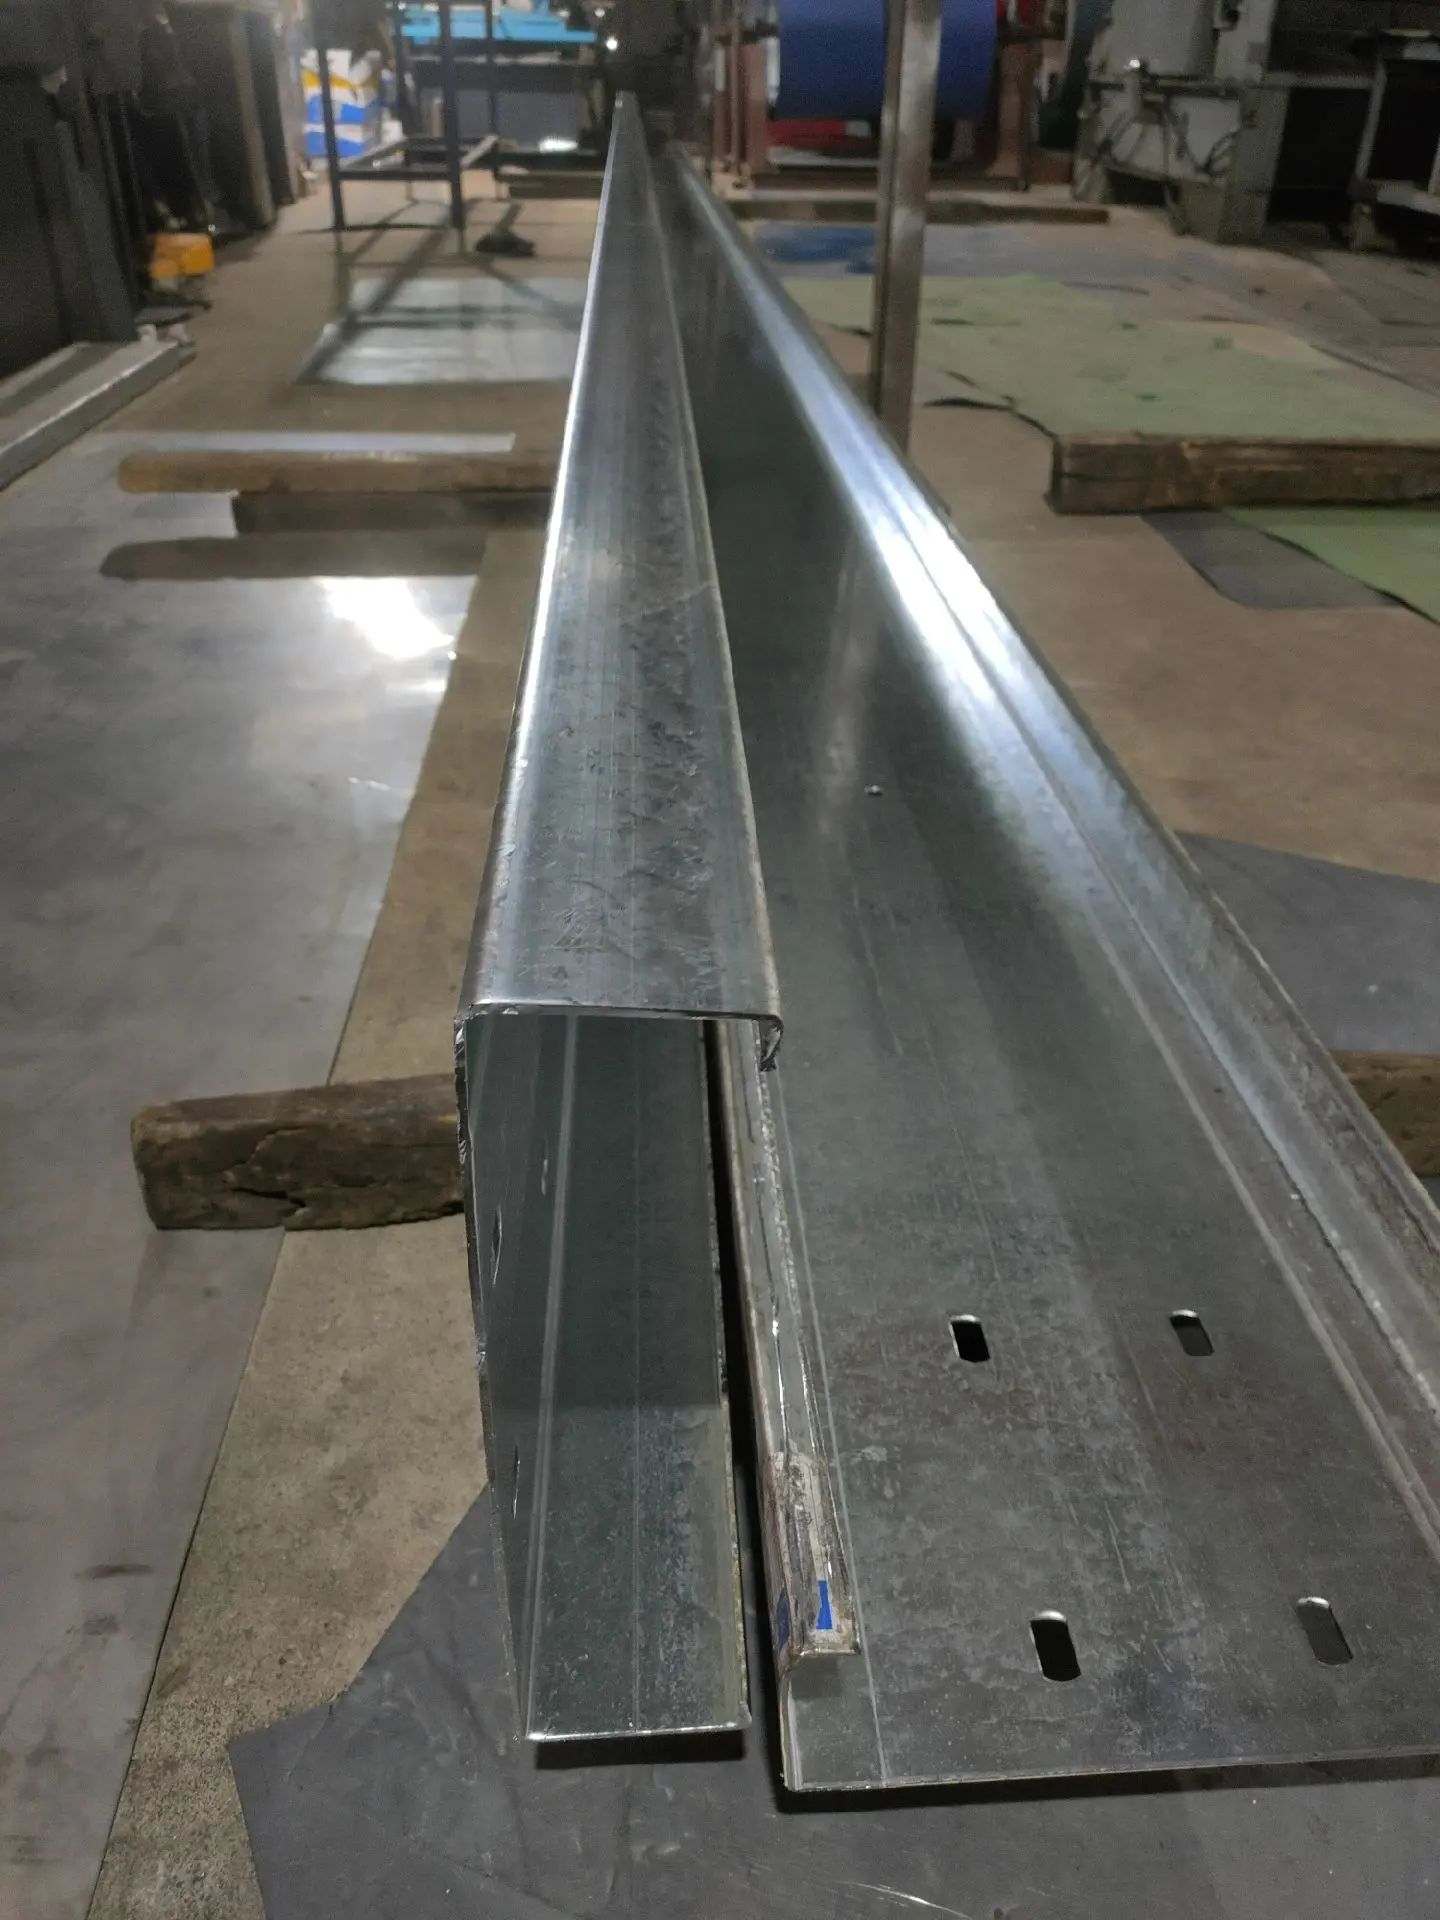
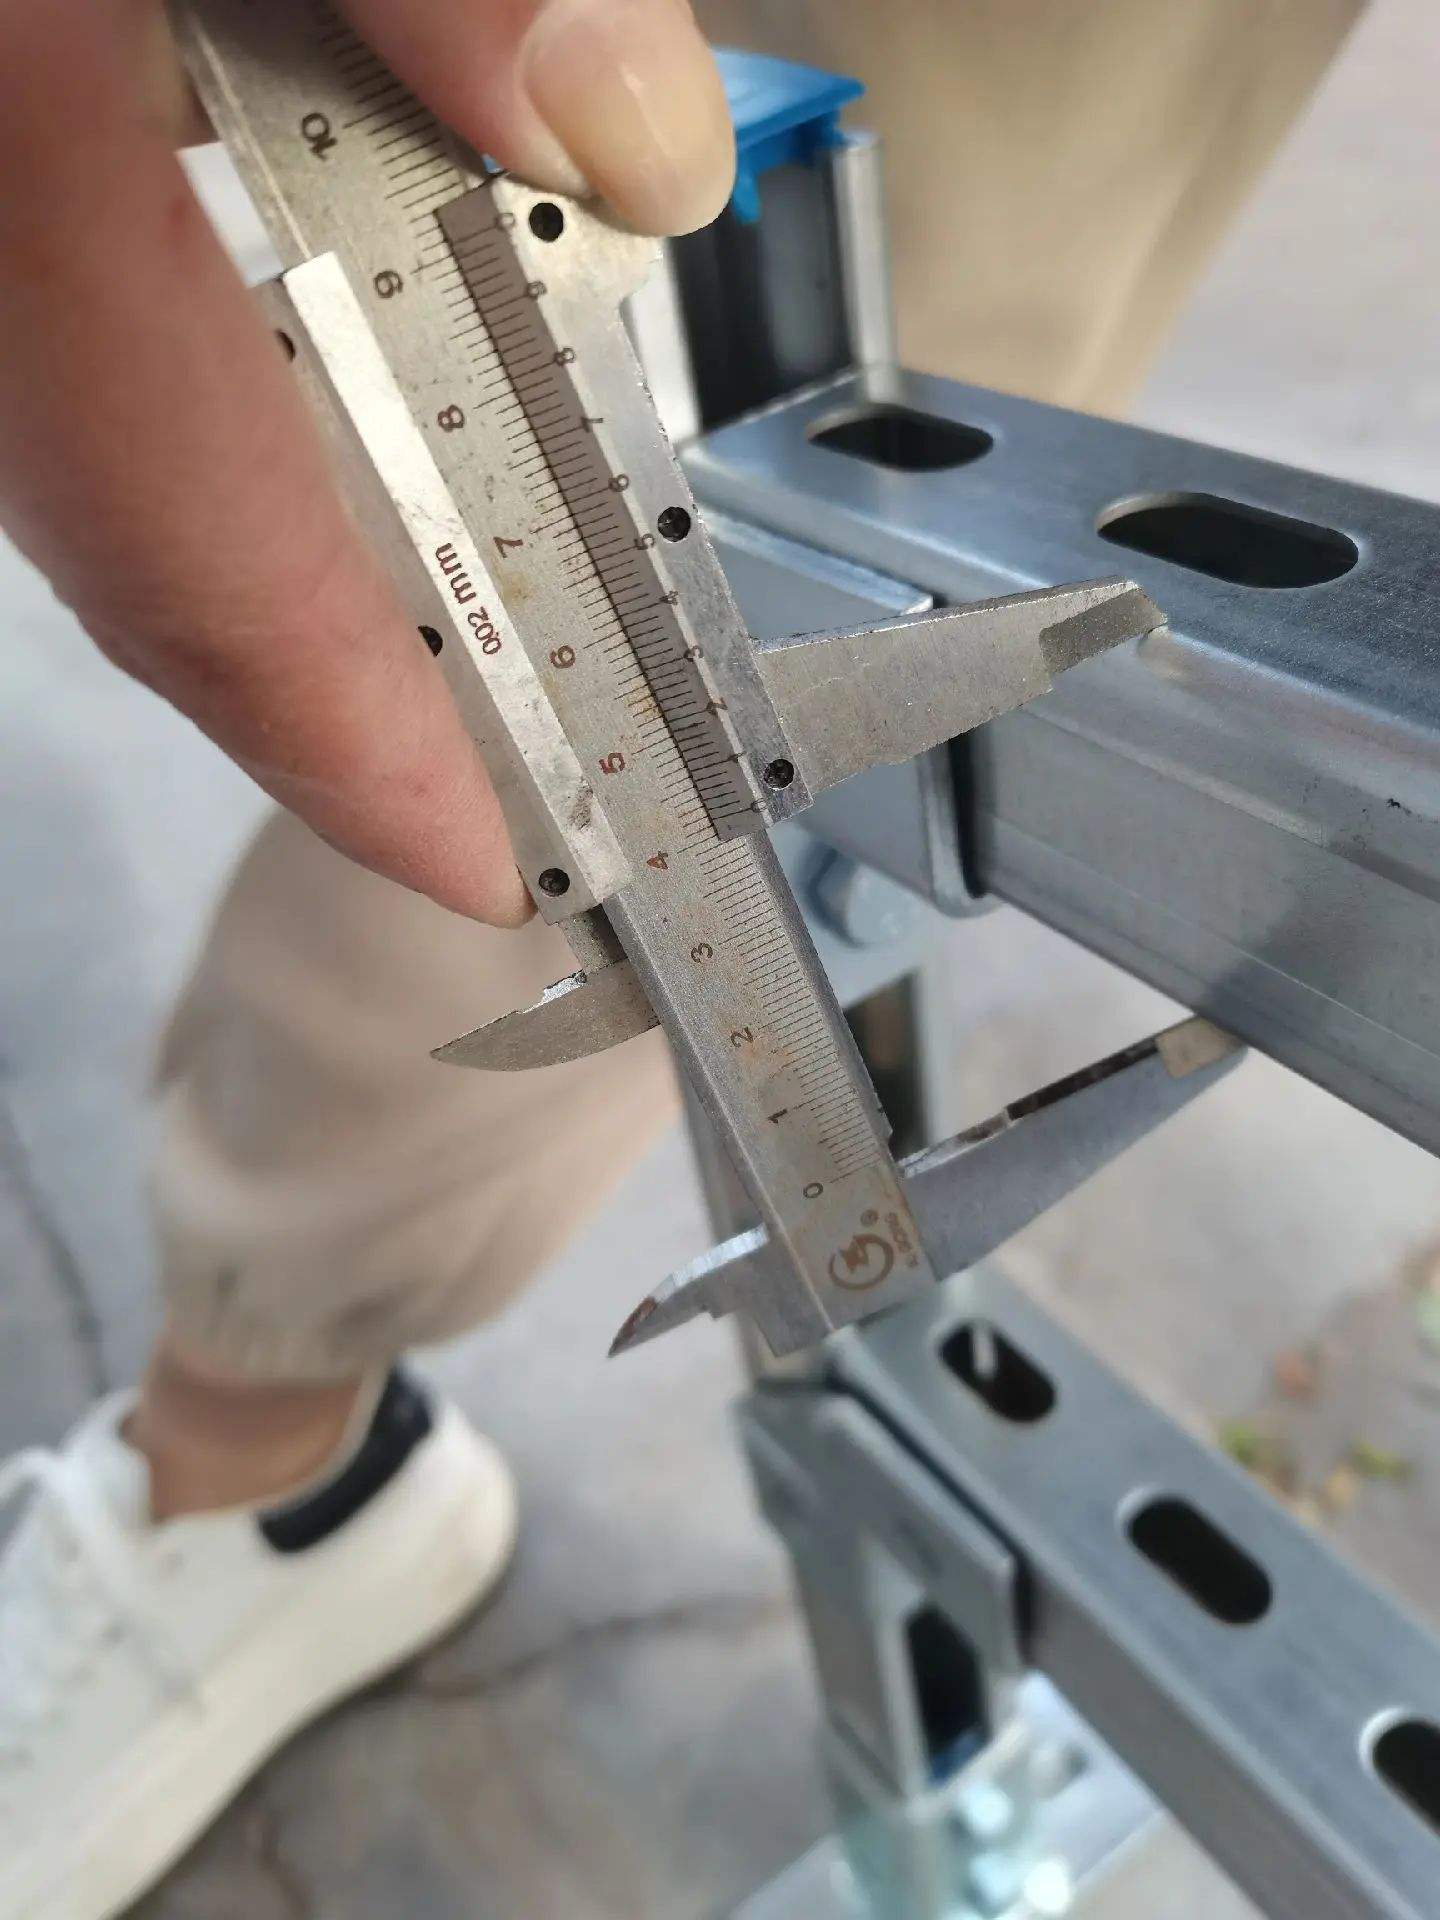
To facilitate alignment adjustment during installation, galvanized steel purlins feature oval holes measuring 18×22mm. This design allows more installation adjustment space without compromising structural performance.
Z-Purlin Connection: For Z-purlins, additional connection holes are needed at the overlap points to ensure continuity and stability of the structure.
Bolt Specifications:Important: Purlins designed for M12 bolts should not use M16 bolts, as this may affect structural safety.
9.2Installation Direction Norms
To minimize twisting deformation of purlins or stability issues due to failed connections, the following installation direction norms should be followed:
- C-Purlins: Install with the high side connected to the cleat, keeping the open side facing upwards towards the slope.
- Z-Purlins: The web should be positioned on the lower side of the cleat, with the upper flange above it.
9.3Installation Precautions
- Cross-Bracing Installation: Before the purlins are fully incorporated into the system, they are relatively flexible. Therefore, cross-bracing (Bridging) must be installed simultaneously to maintain overall stability.
- Avoid Stacking: Do not stack bundled roofing materials on purlins that have not yet had roofing panels installed, to prevent permanent deformation due to local overload.
10.0Metal Purlin Materials and Surface Treatment
Metal purlins are typically made of steel or aluminum. Below are the characteristics of common materials and surface treatments:
10.1Material Selection:
- Steel Purlins: Commonly made from cold-formed steel, which is lightweight, dimensionally stable, cost-effective, and easy to process.
- Aluminum Purlins: Lighter weight and better corrosion resistance, suitable for special environments (e.g., high humidity or corrosive environments).
10.2Surface Treatment Types and Suitable Environments:
| Surface Type | Description | Advantages | Suitable Environment |
| Red Oxide Coating | Red oxide rust-proof primer for transport rust protection | Lower cost (25%-35% cheaper than galvanized), can be painted, suitable for secondary coating | Indoor or non-exposed environments requiring protective painting |
| Galvanized | Surface coated with zinc alloy for corrosion resistance | Corrosion-resistant, suitable for harsh environments, especially coastal areas | Outdoor, coastal, and chemical factory environments |
10.3Red Oxide Purlins vs. Galvanized Purlins Comparison:
| Comparison Item | Red Oxide Purlins | Galvanized Purlins |
| Cost | Low | High |
| Corrosion Resistance | Weak, needs top-coat protection | Strong |
| Use Environment | Indoor, non-exposed, or requires painting | Outdoor, coastal, and corrosive environments |
| Ease of Painting | Easy to paint | Difficult to paint |
| Service Life | Short | Long |
10.4Common Sizes and Specifications
- Length Range: From 4 feet (approx. 1.2 meters) to 12 feet (approx. 3.6 meters), customizable.
- Web Height: Common specifications range from tens of millimeters to 300 millimeters.
- Flange Width: Between 1.5 inches to 4 inches.
- Material Thickness: Up to 3.2mm, to meet various load-bearing requirements.
This installation and material information should help you better understand and plan the installation of purlins, ensuring the structural stability and durability of the building.
11.0C Purlin Section Dimensions and Structural Properties – Metric Units
All purlins are manufactured from hot-dip galvanized steel coils compliant with BS EN 10346, with a minimum yield strength of 450 N/mm² and a Z275 coating, ensuring strong corrosion resistance.
| Section Ref | Depth (mm) | Thickness (mm) | Top Flange (a mm) | Bottom Flange (b mm) | Top Lip (c mm) | Bottom Lip (d mm) | Wt/m (Kg/m) | Area (cm²) | Major Axis Ixx (cm⁴) | Minor Axis Iyy (cm⁴) | Major Axis Zxx (cm³) | Minor Axis Zyy (cm³) | Major Axis rgx (cm) | Minor Axis rgy (cm) | Major Axis Mcx (kNm) | Minor Axis Mcy (kNm) |
| C140-14 | 140 | 1.4 | 65 | 65 | 15 | 15 | 3.24 | 4.12 | 132.12 | 23.86 | 18.87 | 5.37 | 5.66 | 2.41 | 6.61 | 2.4 |
| C140-16 | 140 | 1.6 | 65 | 65 | 15 | 15 | 3.69 | 4.7 | 150.4 | 26.99 | 21.44 | 6.08 | 5.65 | 2.39 | 8.2 | 2.73 |
| C140-18 | 140 | 1.8 | 65 | 65 | 15 | 15 | 4.14 | 5.27 | 170.32 | 30.1 | 24.33 | 6.54 | 5.66 | 2.38 | 9.65 | 3.11 |
| C140-20 | 140 | 2 | 65 | 65 | 15 | 15 | 4.58 | 5.84 | 195.6 | 33.05 | 26.49 | 7.45 | 5.63 | 2.38 | 11.27 | 3.35 |
| C140-25 | 140 | 2.5 | 65 | 65 | 15 | 15 | 5.73 | 7.31 | 228.29 | 40.27 | 32.61 | 9.08 | 5.61 | 2.36 | 14.74 | 4.09 |
| C177-14 | 177 | 1.4 | 65 | 65 | 15 | 15 | 3.64 | 4.64 | 226.96 | 25.68 | 25.6 | 5.51 | 6.99 | 2.35 | 8.55 | 2.47 |
| C177-16 | 177 | 1.6 | 65 | 65 | 15 | 15 | 4.15 | 5.28 | 257.59 | 30.12 | 29.4 | 6.51 | 6.99 | 2.34 | 10.59 | 2.8 |
| C177-18 | 177 | 1.8 | 65 | 65 | 15 | 15 | 4.66 | 5.94 | 288.28 | 33.54 | 33.6 | 6.98 | 6.96 | 2.33 | 12.65 | 3.13 |
| C177-20 | 177 | 2 | 65 | 65 | 15 | 15 | 5.17 | 6.58 | 319.6 | 38.36 | 36.6 | 7.84 | 6.95 | 2.33 | 14.65 | 3.44 |
| C177-25 | 177 | 2.5 | 65 | 65 | 15 | 15 | 6.42 | 8.17 | 383.96 | 43.36 | 44.42 | 9.31 | 6.93 | 2.32 | 19.32 | 4.19 |
| C200-14 | 200 | 1.4 | 65 | 65 | 15 | 15 | 3.96 | 5.04 | 266.2 | 30.12 | 31.61 | 6.51 | 7.79 | 2.3 | 9.66 | 2.5 |
| C200-16 | 200 | 1.6 | 65 | 65 | 15 | 15 | 4.51 | 5.74 | 301.4 | 33.54 | 36.41 | 6.71 | 7.78 | 2.31 | 12.07 | 2.84 |
| C200-18 | 200 | 1.8 | 65 | 65 | 15 | 15 | 4.99 | 6.33 | 338.3 | 38.33 | 38.73 | 7.03 | 7.77 | 2.3 | 14.45 | 3.16 |
| C200-20 | 200 | 2 | 65 | 65 | 15 | 15 | 5.51 | 7 | 375.62 | 42.38 | 42.76 | 7.32 | 7.76 | 2.29 | 16.76 | 3.48 |
| C200-25 | 200 | 2.5 | 65 | 65 | 15 | 15 | 6.87 | 8.75 | 523.37 | 44.95 | 52.34 | 9.43 | 7.73 | 2.27 | 22.83 | 4.24 |
| C235-14 | 235 | 1.4 | 65 | 65 | 15 | 15 | 4.28 | 5.45 | 439.87 | 27.84 | 37.44 | 5.65 | 8.98 | 2.26 | 11.31 | 2.53 |
| C235-16 | 235 | 1.6 | 65 | 65 | 15 | 15 | 4.88 | 6.22 | 500.3 | 30.25 | 42.59 | 6.4 | 8.97 | 2.25 | 13.45 | 2.88 |
| C235-18 | 235 | 1.8 | 65 | 65 | 15 | 15 | 5.48 | 6.98 | 561.3 | 35.05 | 45.1 | 6.7 | 8.97 | 2.25 | 15.42 | 3.2 |
| C235-20 | 235 | 2 | 65 | 65 | 15 | 15 | 6.08 | 7.74 | 622.8 | 38.96 | 50.4 | 7.13 | 8.95 | 2.23 | 17.12 | 3.53 |
| C235-25 | 235 | 2.5 | 65 | 65 | 15 | 15 | 7.56 | 9.63 | 755.5 | 47 | 65.23 | 9.56 | 8.92 | 2.21 | 26.69 | 4.3 |
| C265-14 | 265 | 1.4 | 65 | 65 | 15 | 15 | 4.61 | 5.87 | 585.32 | 28.73 | 44.17 | 5.71 | 9.98 | 2.21 | 12.58 | 2.56 |
| C265-16 | 265 | 1.6 | 65 | 65 | 15 | 15 | 5.26 | 6.72 | 660.95 | 32.05 | 46.6 | 6.46 | 9.97 | 2.2 | 15.2 | 2.91 |
| C265-18 | 265 | 1.8 | 65 | 65 | 15 | 15 | 5.9 | 7.52 | 746.358 | 36.19 | 56.33 | 7.2 | 9.95 | 2.19 | 19.32 | 3.42 |
| C265-20 | 265 | 2 | 65 | 65 | 15 | 15 | 6.48 | 8.31 | 823.98 | 39.86 | 62.33 | 7.92 | 9.95 | 2.18 | 26.61 | 3.56 |
| C265-25 | 265 | 2.5 | 65 | 65 | 15 | 15 | 7.56 | 10.38 | 1021.62 | 48.48 | 77.1 | 9.66 | 9.92 | 2.16 | 30.53 | 4.32 |
References
www.westernstatesmetalroofing.com/blog/metal-purlins
vodsteelbuildings.com/blog/what-is-metal-building-purlin-types-sizes-cost/
www.bansalroofing.com/types-of-purlins-and-things-to-know-about-it/