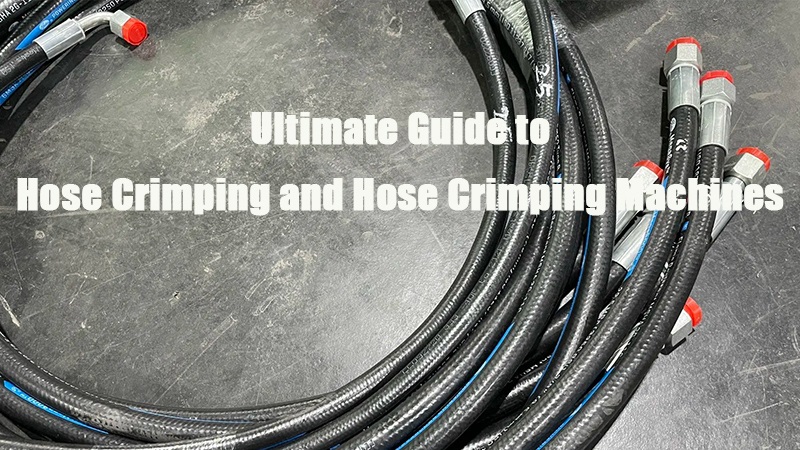
- 1.0What Is Hose Crimping?
- 2.0How to Crimp a Hydraulic Hose: A Step-by-Step Guide
- 2.1Step 1: Prepare Tools and Materials
- 2.2Step 2: Measure and Cut the Hose
- 2.3Step 3: Clean the Hose
- 2.4Step 4: Select the Correct Die Set
- 2.5Step 5: Choose and Insert the Fitting
- 2.6Step 6: Set Up the Crimping Machine
- 2.7Step 7: Position the Hose and Begin Crimping
- 2.8Step 8: Inspect the Crimped Fitting
- 2.9Step 9: Perform Pressure Testing
- 2.10Step 10: Final Steps
- 3.0Types of Hydraulic Hose Crimping Tools
- 4.0Hose Crimping vs. Hose Swaging: Key Differences
- 5.0Principles and Steps of Hydraulic Hose Repair
- 6.0How to Choose a High-Quality Hydraulic Hose Crimping Machine
1.0What Is Hose Crimping?
Hose crimping is a mechanical process used to attach a hose to a metal fitting securely. Using a specialized crimping machine, radial force is applied to compress the fitting onto the outer wall of the hose, forming a tight, leak-resistant, and durable connection.
This process typically involves two essential components:
- Hose Fitting (also known as “insert”): The metal part that connects to the pressure source in a hydraulic or pneumatic system.
- Ferrule (also known as “hose sleeve” or “collar”): A metal ring that holds the fitting tightly in place when compressed over the hose.
In hydraulic systems, hose crimping is especially critical, as it directly affects sealing integrity, pressure stability, and overall operational safety. Improper crimping may result in leakage, pressure loss, or even system failure.
1.1Advantages of Hose Crimping:
While industrial hoses offer flexibility and sealing properties, connecting them to machines or systems requires a secure mechanical interface. Crimping is the most common and effective solution.
- Strong Mechanical Bond: Crimped connections withstand high-pressure environments and prevent hose blowouts.
- Reliable Seal: Proper crimping ensures a leak-proof seal between the hose and fitting.
- Extended Service Life: Crimped joints improve durability and reduce the need for frequent replacements or repairs.
- Versatility: Suitable for a wide range of hydraulic and pneumatic applications, including construction machinery, fluid systems, automotive, and marine industries.
- Enhanced Safety: Secure connections improve system integrity and reduce the risk of failure under pressure.
1.2Basic Steps of Hose Crimping:
- Cut the Hose: Trim the hose to the required length using a hose-cutting tool.
- Strip the Outer Layer (if required): Remove the outer rubber layer to expose the inner braid or liner, depending on the application.
- Insert the Fitting: Push the metal fitting into the hose end.
- Crimp Using Dies: Place the hose assembly into the crimping machine. Activate the machine to compress the ferrule evenly around the fitting.
- Inspect the Crimp: Check the crimped assembly for proper outer diameter, absence of cracks, and secure fitment to ensure the connection is reliable and within tolerance.
1.3What Is a Hydraulic Hose Crimping Machine?
A hydraulic hose crimping machine is a specialized piece of equipment used to attach metal fittings to the ends of hydraulic hoses securely. By applying high radial force through a hydraulic-powered die set, it ensures a reliable seal and mechanical connection that prevents hydraulic fluid leaks and fitting blow-offs under high pressure.
These machines come in various types to suit different applications. Compact, portable models are ideal for on-site repairs, while high-pressure crimpers are designed for heavy-duty industrial use.

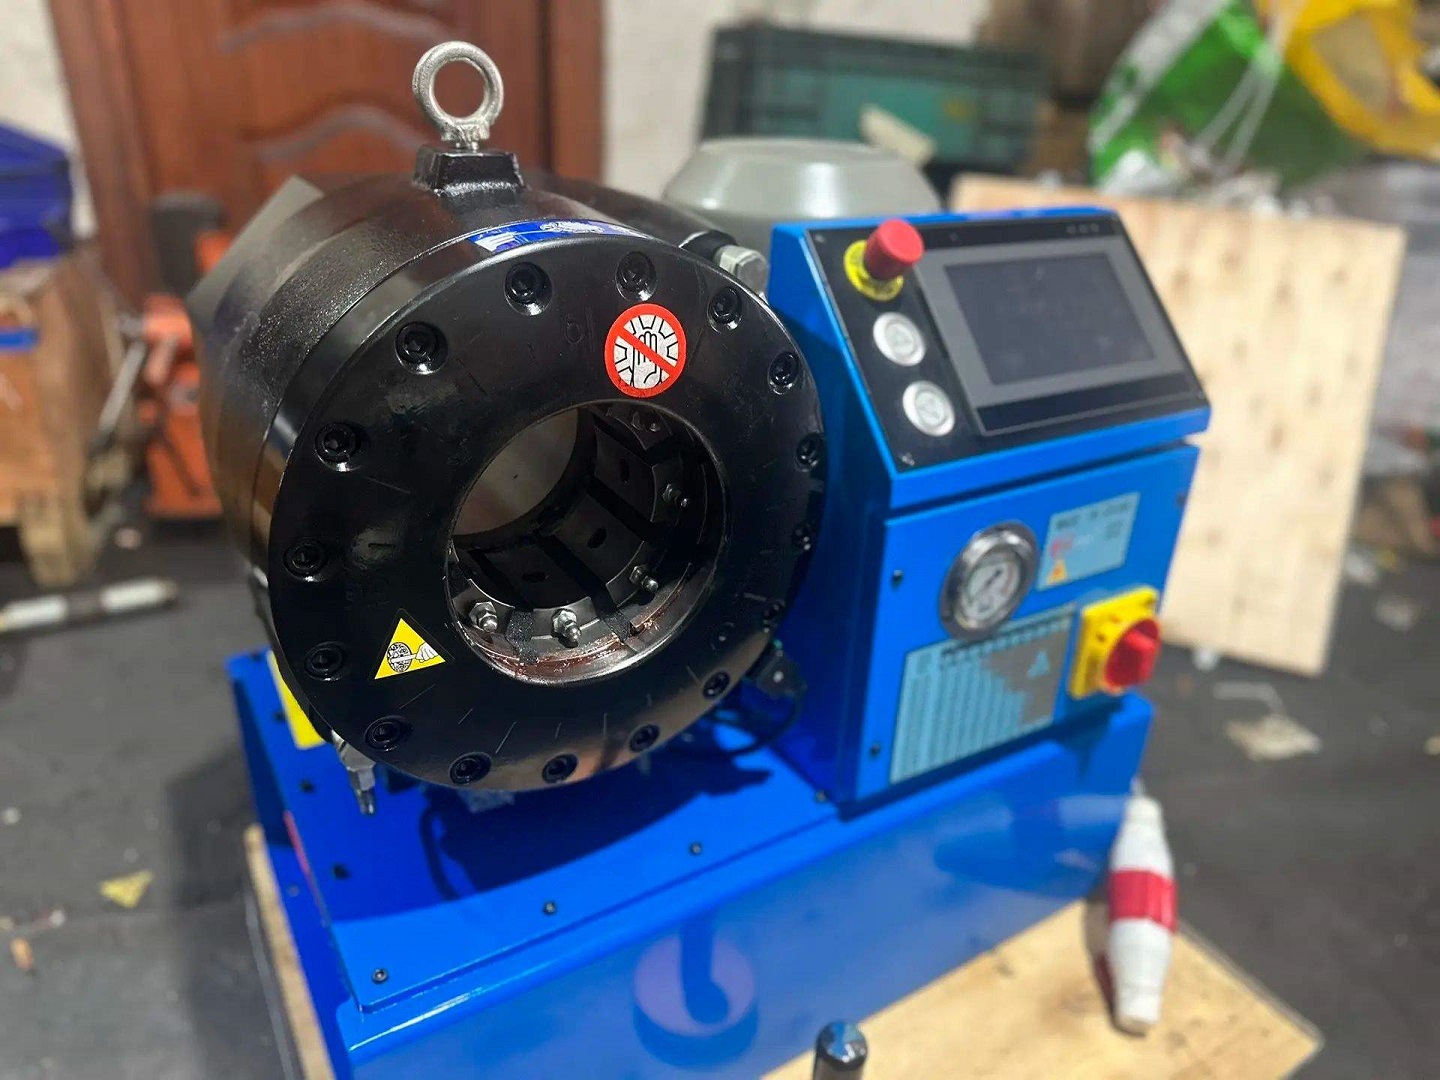
1.4Key Components of a Hydraulic Hose Crimping Machine:
Crimp Head: The central part of the machine where the crimping process occurs. It includes:
- Die Set: Interchangeable dies matched to the specific hose and fitting size.
- Crimping Jaws: Secure and compress the hose and fitting during crimping.
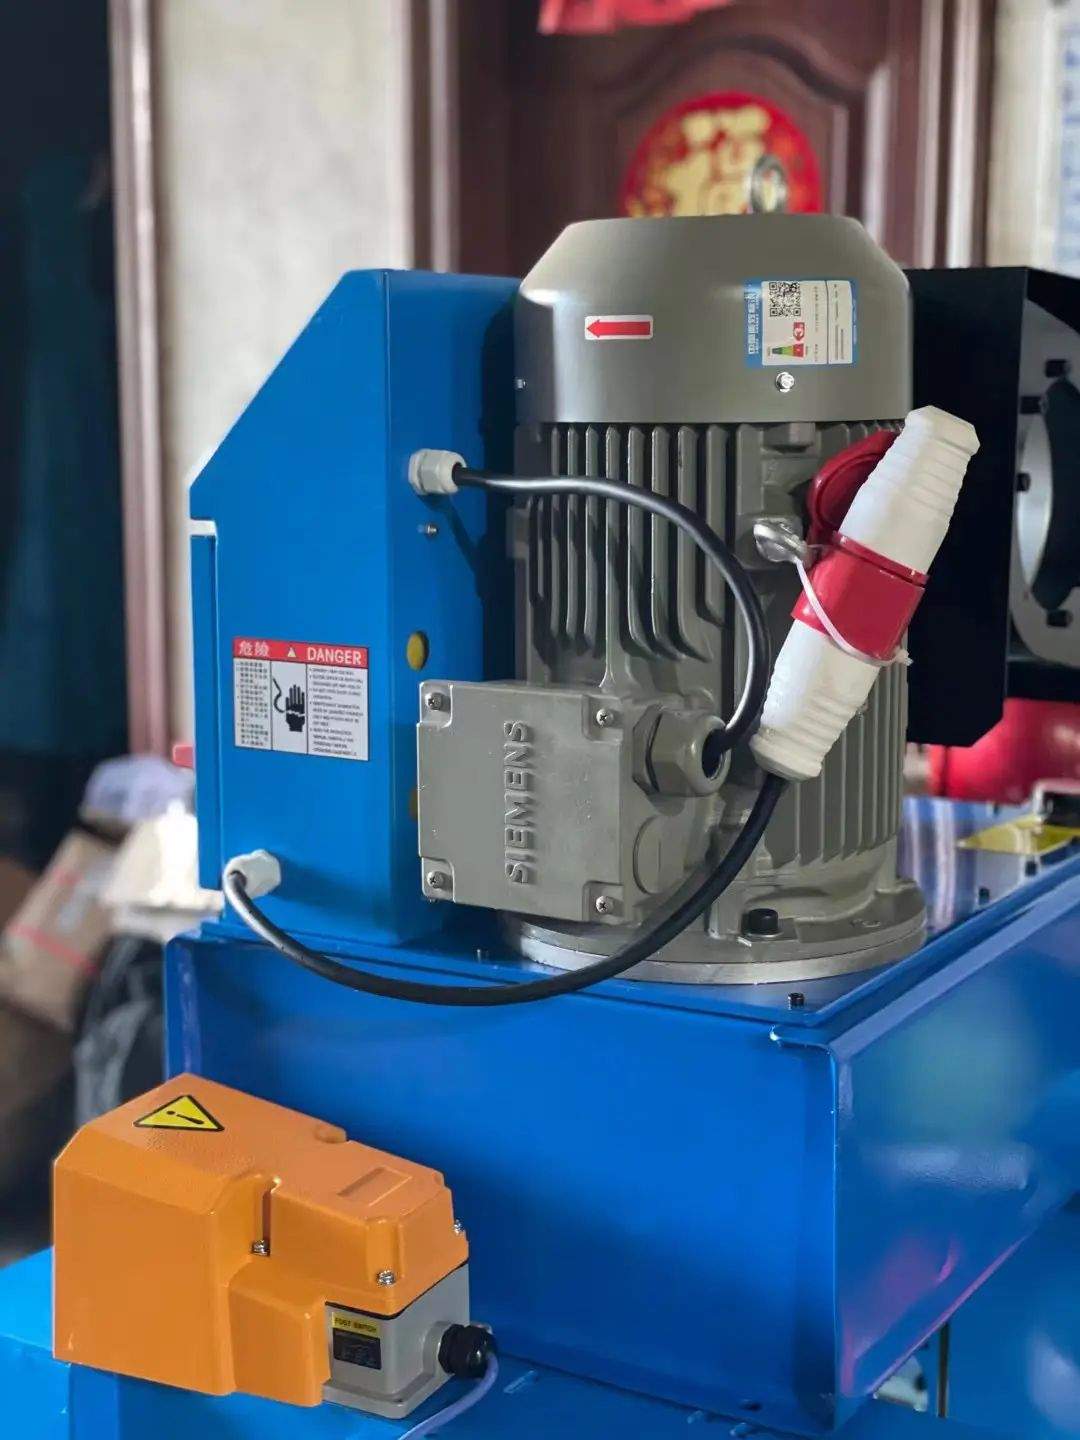
Hydraulic System: Supplies the force required for crimping. It typically consists of:
- Hydraulic Pump: Powers the crimping action.
- Hydraulic Cylinder: Converts fluid pressure into mechanical force.
- Valves and Controls: Regulate oil flow and adjust crimping force.
Control Panel: Features operation buttons, digital displays, and programmable settings to monitor and control pressure, crimp diameter, and force.
Frame and Structure: Constructed from durable materials (e.g., steel) to provide support and stability during operation.
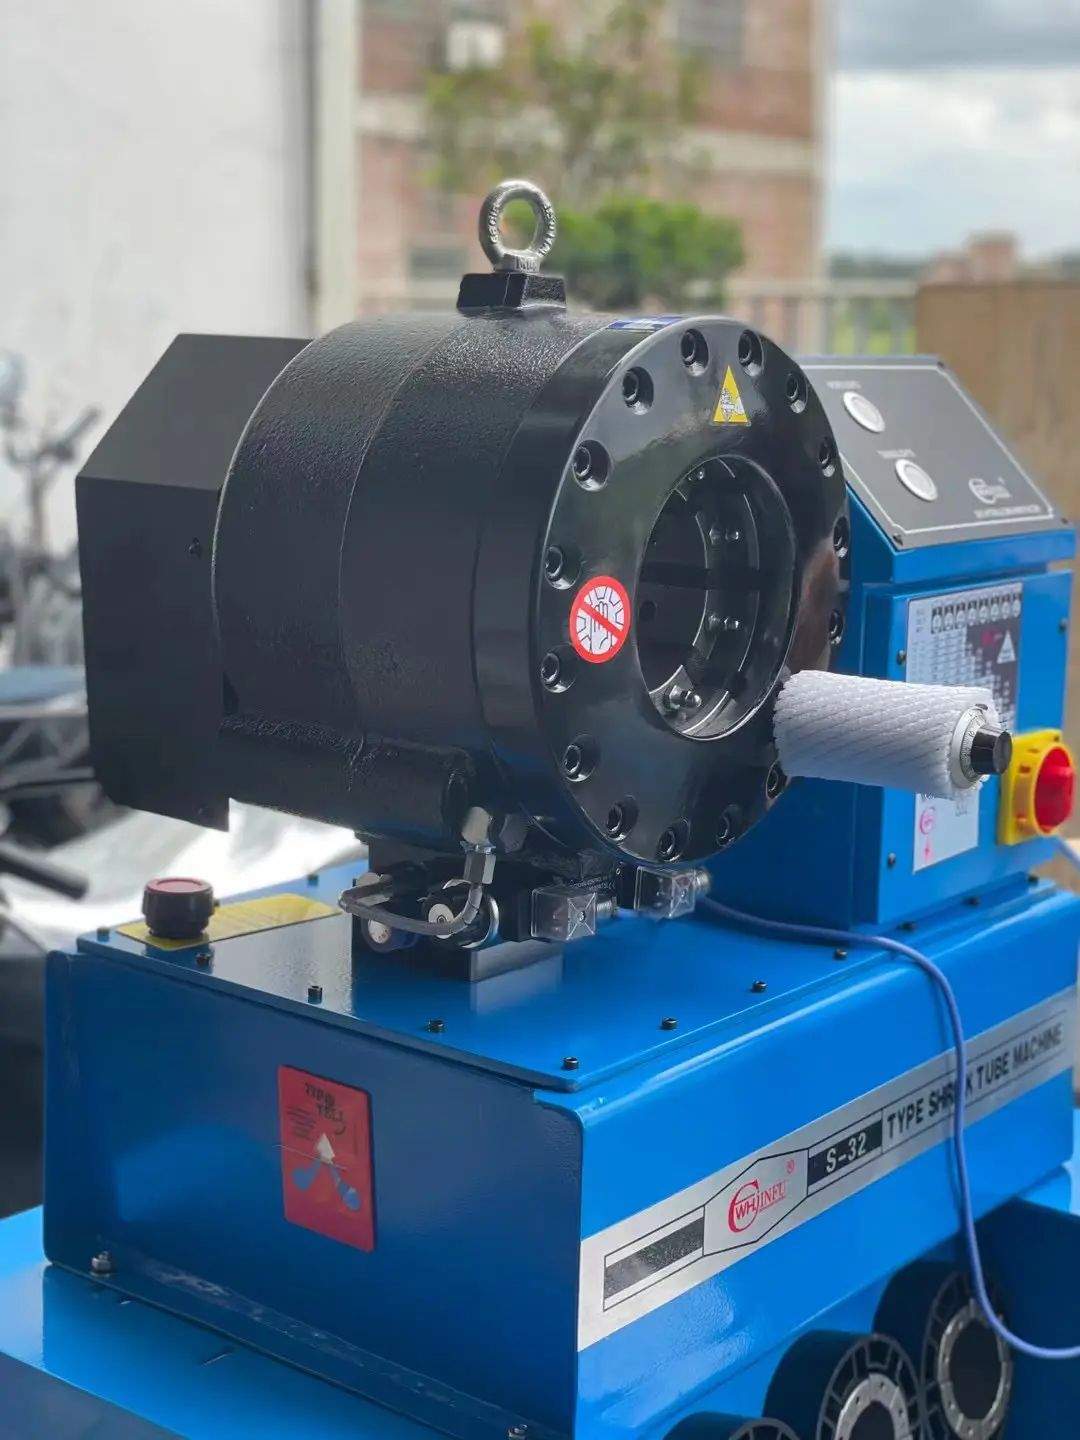
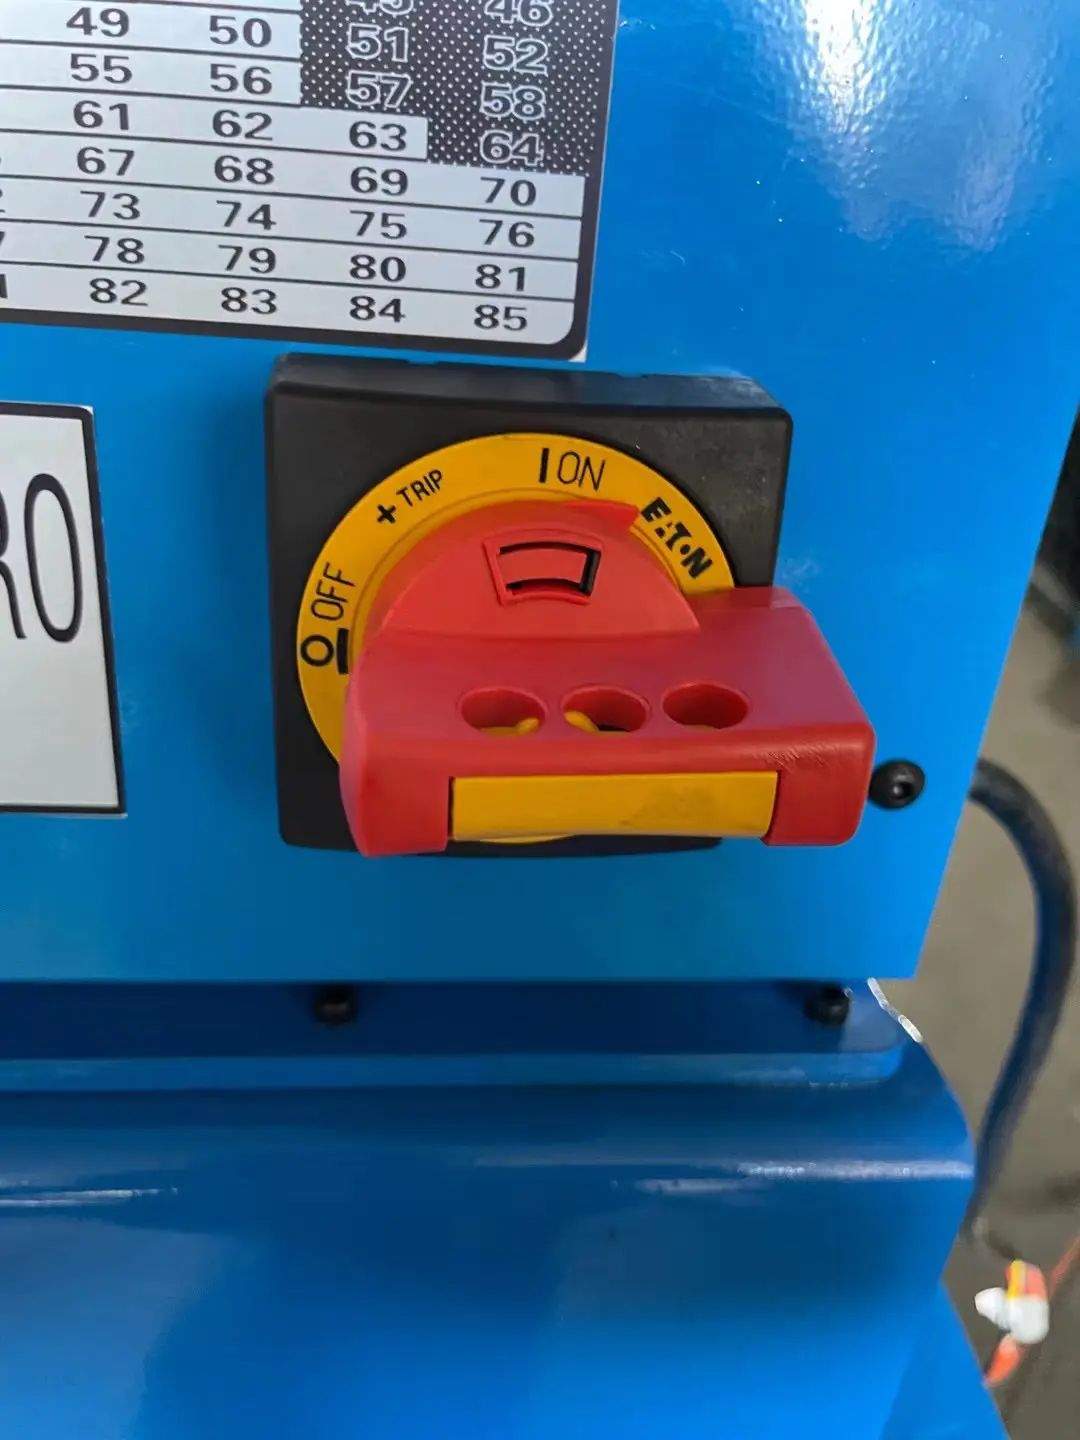
Safety Features:
- Emergency stop button
- Protective covers
- Pressure relief valves
Accessories:
- Hose Cutting Blade: Used to cut hoses to length prior to crimping.
- Crimping Gauge: Helps verify crimp dimensions and quality.
1.5How It Works:
A hydraulic hose crimping machine operates by using a die set that matches the size of the hose and fitting. The hydraulic pump delivers pressure to the crimp head. Once the hose and fitting are properly inserted, the dies close radially, applying even force to compress the fitting onto the hose. The operator initiates the process via a control switch or button, and the machine completes the crimp automatically.
1.6Applications:
Hydraulic hose crimping machines are essential for assembling hose fittings and ensuring leak-free, pressure-tight connections in hydraulic systems. Typical application areas include:
- Construction machinery
- Industrial manufacturing
- Automotive systems
- Marine equipment
Owning a hydraulic hose crimping machine is vital for maintaining hydraulic systems and reducing downtime caused by connection failures.
1.7Maintenance Tips:
Regular maintenance helps extend the lifespan of your crimping machine and ensures stable hydraulic performance. Consider the following practices:
Routine Inspection:
- Visual Checks: Look for signs of wear, cracks, or leaks in hoses and fittings.
- Pressure Testing: Periodically test to verify system pressure tolerance.
Proper Storage:
- Climate Control: Store hoses and fittings in temperature-controlled environments to prevent degradation.
- Organized Inventory: Maintain a well-labeled parts inventory for quick access and reduced downtime.
Replace Hoses and Fittings When Needed:
- Material Fatigue: Replace components showing signs of cracking, discoloration, or brittleness.
- Operational Issues: Persistent pressure loss or leakage may indicate the need for replacement.
2.0How to Crimp a Hydraulic Hose: A Step-by-Step Guide
Crimping a hydraulic hose is a critical process to ensure secure, leak-free connections within a hydraulic system. This detailed step-by-step guide will walk you through the process to help you complete hose assemblies efficiently and safely.
2.1Step 1: Prepare Tools and Materials
Before starting, make sure the work area is clean and all necessary tools and components are ready:
- Hydraulic hose
- Hose fittings and ferrules
- Hose lubricant
- Caliper
- Chalk or white marker
- Safety goggles and gloves
- Hydraulic hose crimping machine
- Die set matched to hose and fitting size
- Hose cutter
- Insertion tool for fittings
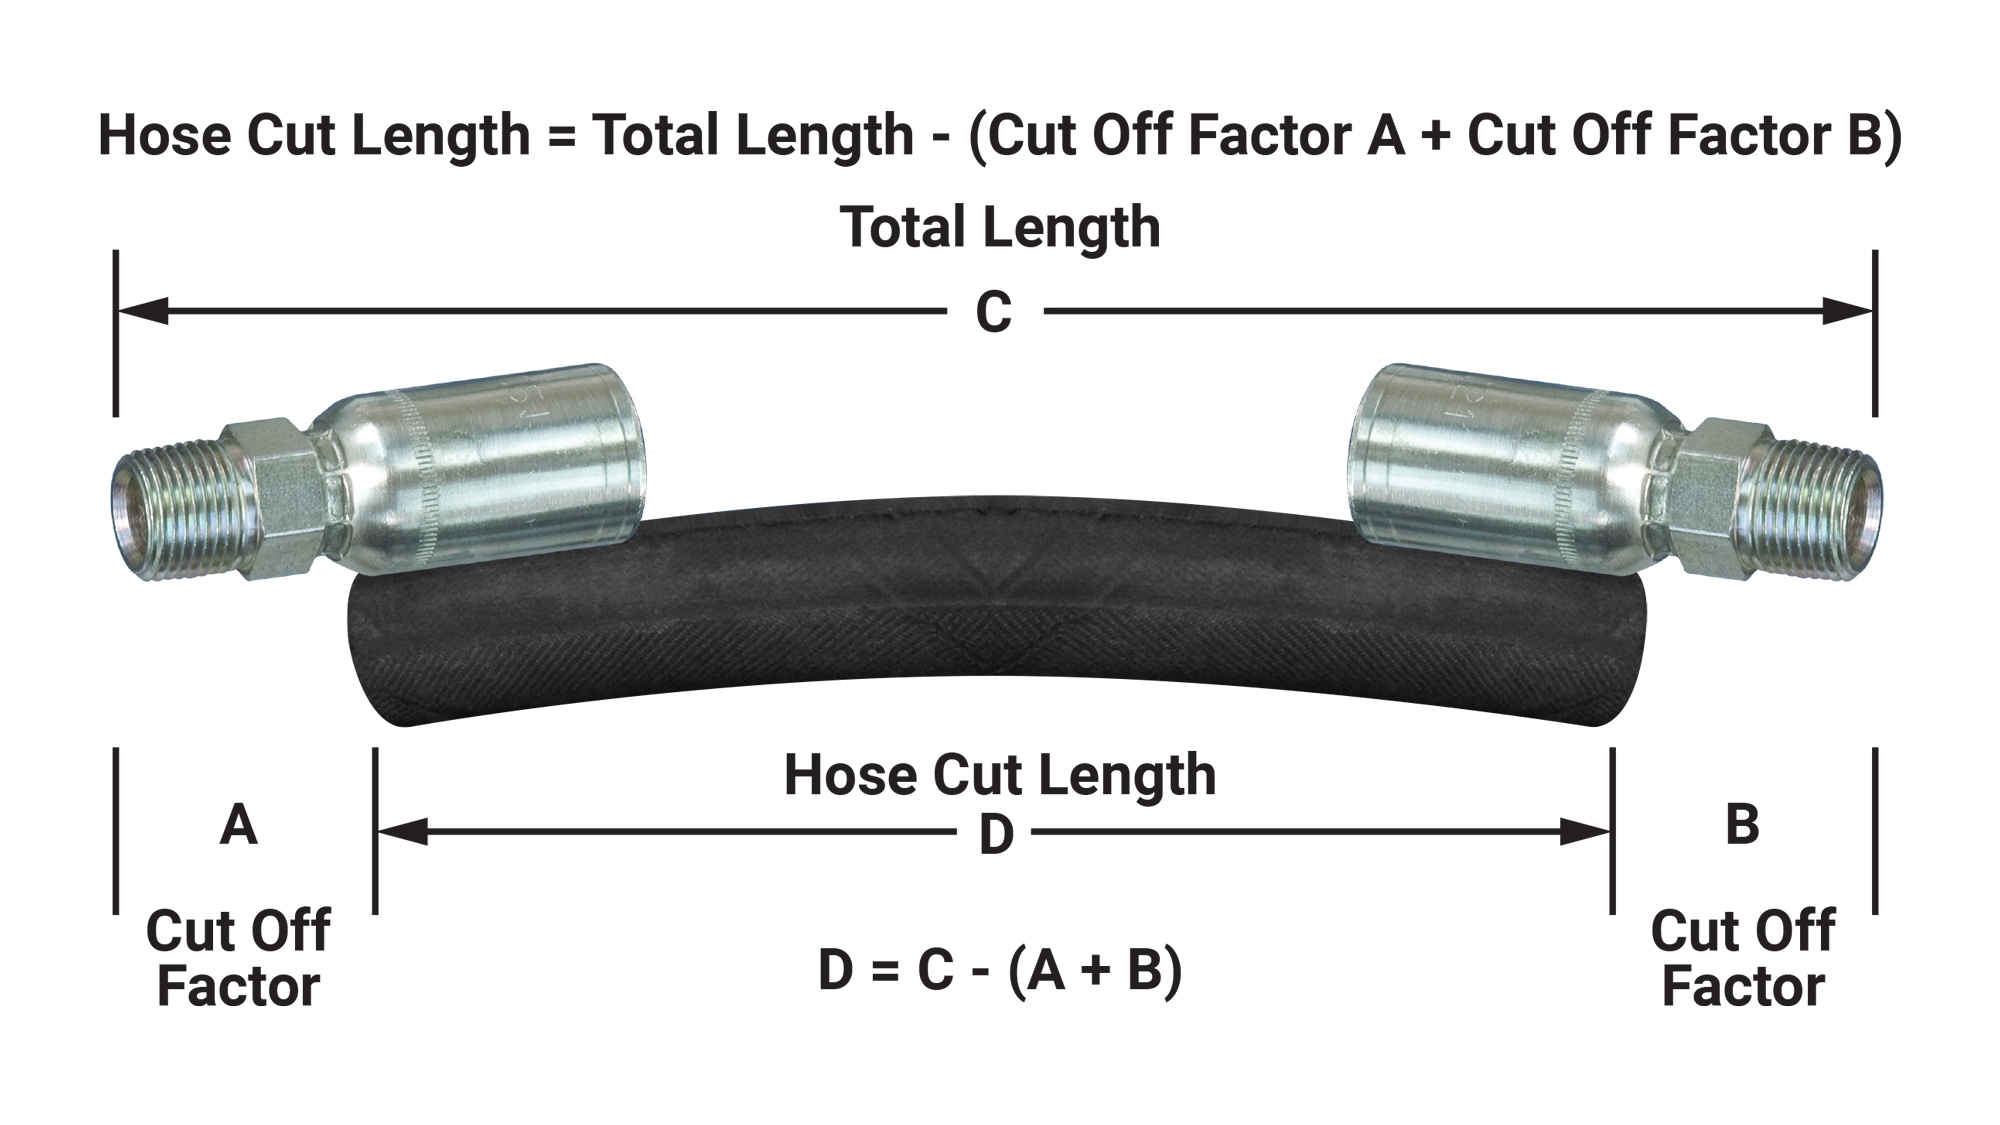
2.2Step 2: Measure and Cut the Hose
Use a measuring tape to determine the required hose length. When calculating, account for the cut-off factor (usually specified by the fitting manufacturer). Cut the hose with a hose saw, ensuring a clean and straight cut. Deburr the ends if necessary.
2.3Step 3: Clean the Hose
After cutting, debris or residue may remain inside the hose. Use a foam projectile or air flushing system to clean the inner bore thoroughly and prevent contamination or system failure.
2.4Step 4: Select the Correct Die Set
Choose the appropriate die based on the hose and fitting specifications. Each hose size and fitting combination requires a specific die set to ensure a proper crimp.
2.5Step 5: Choose and Insert the Fitting
Select a fitting that matches the system’s requirements (pressure rating, thread type, connection style, and material). Insert the fitting into the hose end completely. Use a soft mallet to gently tap the fitting into place if needed.
2.6Step 6: Set Up the Crimping Machine
Install the selected dies into the crimping machine. Adjust the machine’s pressure and stroke settings according to the hose and fitting specifications. Confirm the crimp diameter setting aligns with manufacturer recommendations.
2.7Step 7: Position the Hose and Begin Crimping
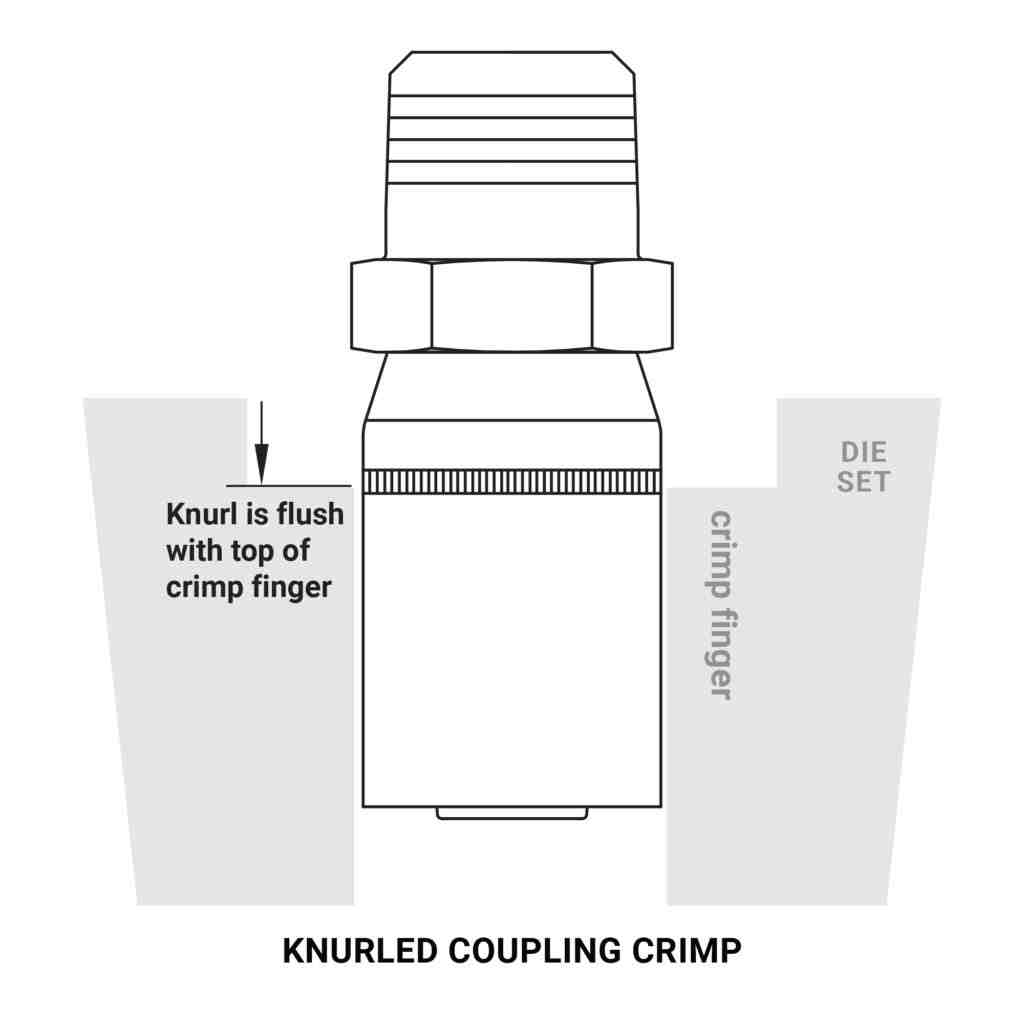
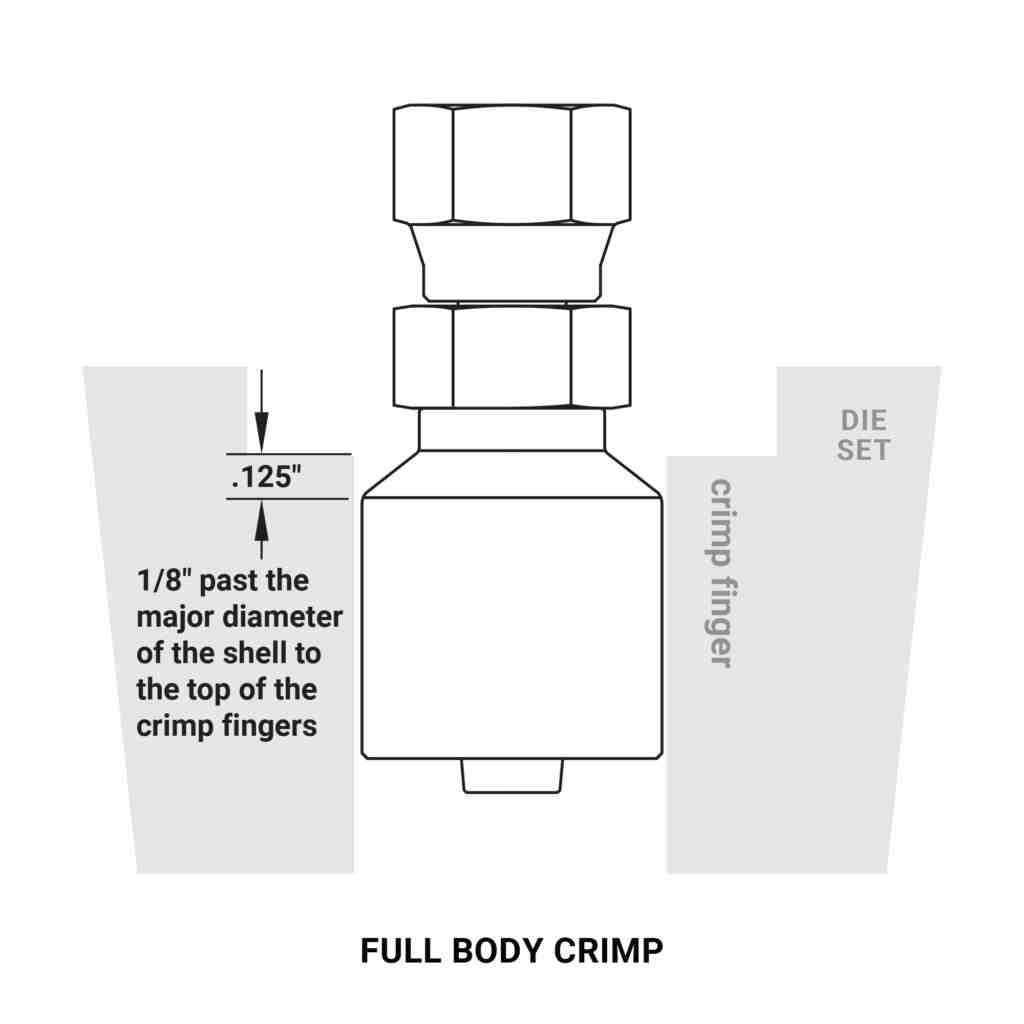
Place the hose assembly into the crimping machine. Make sure the fitting is properly aligned under the die and that the hose end extends slightly above the die. Activate the crimping machine to begin the process. Follow safety procedures and avoid contact with moving parts.
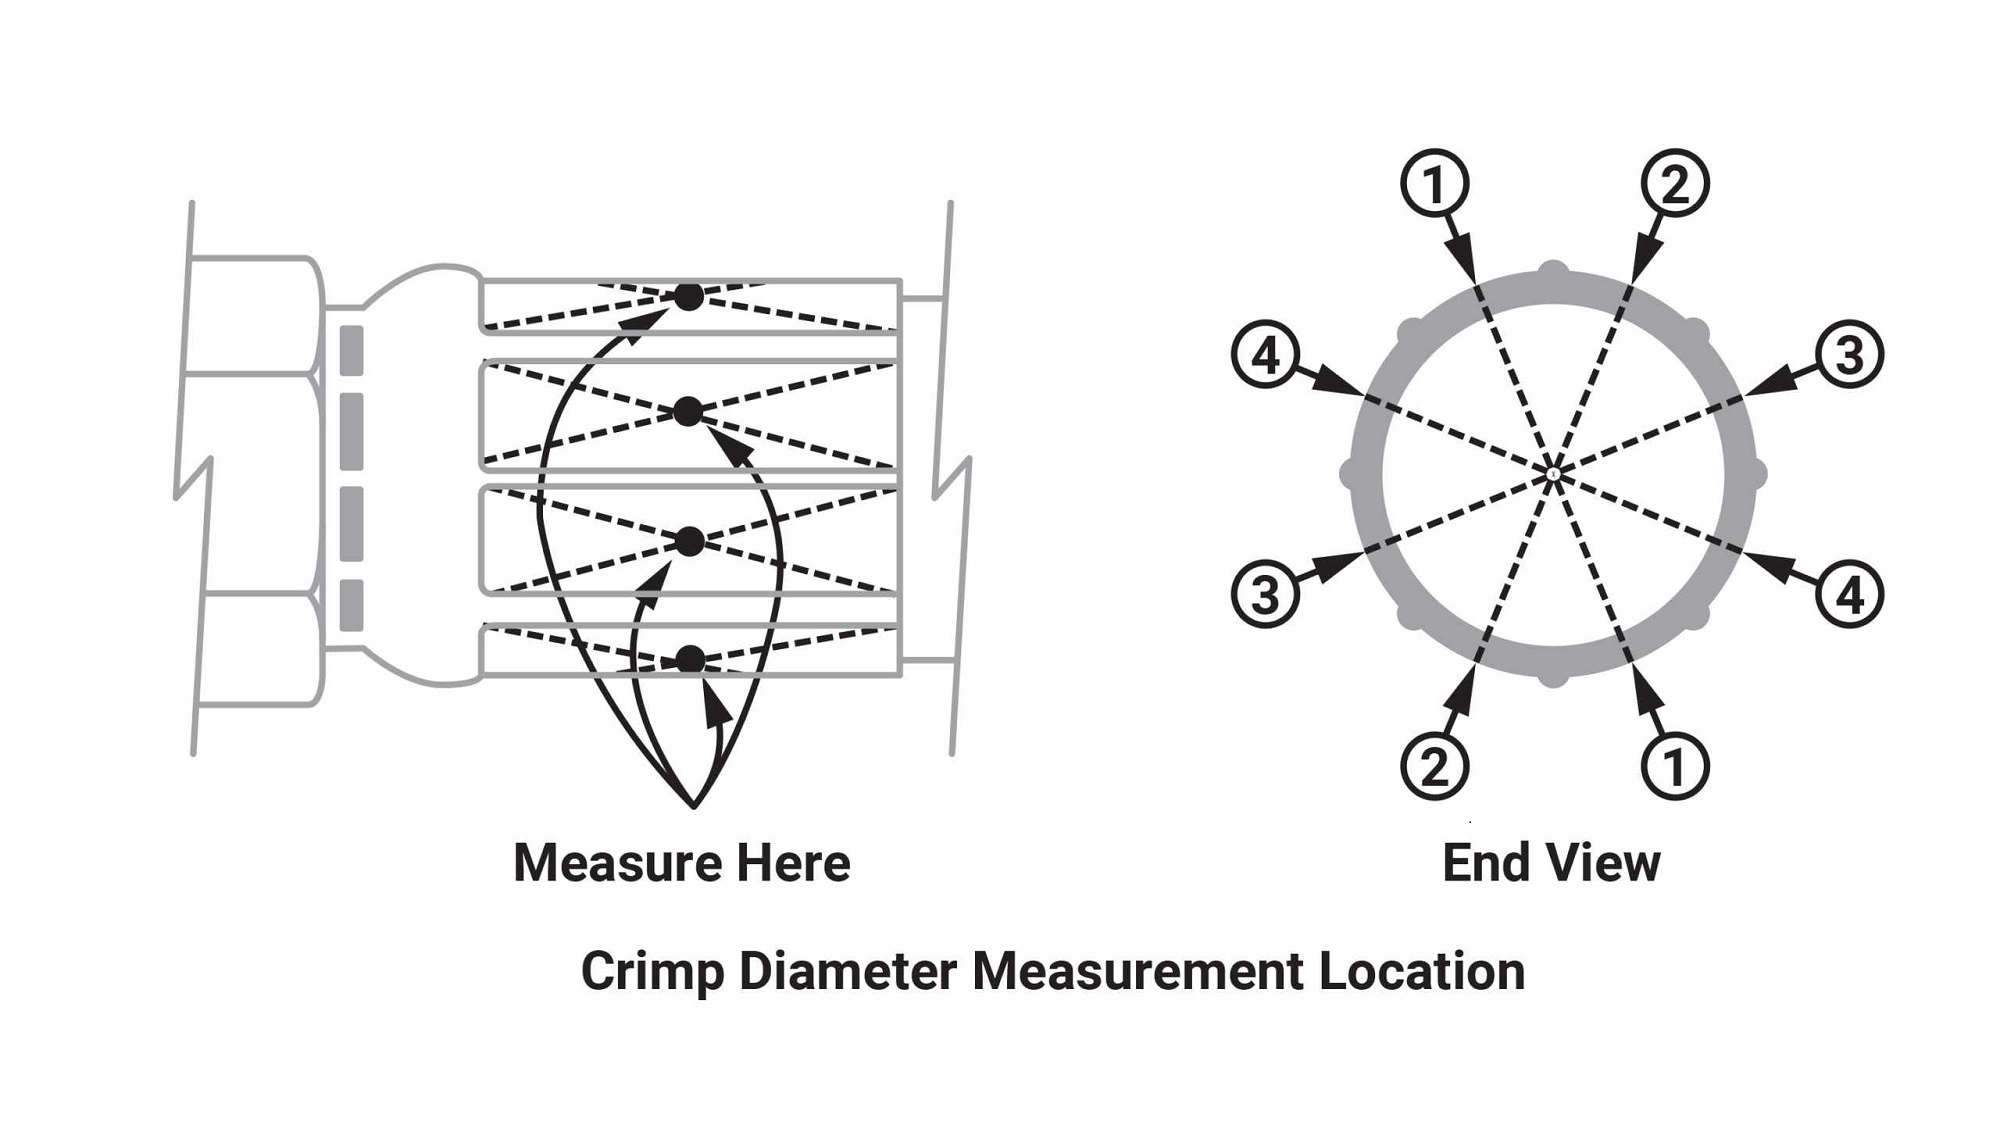
2.8Step 8: Inspect the Crimped Fitting
After crimping, visually inspect the fitting for cracks, misalignment, or excessive deformation. Use a caliper to measure the crimp diameter and verify it falls within specified tolerances.
2.9Step 9: Perform Pressure Testing
- Low-pressure test: Start with a low-pressure test to check for visible leaks or weak connections.
- High-pressure test: Gradually increase to the hose’s rated working pressure and monitor the assembly for leaks or failures.
- Hold-pressure test: Maintain the maximum pressure for a set period to confirm long-term reliability.
2.10Step 10: Final Steps
Seal the ends of the crimped assembly with plastic caps or heat-shrink covers to prevent contamination. Clean the work area and tools, especially the hose interior, using a hose brush or compressed air to remove any remaining debris.
Additional Tips:
- Prioritize safety: Always wear safety goggles and gloves during the crimping process.
- Double-check machine settings: Confirm that the crimp parameters match the hose and fitting specs before starting.
- Practice runs: Consider test crimping on a scrap hose to familiarize yourself with the process.
- Seek help if needed: When in doubt, consult the machine manual or contact a qualified technician.
3.0Types of Hydraulic Hose Crimping Tools
Choosing the right hydraulic hose crimping tool is crucial—it directly impacts connection quality, job efficiency, and long-term system performance. Below are the most common types of hose crimping tools, each suited to different working conditions and operational needs.
3.1Manual Hose Crimping Machine:
Manual crimpers are affordable and widely used in small workshops or low-volume production environments. These machines typically feature two handles connected via steel cables that pass through a hardened die set. Crimping is achieved by manually applying force.
Advantages:
- Simple to operate and cost-effective
- Ideal for low-volume or infrequent crimping tasks
- Can be used without access to electricity
Limitations:
- Labor-intensive and slower to operate
- Suitable only for light-duty or low-pressure applications
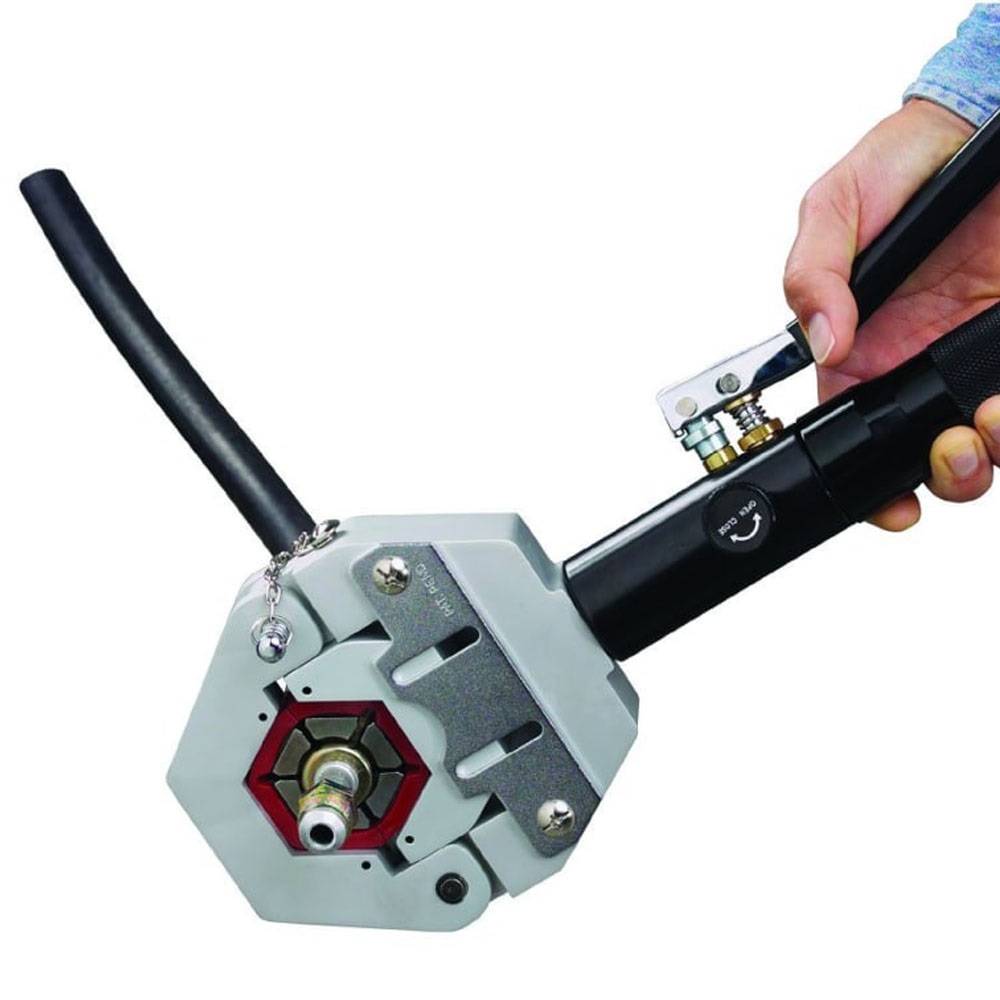
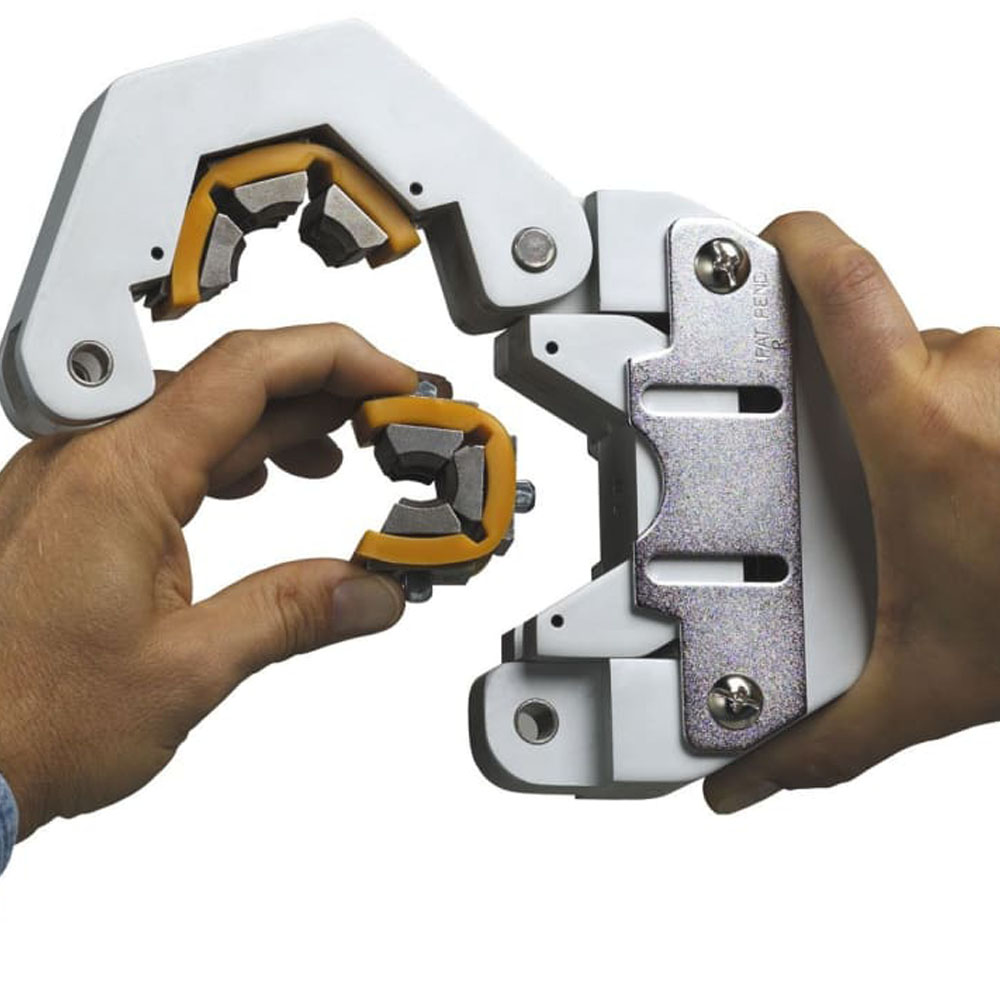
3.2Handheld Hose Crimping Tool:
Handheld hose crimpers are compact, portable tools designed for on-site or field repairs. They often come with a standard set of dies and can crimp hoses of various sizes.
Advantages:
- Easy to transport and use in tight or remote locations
- Well-suited for mobile maintenance and emergency repairs
Limitations:
- Limited crimping force and capacity
- Best for small-scale, low-frequency use
3.3Bench-Mounted Hose Crimping Machine:
Bench-mounted crimpers are commonly used in workshops or repair facilities for precision hose assembly. These machines handle a wide range of hoses and fittings and offer consistent crimp quality, making them ideal for medium- to high-volume tasks.
Advantages:
- High precision with stable and repeatable crimping results
- Compatible with various hose types and fittings
- Adjustable pressure settings for different hose thicknesses
Limitations:
- Requires dedicated workspace and is not easily portable
- Higher cost; best suited for professional or industrial use
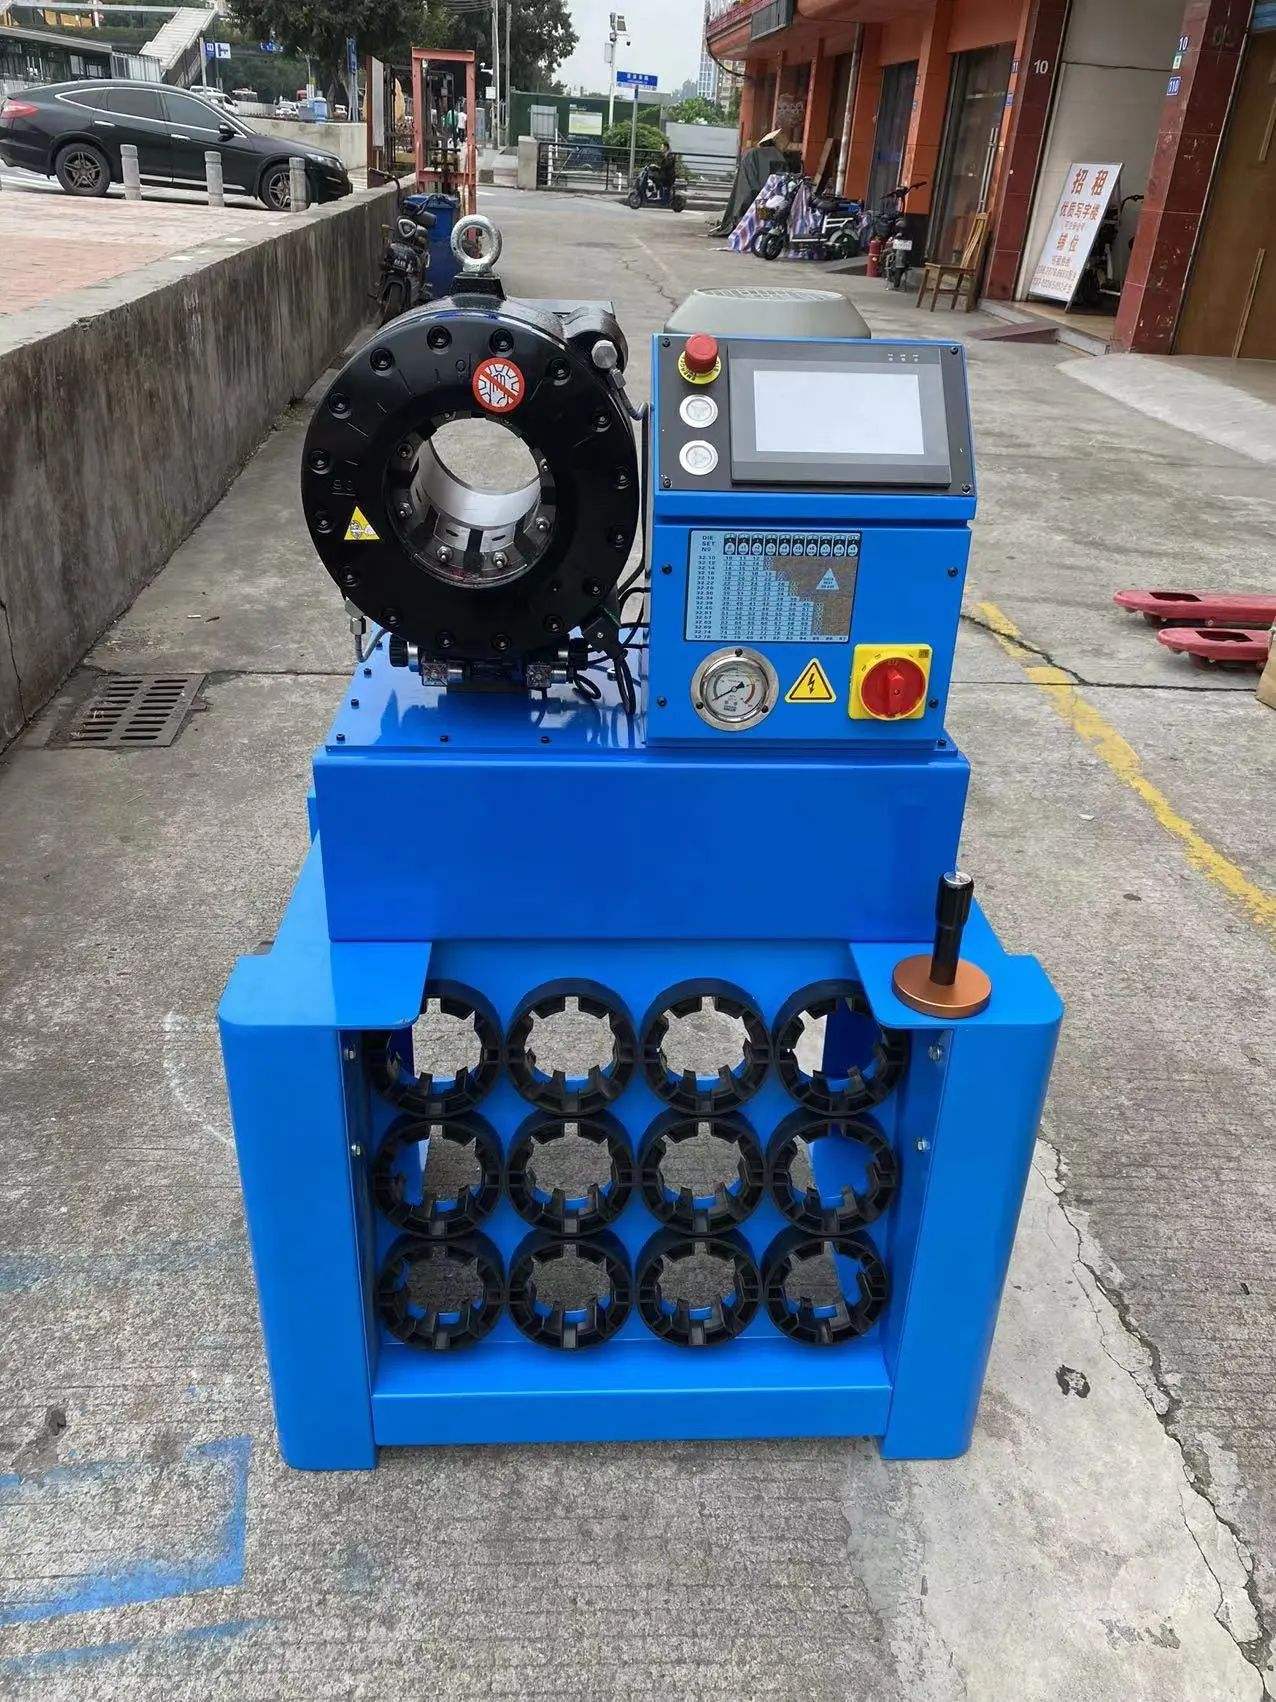

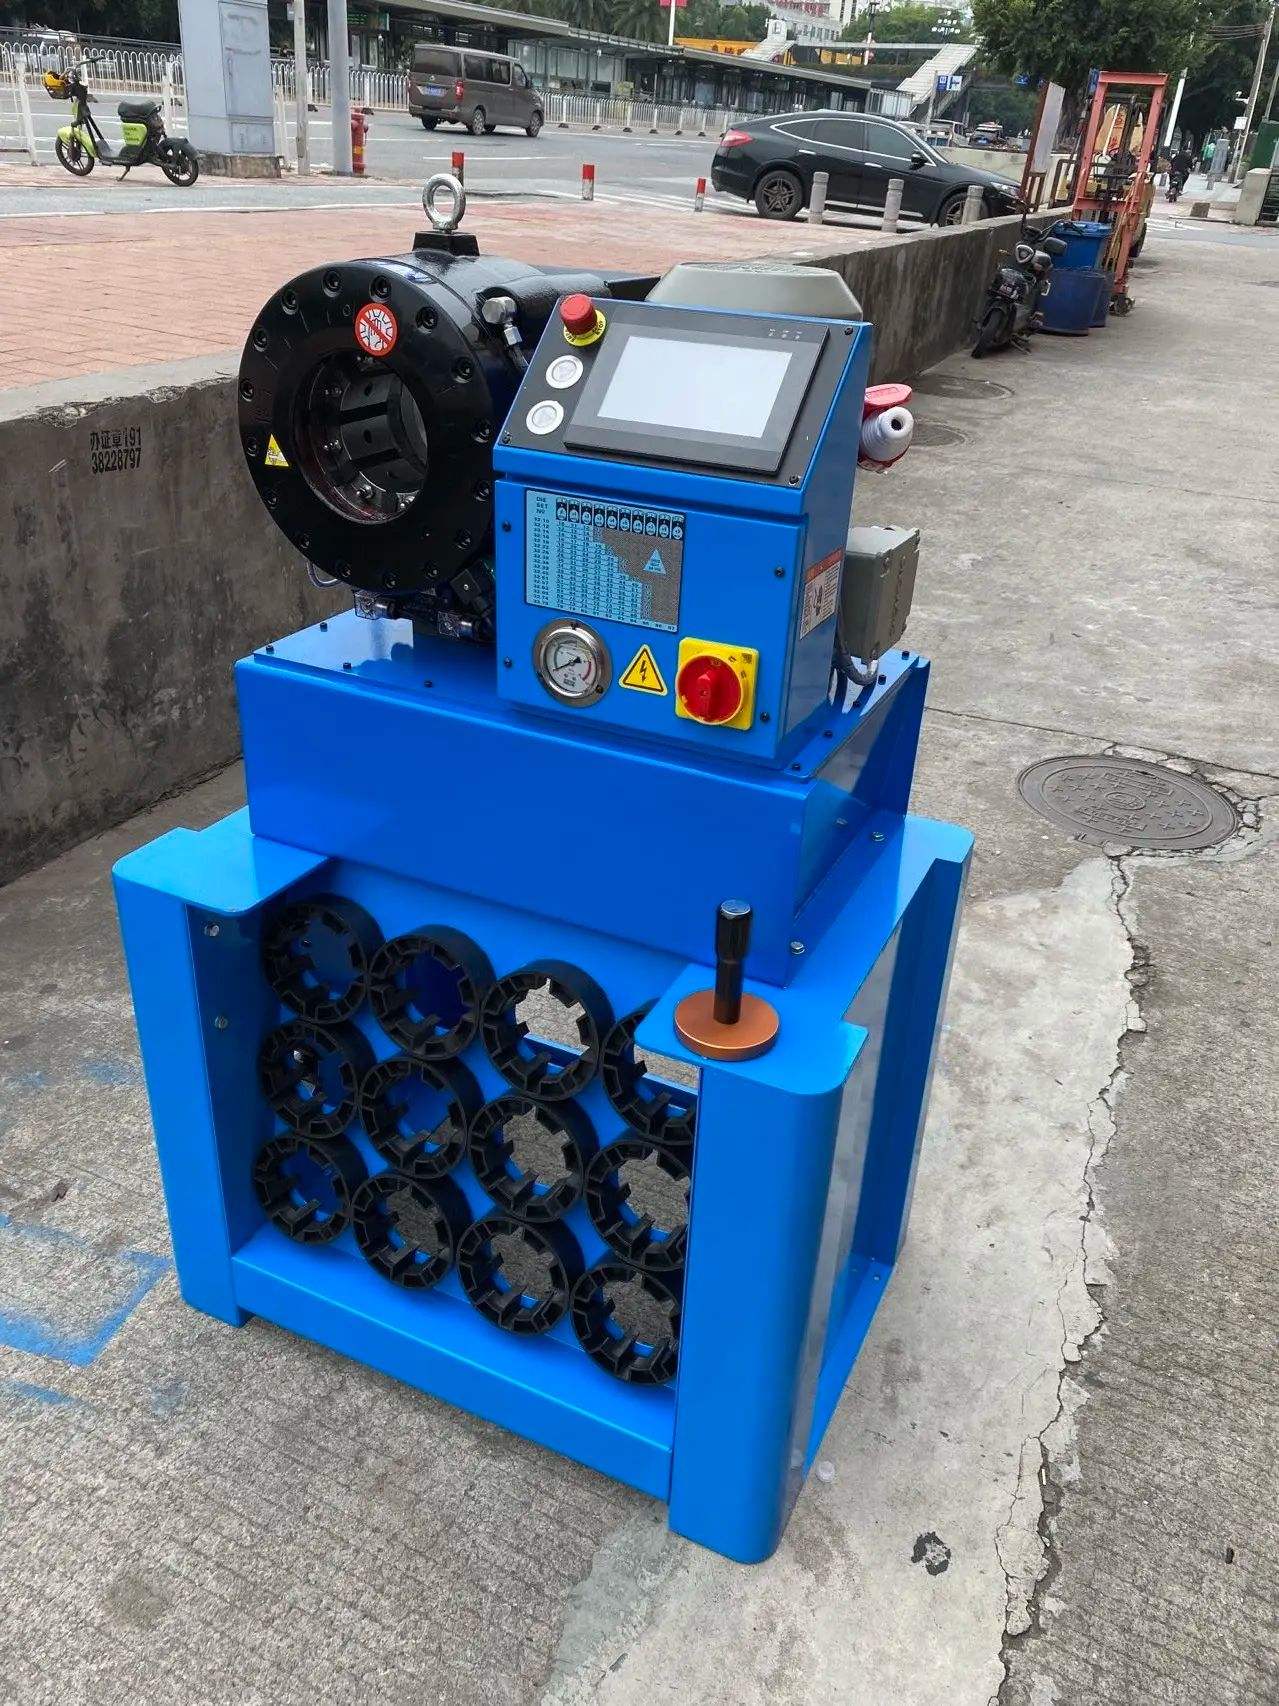
3.4Industrial Hydraulic Hose Crimping Machine:
Designed for large-scale production, industrial hose crimping machines offer high efficiency, automation, and versatility. Many models also support tube shrinking or diameter reduction functions, making them suitable for complex applications in modern manufacturing.
Advantages:
- High output and automation, ideal for mass production
- Supports a wide range of hose sizes and materials
- Shrinking (reducing) functionality enhances processing flexibility
- Improves productivity and product consistency in industrial settings
Limitations:
- High initial investment
- Larger footprint; requires more installation space
3.5How to Choose the Right Hose Crimping Tool:
When selecting a hose crimping tool, consider the following factors:
- Hose Size: Ensure the tool supports the diameter and type of hose you’re working with.
- Crimping Force: The tool must provide sufficient force to securely attach the ferrule to the hose.
- Portability: If working in the field or on mobile equipment, a portable tool is essential.
- Ease of Use: The tool should be user-friendly and require minimal maintenance.
- Cost: Balance your budget with functionality and expected usage frequency. More advanced tools may offer greater efficiency but come at a higher cost.
4.0Hose Crimping vs. Hose Swaging: Key Differences
In swaging, the machine reduces the ferrule’s outer diameter by forcing both the ferrule and the fitting into a fixed split die. One of the main differences between crimping and swaging is that crimping alters both the circumference and the shape of the ferrule, which generally requires more force than swaging.
4.1Definition Differences:
- Hose Crimping:
Crimping is a connection method in which the external die of a crimping machine radially compresses a metal fitting onto the outer surface of a hose. It is widely used in hydraulic hose assembly and is the most common technique today. - Hose Swaging:
Swaging involves the combined action of internal and external dies to plastically deform both the hose and the fitting. In some processes, expansion or rotary swaging is used. This method is commonly applied in precision systems requiring seamless and permanent fittings.
4.2Comparison Table:
| Category | Hose Crimping | Hose Swaging |
| Deformation Direction | Radial compression from the outside | Combined internal and external deformation; may include local expansion |
| Forming Method | Outer die compresses the fitting shell | Inner mandrel supports while outer die swages or rotary-forges |
| Common Fittings | Standard removable crimp-style fittings | One-piece or custom-designed fittings |
| Typical Applications | Hydraulic hose assemblies, field repairs | Aerospace, instrumentation, high-pressure systems |
| Equipment Setup | Highly versatile; quick die changes | Specialized machines; high degree of die customization |
| Joint Strength | Meets typical hydraulic pressure requirements | Designed for higher precision and structural integrity |
| Operational Complexity | Straightforward; suitable for high-volume work | More complex; requires precise control of material deformation |
| Example Products | Construction machinery hoses, agricultural lines | Aircraft fuel lines, automotive brake systems, small-diameter high-pressure tubing |
5.0Principles and Steps of Hydraulic Hose Repair
Repairing a hydraulic hose involves identifying the root cause of failure, replacing or reworking damaged components, and ensuring the system’s integrity through proper reassembly and testing. Below is a step-by-step guide to help you complete the process safely and effectively.
5.1Diagnose the Problem
The first step in hydraulic hose repair is accurately diagnosing the issue. Common hose problems include:
- Leakage: Often found at the hose ends, fittings, or along the hose body.
- Abrasion or Bulging: Typically caused by external friction or excessive bending, which may damage the hose cover.
- Cracks: Can result from aging, overpressure, temperature fluctuations, or improper installation.
Perform a thorough inspection of the hose to locate visible signs of damage and assess the severity. This will help determine whether the hose can be repaired or must be replaced.
5.2Gather Tools and Materials
Before beginning the repair, make sure the following tools and safety equipment are available:
- Safety gear: Goggles and gloves to protect against hazards.
- Cutting tools: Utility knife or hose cutter for clean, precise cuts.
- Hydraulic hose crimping machine: Ensures secure, leak-free connections.
- Fittings and clamps: To attach and secure hose components.
- Replacement hose: Selected based on the original hose size, pressure rating, and application.
Having the proper tools ready will ensure the repair process is smooth and safe.
5.3Repair the Hose
Step 1: Shut Down the System and Release Pressure
Always power down the hydraulic system and relieve all residual pressure before starting. This is essential to prevent injury or accidental fluid discharge.
Step 2: Remove the Damaged Hose
Carefully disconnect the faulty hose, noting the orientation and fitting placement. Use a hose cutter to make clean, square cuts at the damaged ends.
Step 3: Inspect Fittings and Connectors
If the fittings are reusable, check for signs of wear, damage, or debris. Clean thoroughly. If damaged or incompatible, replace them with new, matching components.
Step 4: Prepare the New Hose and Fittings
Attach the selected fittings to the replacement hose, making sure the orientation is correct to avoid flow restrictions or leaks. Insert the fitting fully into the hose end for a tight fit.
Step 5: Crimp the Hose Assembly
Place the hose and fitting into the crimping machine. Ensure the selected dies match the hose and fitting size. Activate the machine to apply even pressure and secure the fitting in place.
Step 6: Inspect the Repaired Hose
After crimping, examine the hose for visible defects. Verify that the crimp is uniform, the fitting is stable, and the hose body is smooth without deformation.
Step 7: Test the System for Leaks
Before restarting the system, conduct a pressure test to ensure no leaks are present. Verify that all connections are tight and the system is functioning properly.
6.0How to Choose a High-Quality Hydraulic Hose Crimping Machine
When selecting a hydraulic hose crimping machine, price should not be your only consideration. While low-cost equipment may seem attractive, it often comes with hidden costs in the form of maintenance issues and reduced lifespan.
6.1Quality of Key Components:
Low-cost crimping machines often use substandard components such as solenoid valves, oil seals, and motors. These elements directly impact the machine’s long-term performance and reliability. Even if two machines appear similar in design, differences in core parts can lead to significant variations in durability and cost.
Tip: Choose machines that incorporate components from reputable brands—especially solenoid valves and electrical systems—as this ensures longer service life and fewer breakdowns.
6.2Manufacturing Process and Raw Materials:
High-quality crimping machines are made using premium materials and precise manufacturing processes. These help reduce failure rates and improve overall accuracy and durability. In contrast, low-priced machines may use inferior materials and outdated production methods, increasing the risk of structural deformation or early wear.
Tip: If the machine head looks rough or poorly finished, it may be a sign of outdated machining technology or low-grade materials.
6.3Accessories and Quotation Transparency:
Some suppliers offer a low base price for the crimping machine but exclude essential accessories such as die sets. This can make the initial quote seem appealing, but you may end up paying significantly more once all required components are added.
Tip: Always verify whether the quoted price includes all necessary accessories, such as dies and clamps, to avoid unexpected expenses after purchase.
6.4Appearance and Build Quality:
While the exterior look doesn’t guarantee internal performance, attention to detail often reflects the overall manufacturing quality. A poorly finished exterior may suggest sloppy workmanship and subpar internal standards.
Tip: Examine the machine’s appearance and build quality—ensure there are no obvious defects, sharp edges, or poorly assembled parts.
Conclusion:
The quality of a hydraulic hose crimping machine directly affects its performance, safety, and lifespan. While cheaper machines may seem cost-effective at first, they often result in higher maintenance costs and operational downtime. Choosing equipment from a reputable manufacturer, with reliable components and inclusive quotations, ensures better long-term value and fewer future issues.
References
npart24.com/en/resources/article/58/hose-crimping-a-comprehensive-guide
www.kurthydraulics.com/support/crimp-specifications