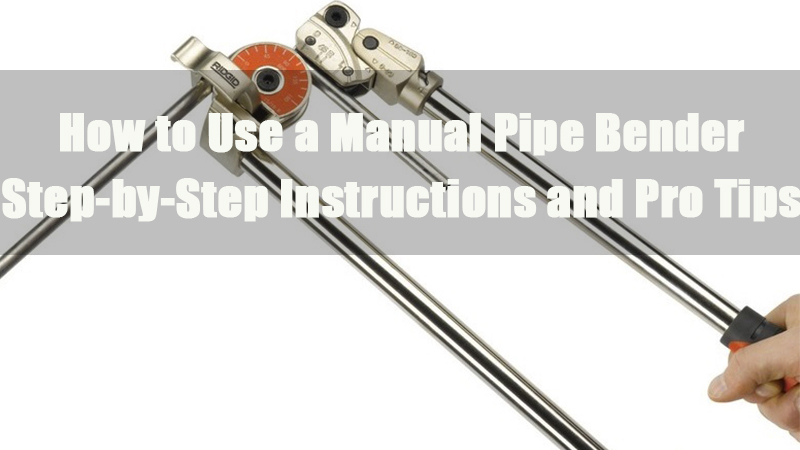
How to Use a Manual Pipe Bender
This guide provides step-by-step instructions, essential formulas, and practical troubleshooting tips to help users perform precise, consistent bends. From basic 90° bends to multi-plane and reverse bends, each section is designed to improve bending accuracy and confidence across a variety of applications.
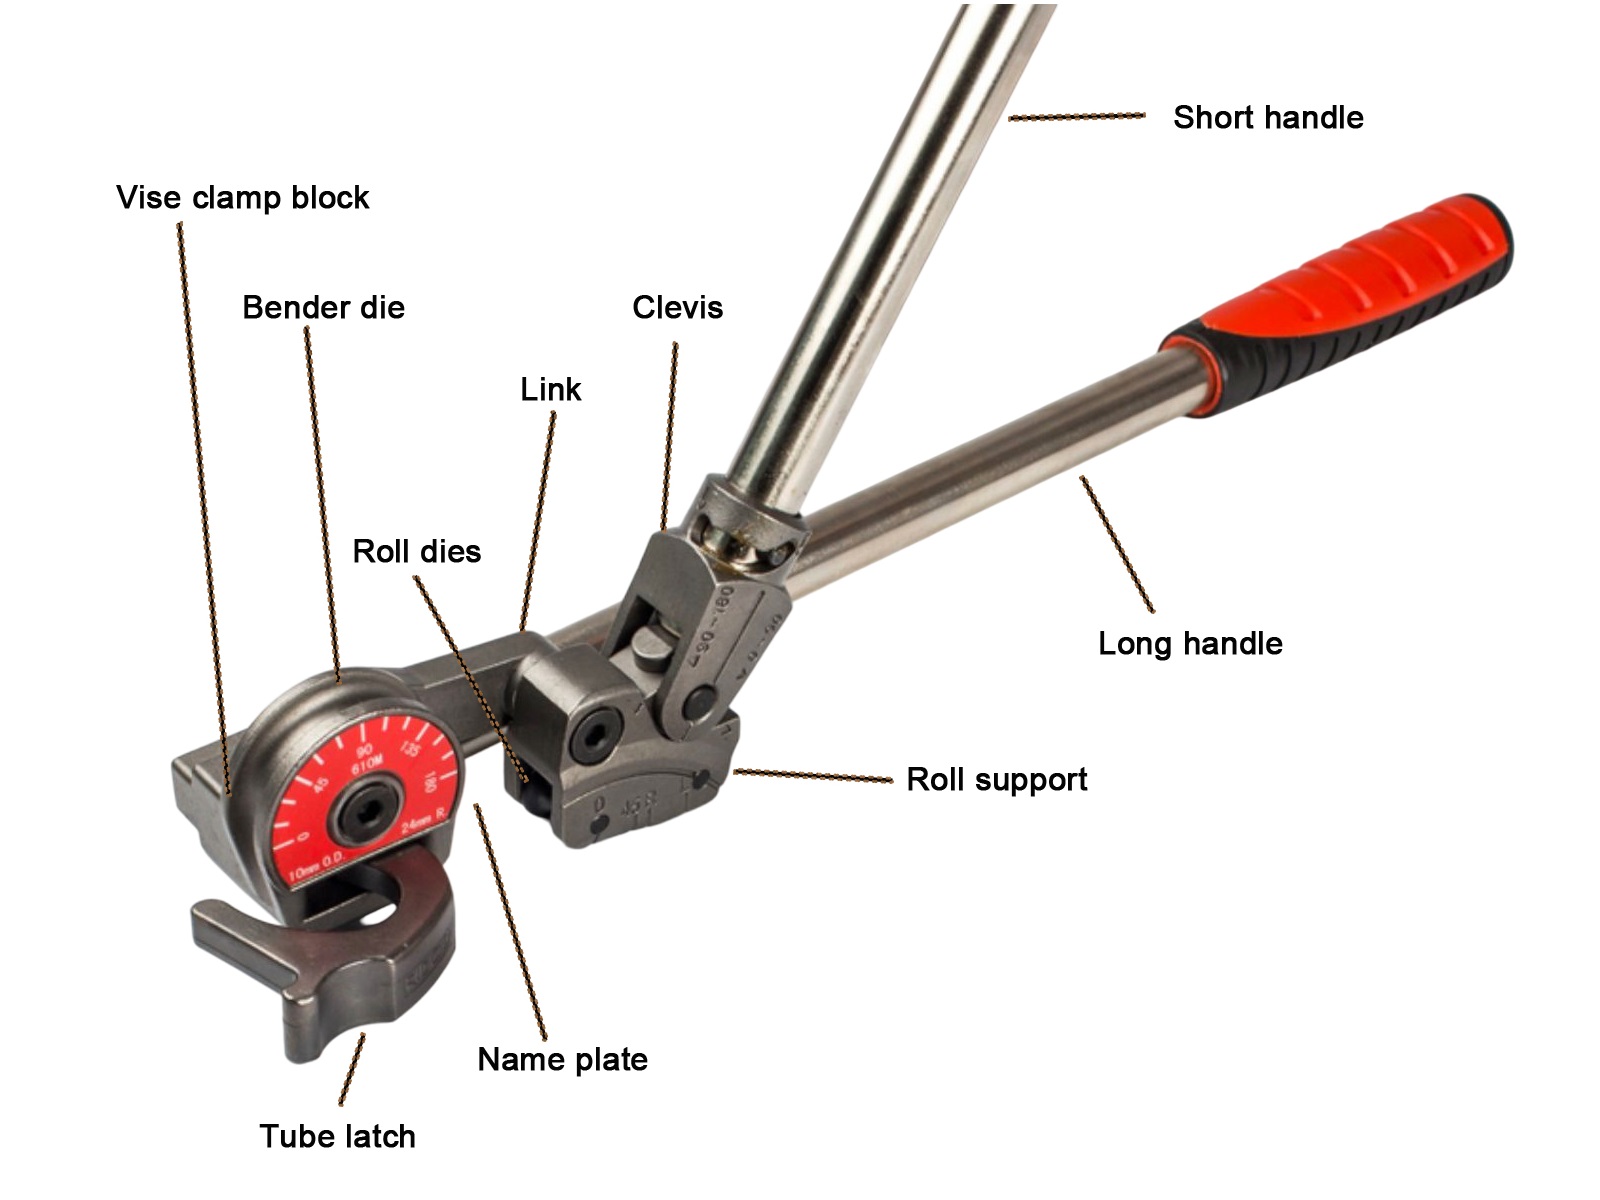
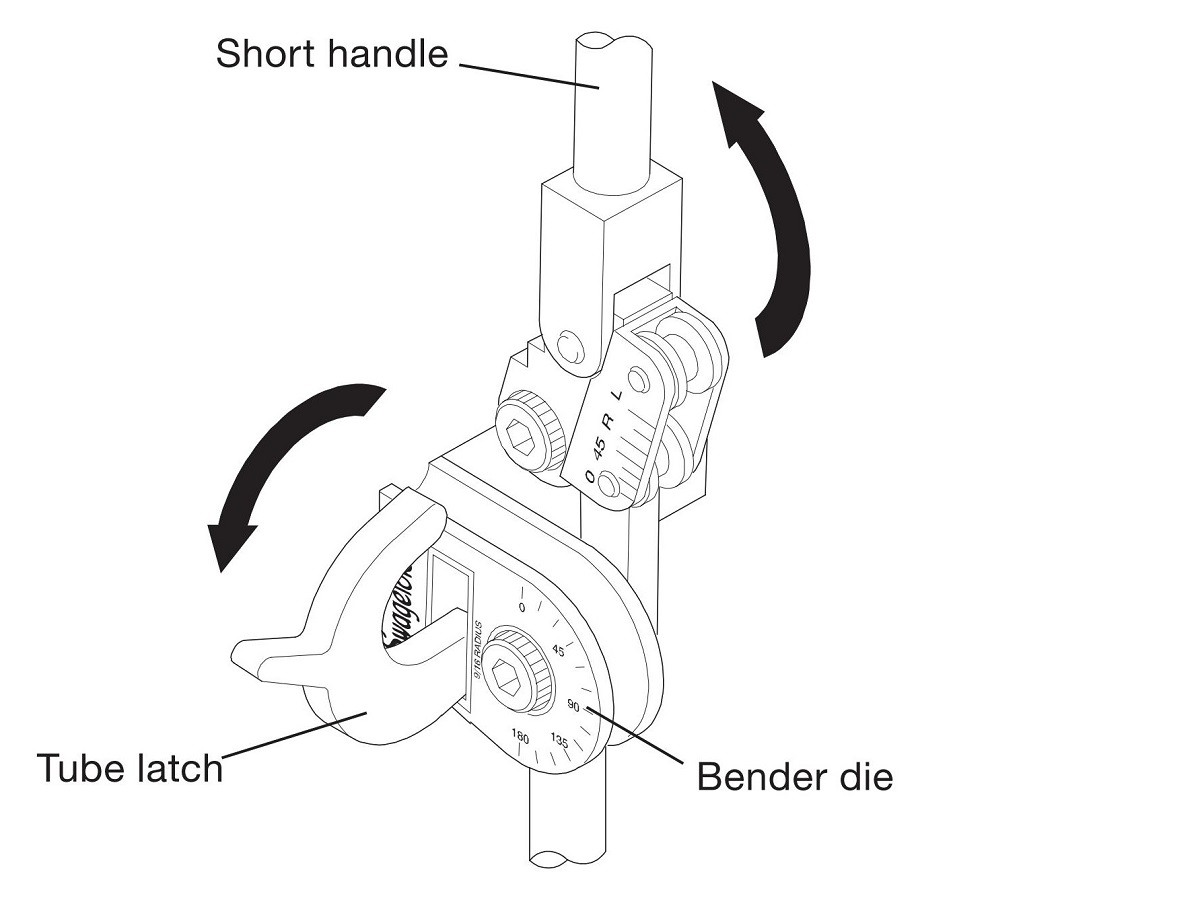
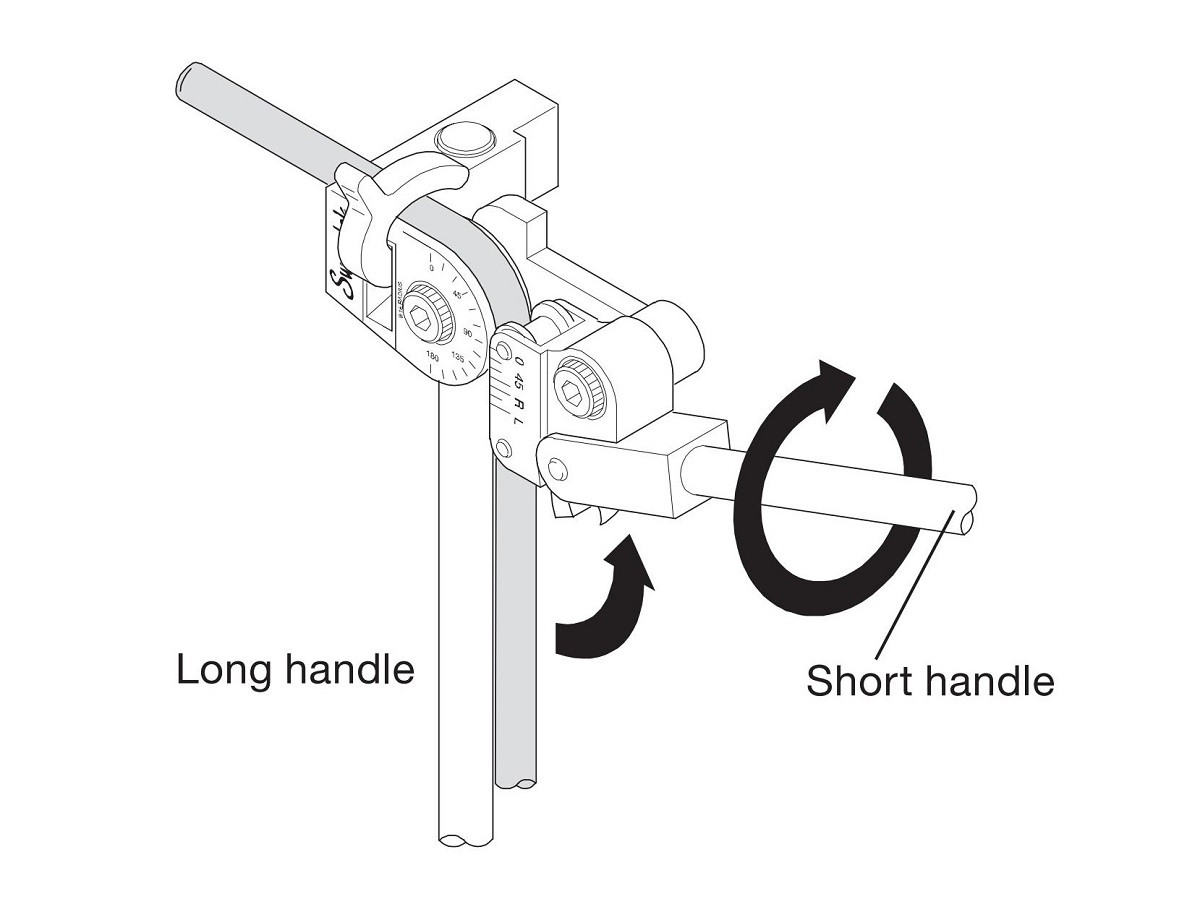
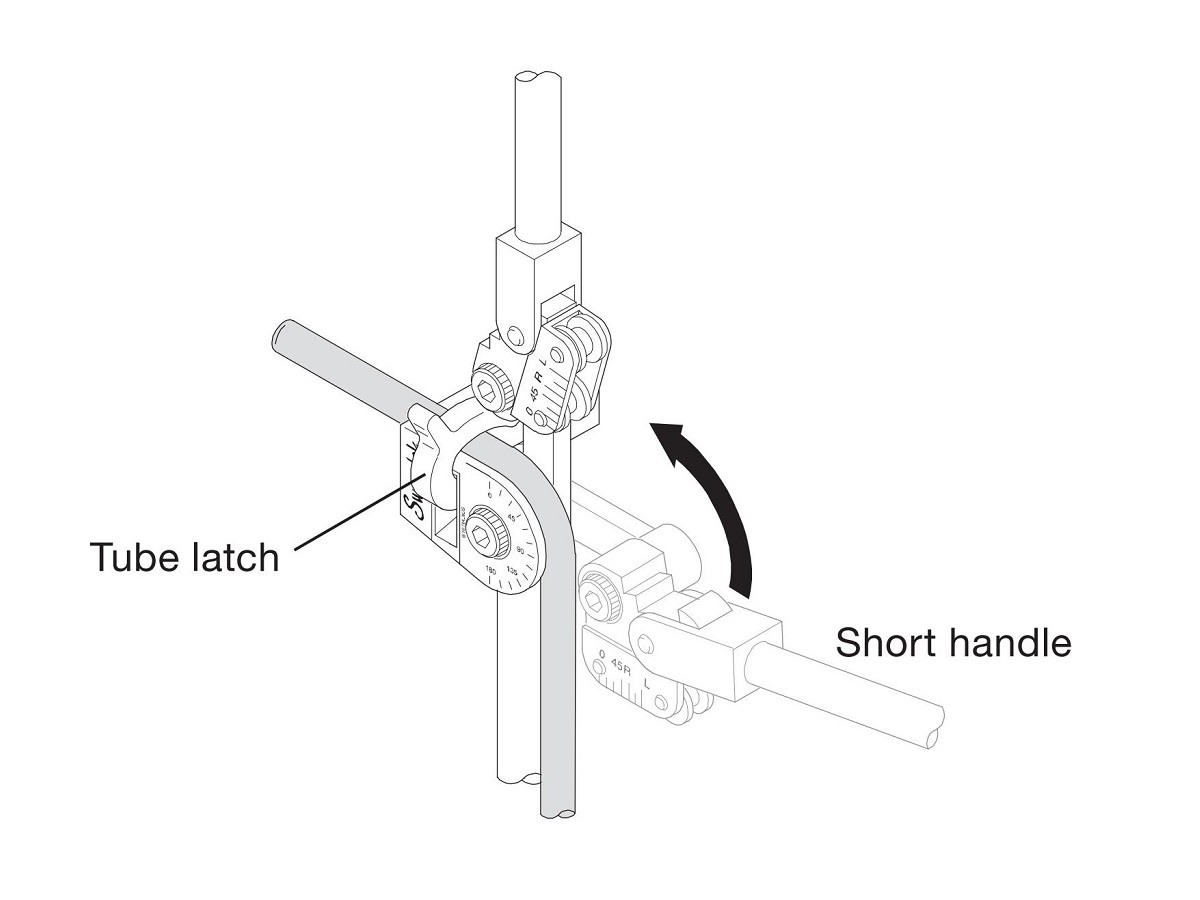
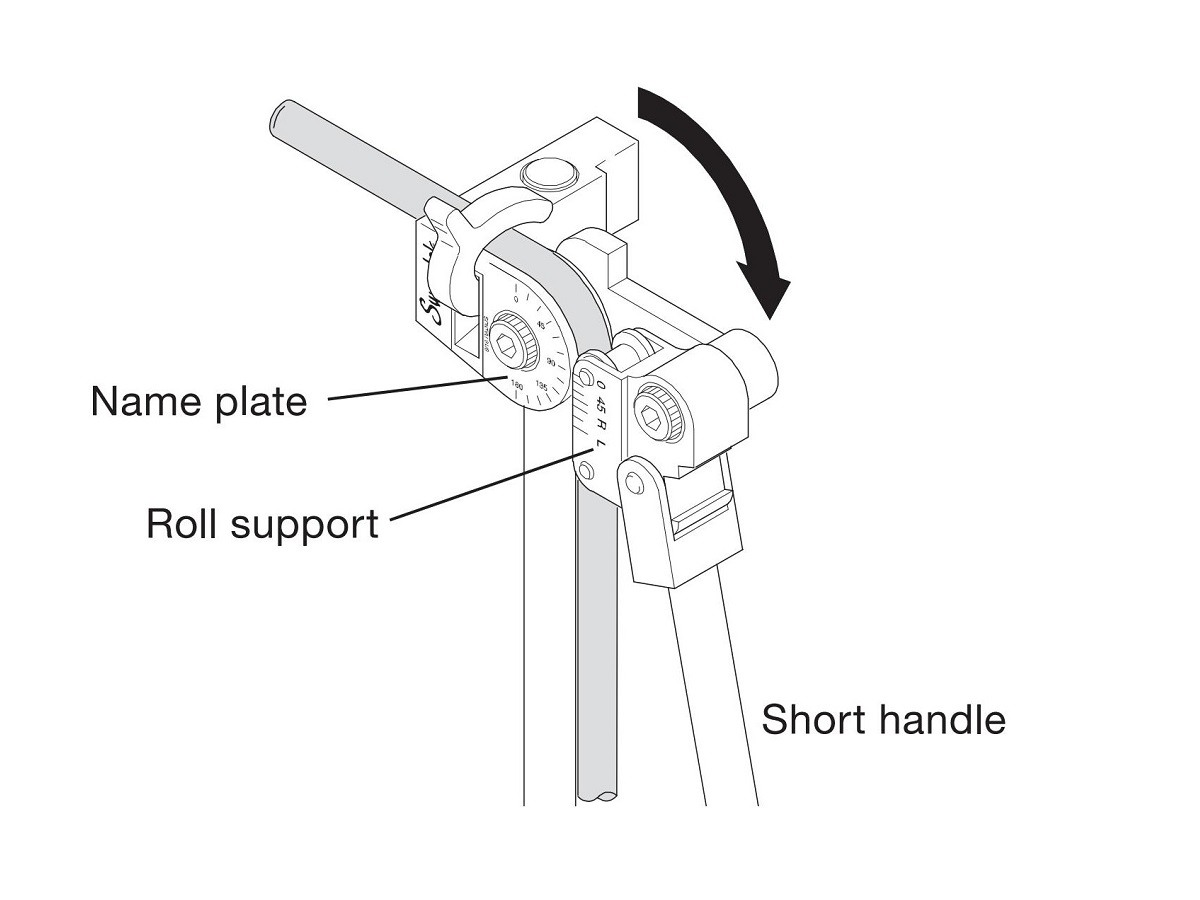
0.1Bender Parts
1.0Bend Calculation Methods
1.1Offset Bend Formula
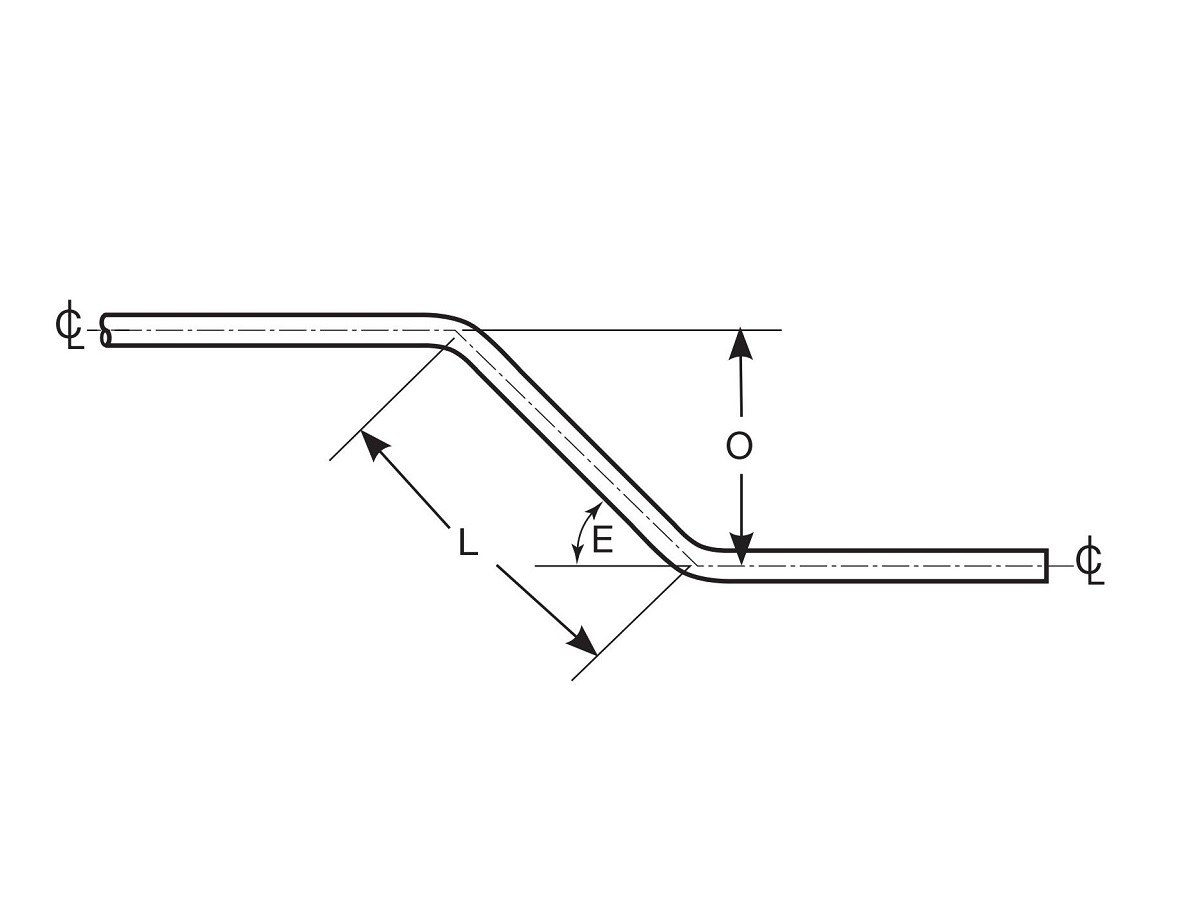

Purpose: To shift the centerline of the tube run—typically to route around obstructions.
Formula: L = O × A
L: Distance between bend marks (in inches)
O: Offset dimension (in inches)
A: Offset bend allowance (based on angle)
| Offset Angle (E) | Allowance (A) |
| 22.5° | 2.613 |
| 30° | 2.000 |
| 45° | 1.414 |
| 60° | 1.154 |
Example:
Offset = 6.75 in, Angle = 45°
Calculation: 6.75 × 1.414 = 9.55 in (≈ 9⁹⁄₁₆ in)
1.2Adjustment (Gain) Calculations
Definition: The difference in tubing length used for a curved bend versus a sharp corner.
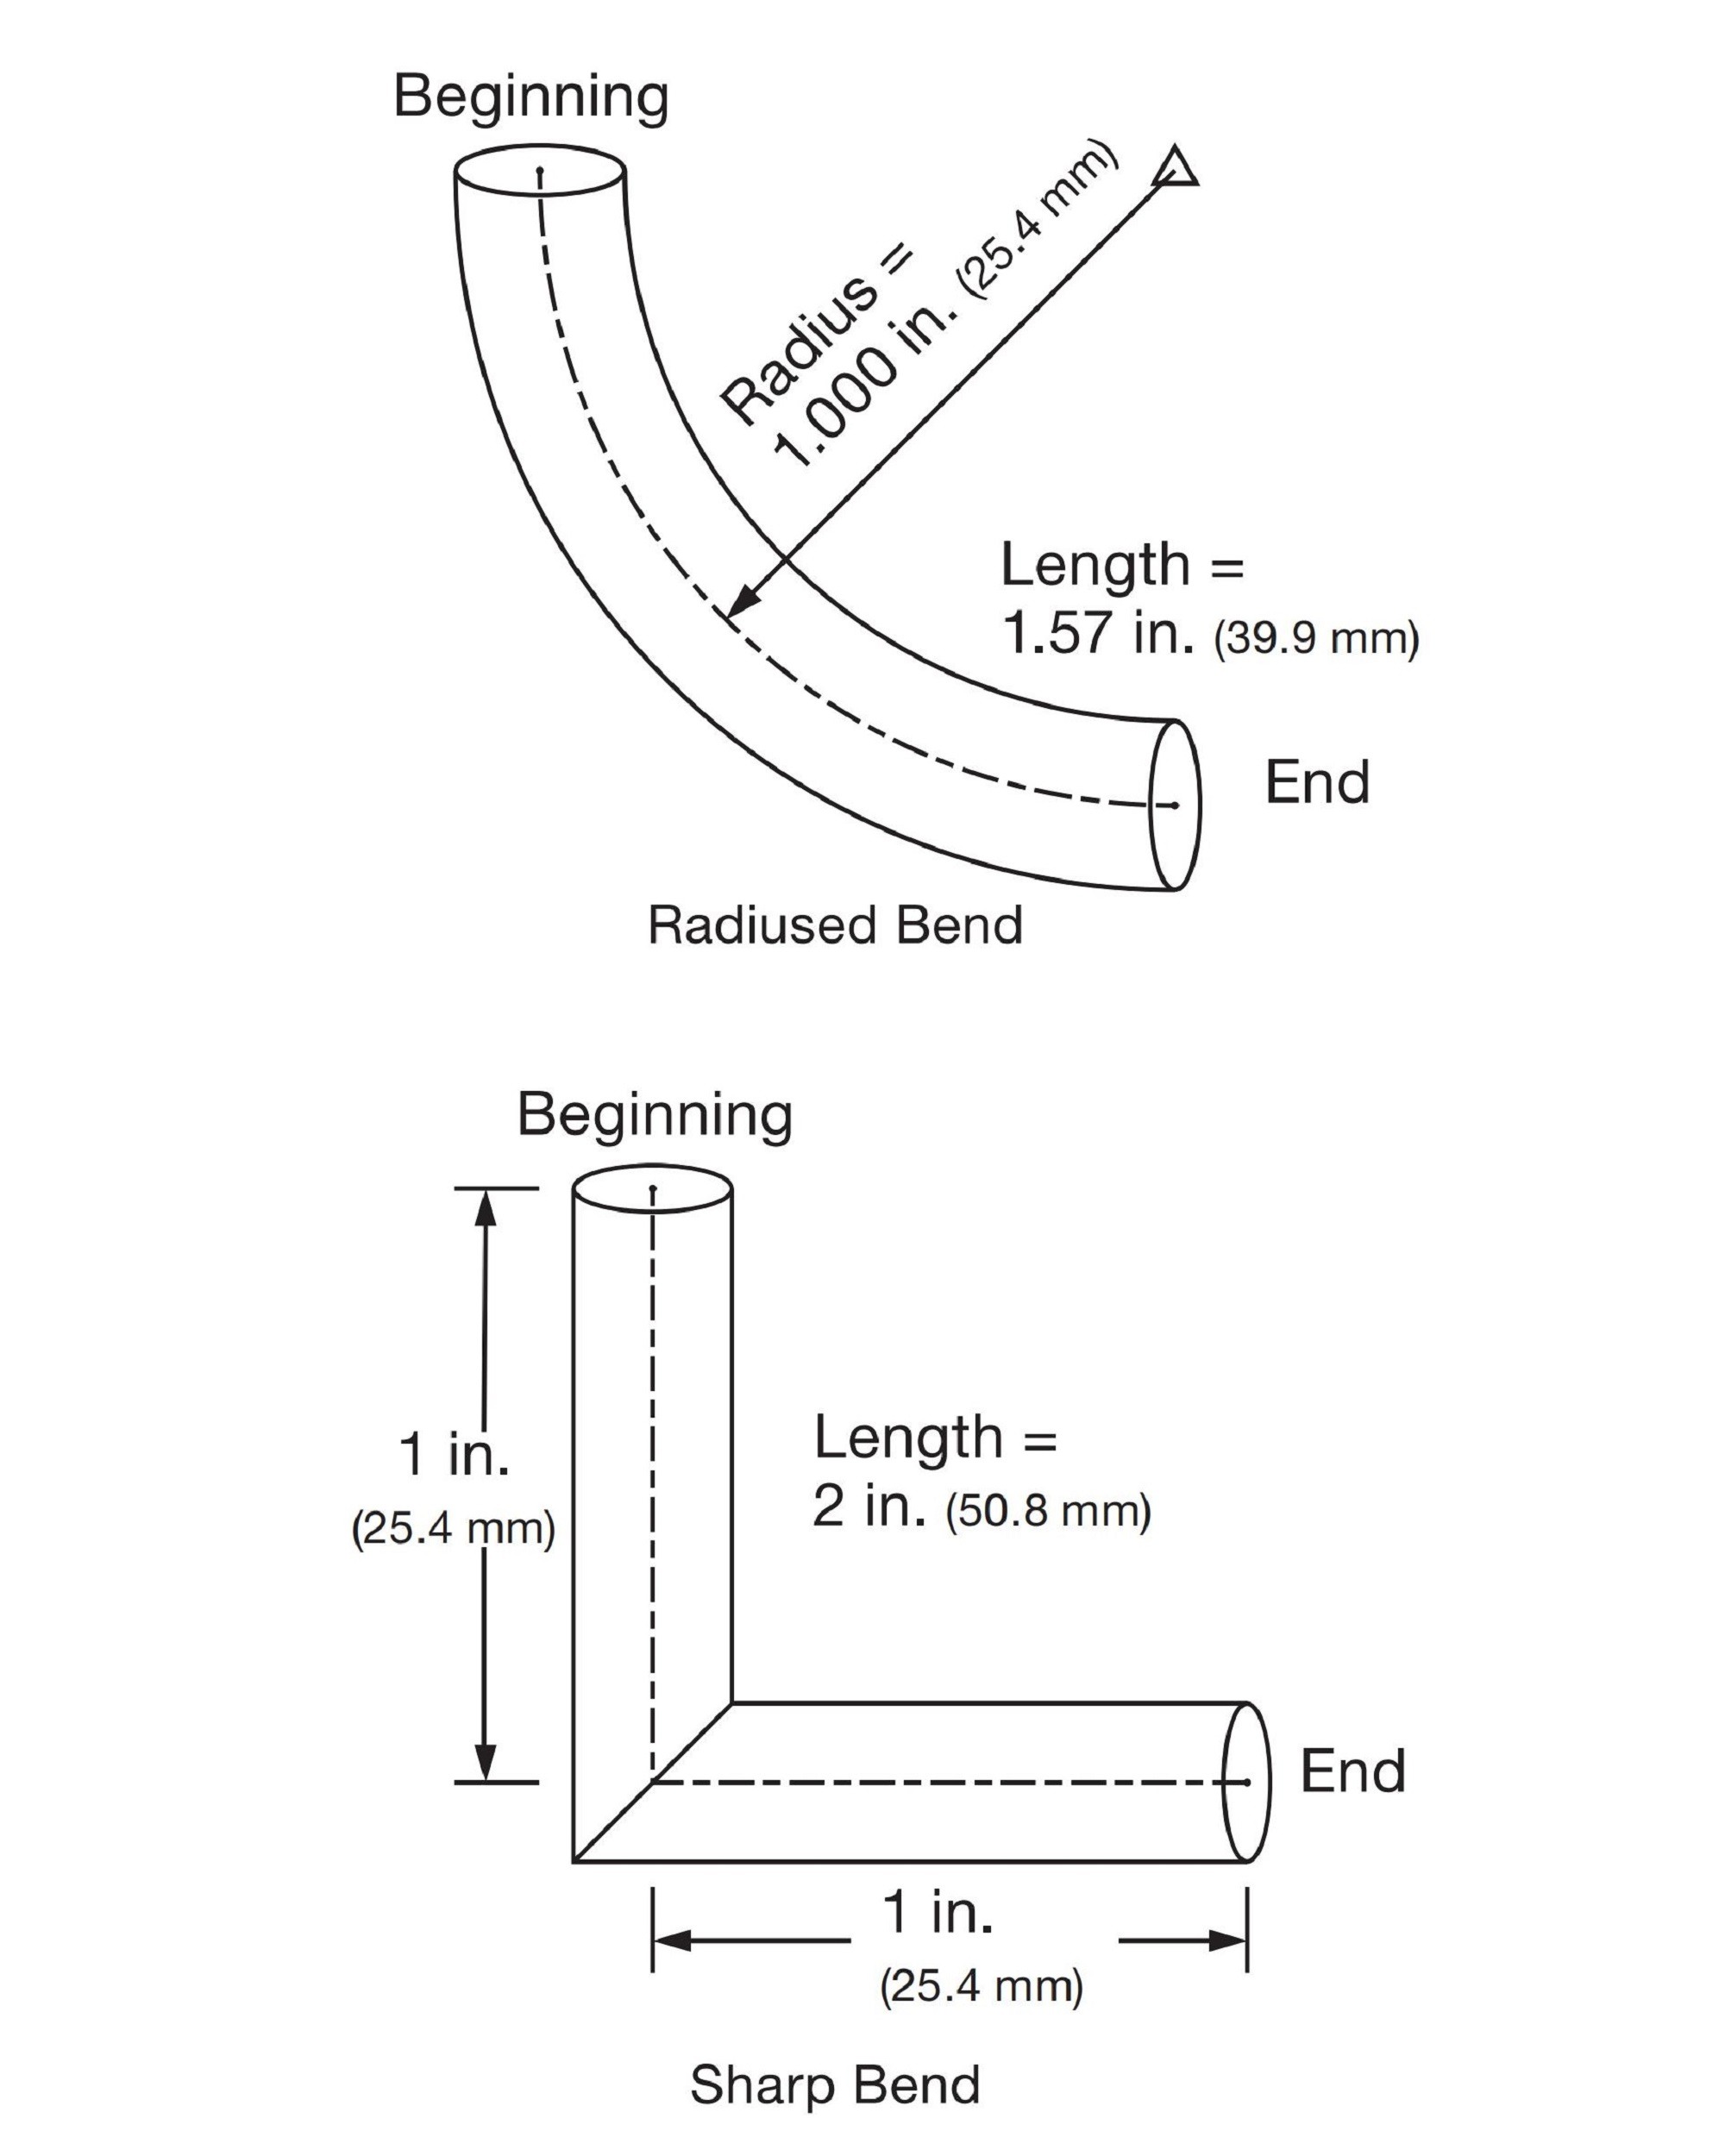
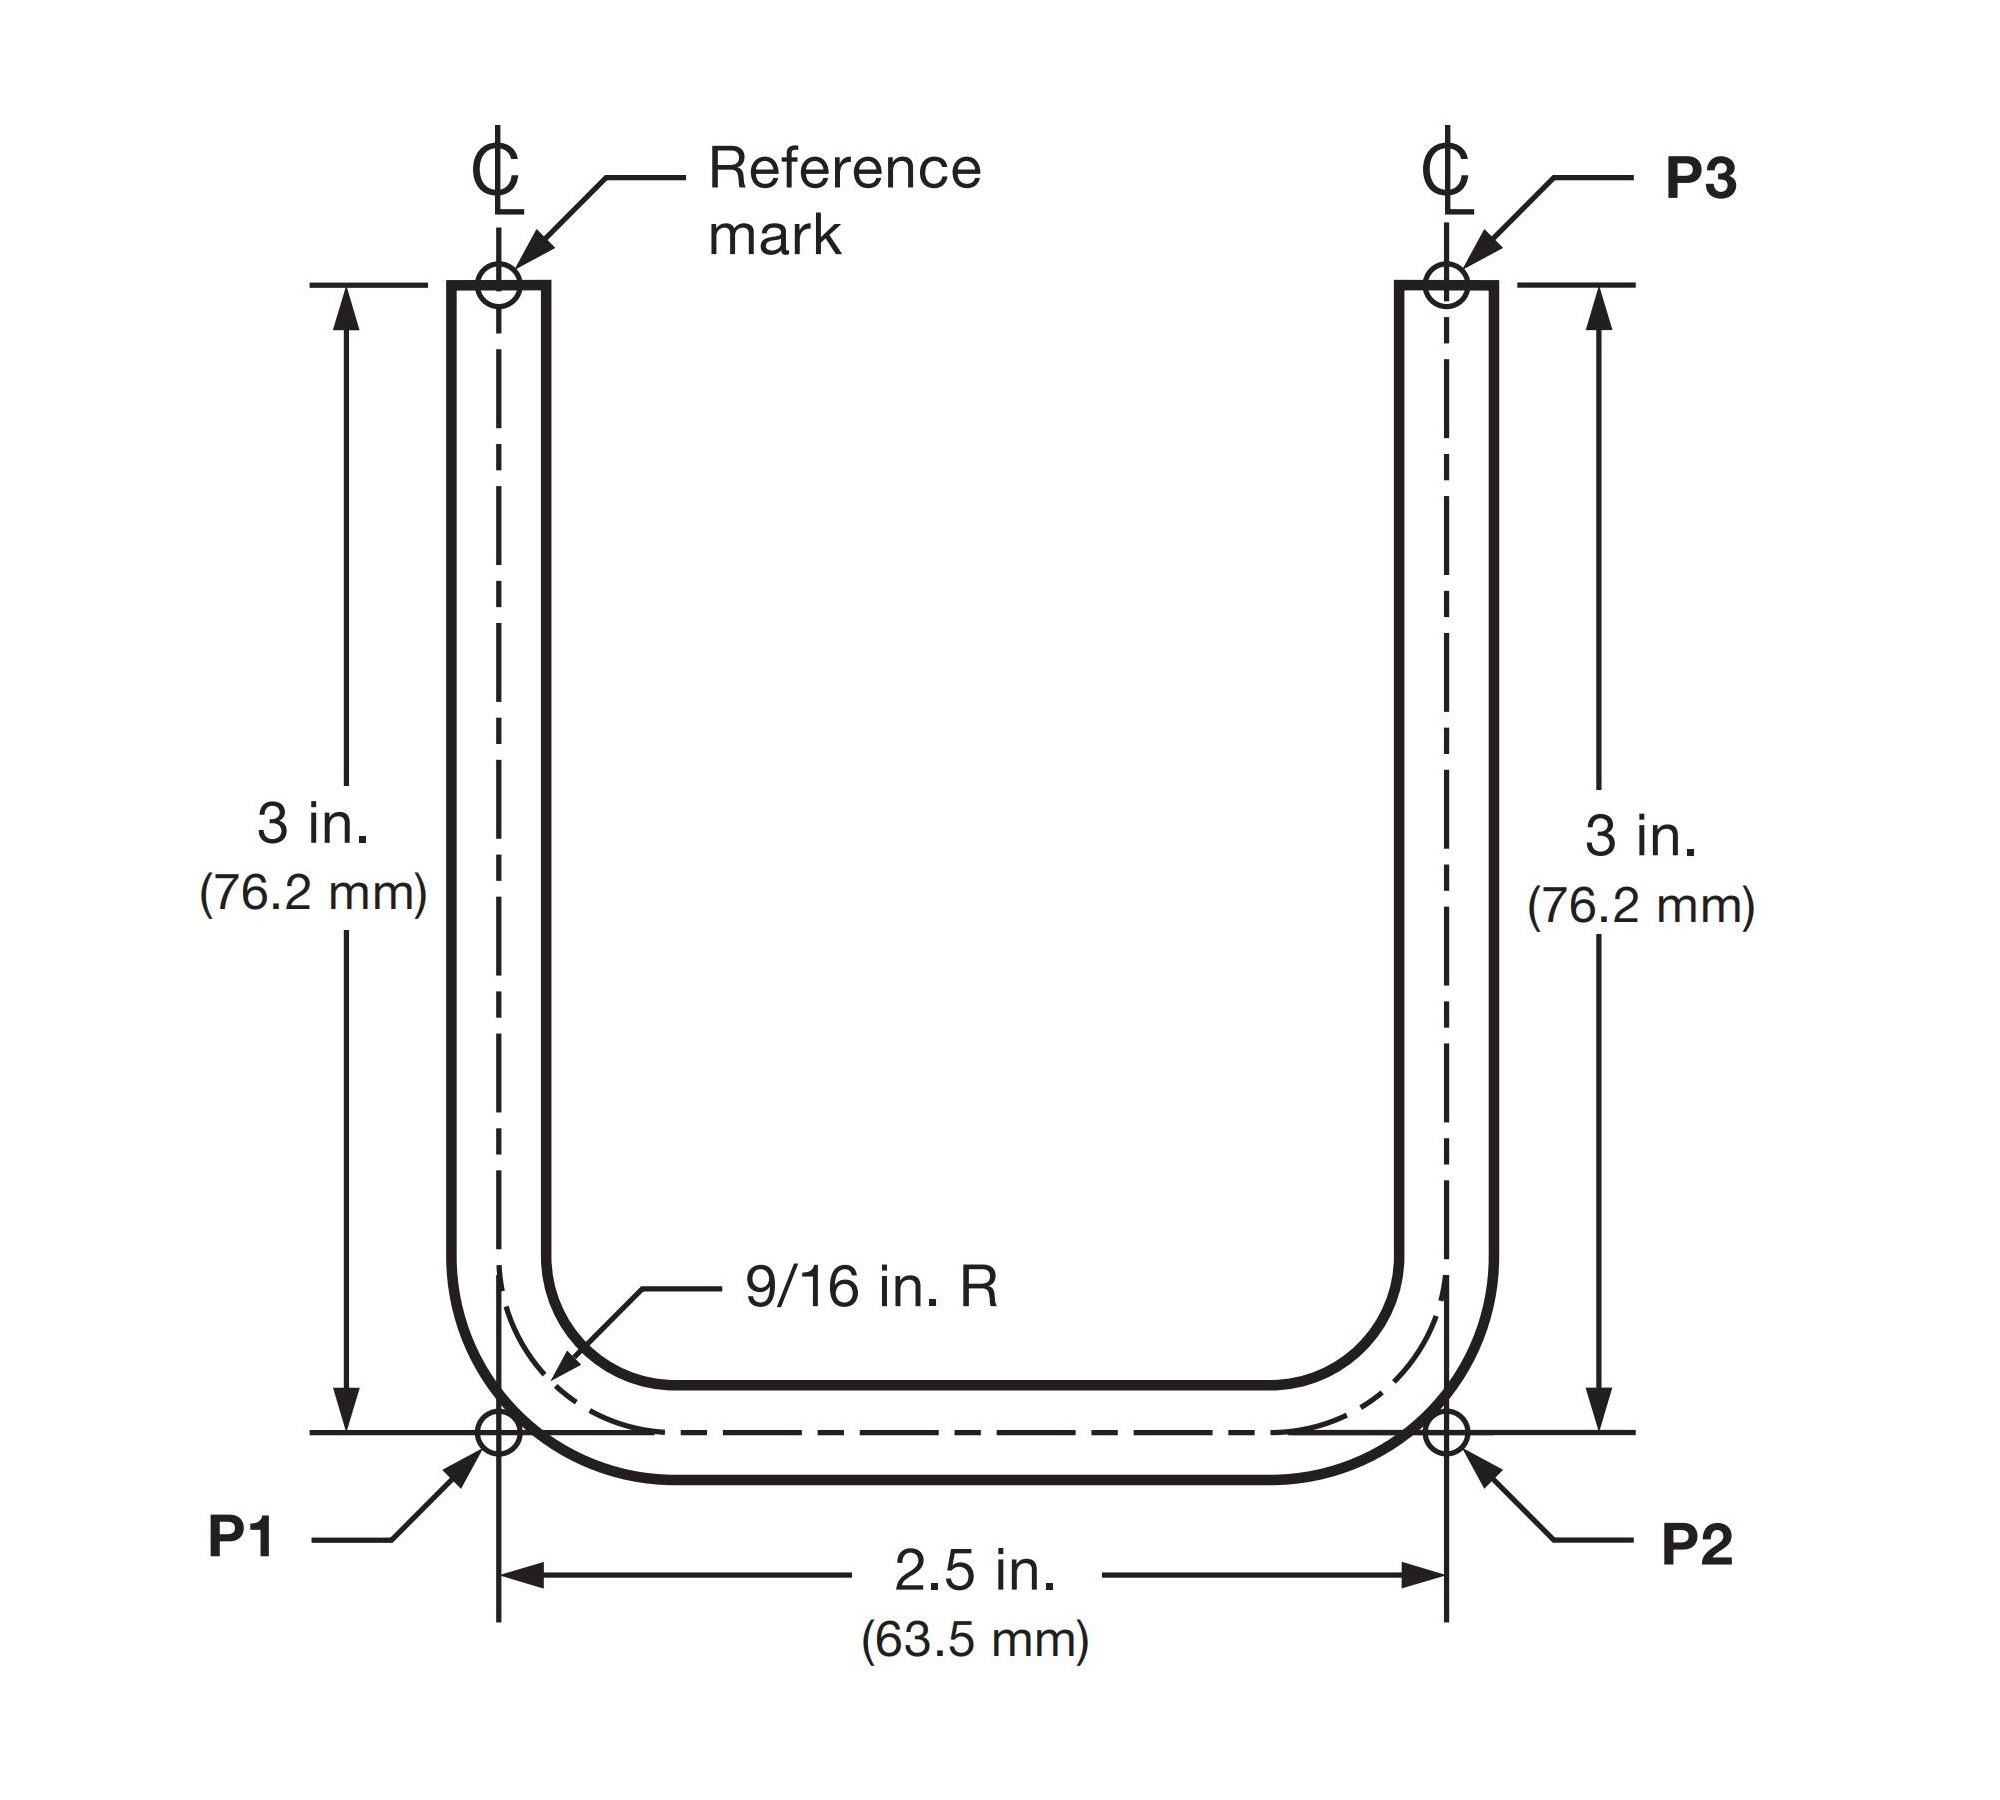
Rule: For each new bend,
New mark = Previous mark + new leg length − previous bend’s gain
Example:
Tube size: 1/4 in, Bend radius: 9/16 in
Gain for 90° = 5/16 in
Step-by-step:
P1 = 3 in
P2 = P1 + 2.5 in − 5/16 in = 5³⁄₁₆ in
P3 = P2 + 3 in − 5/16 in = 7¹³⁄₁₆ in
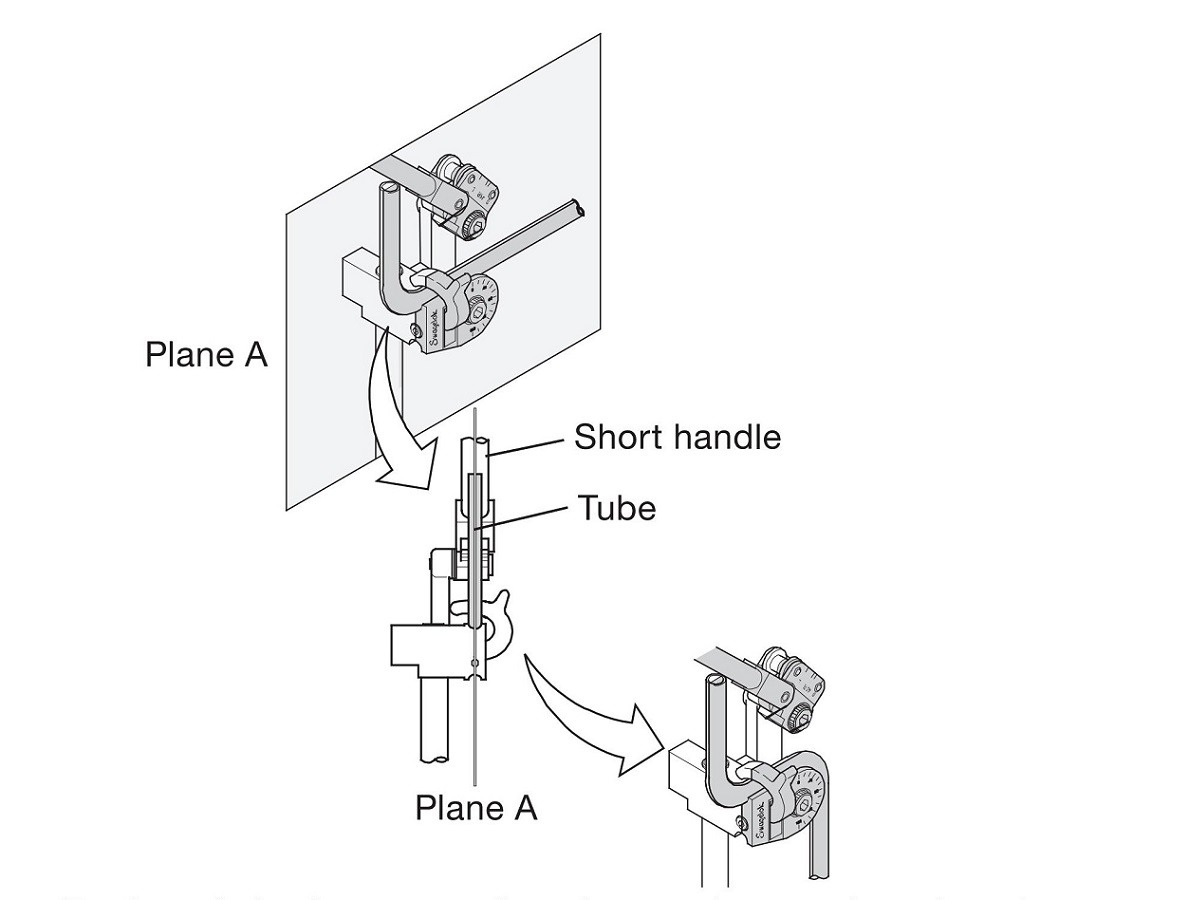
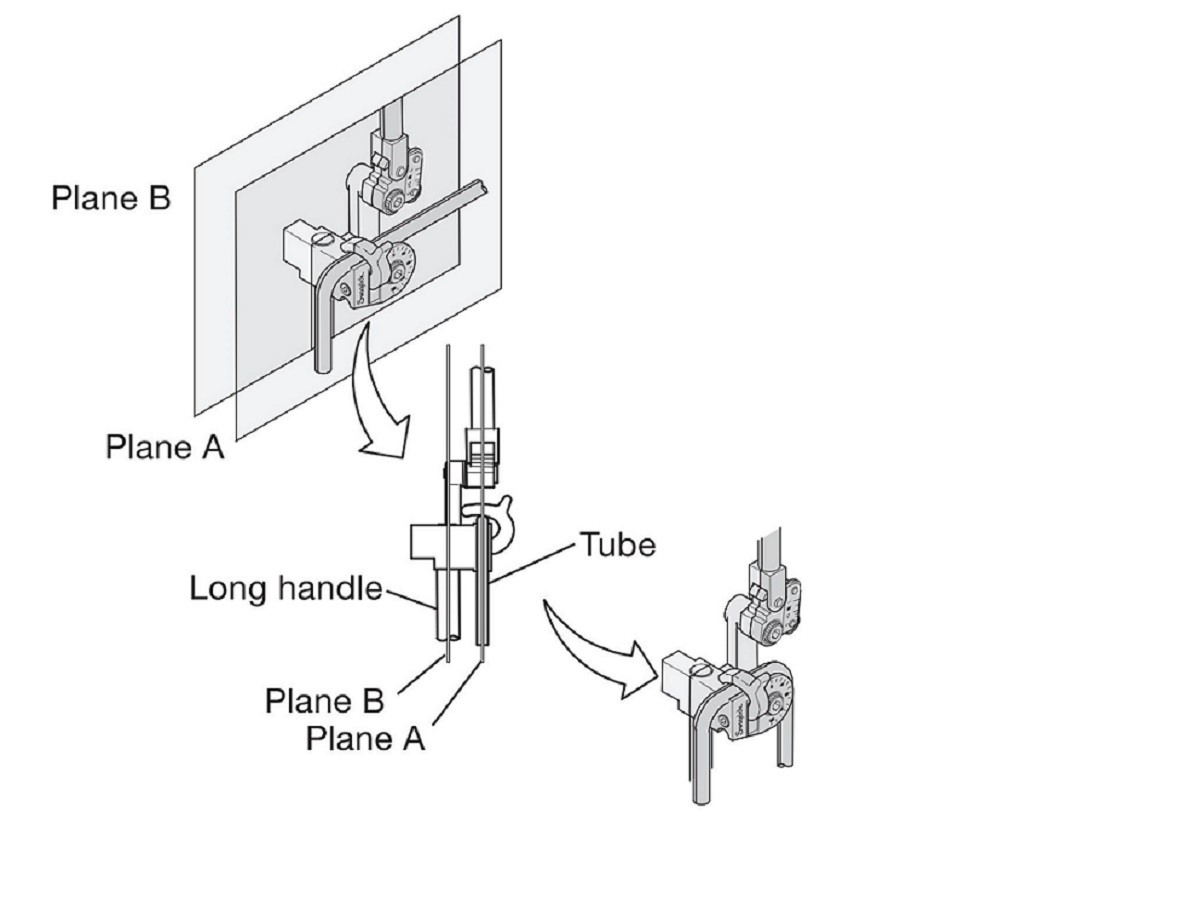
1.3Determining Changes in Plane and Direction
When making multiple bends on a single piece of tube, make sure each bend is made in the correct direction.
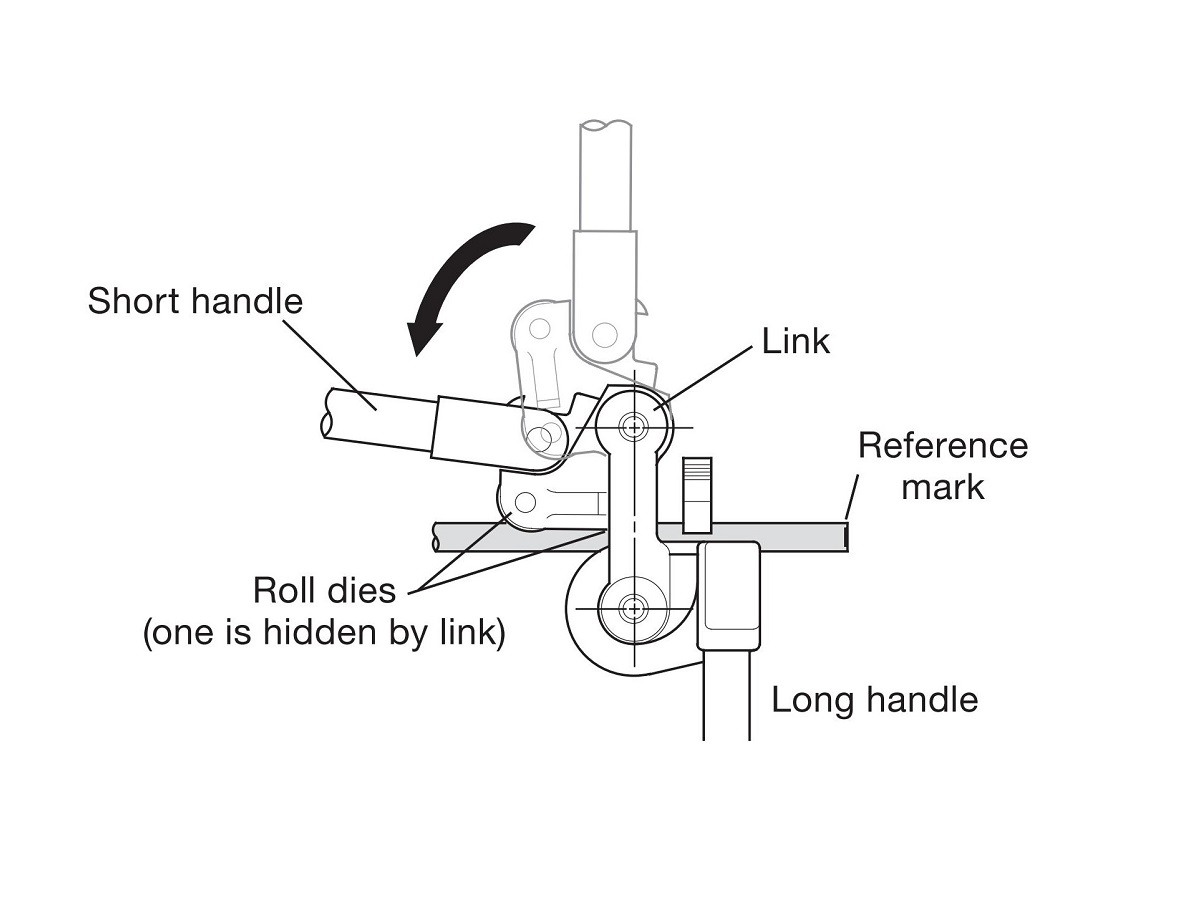
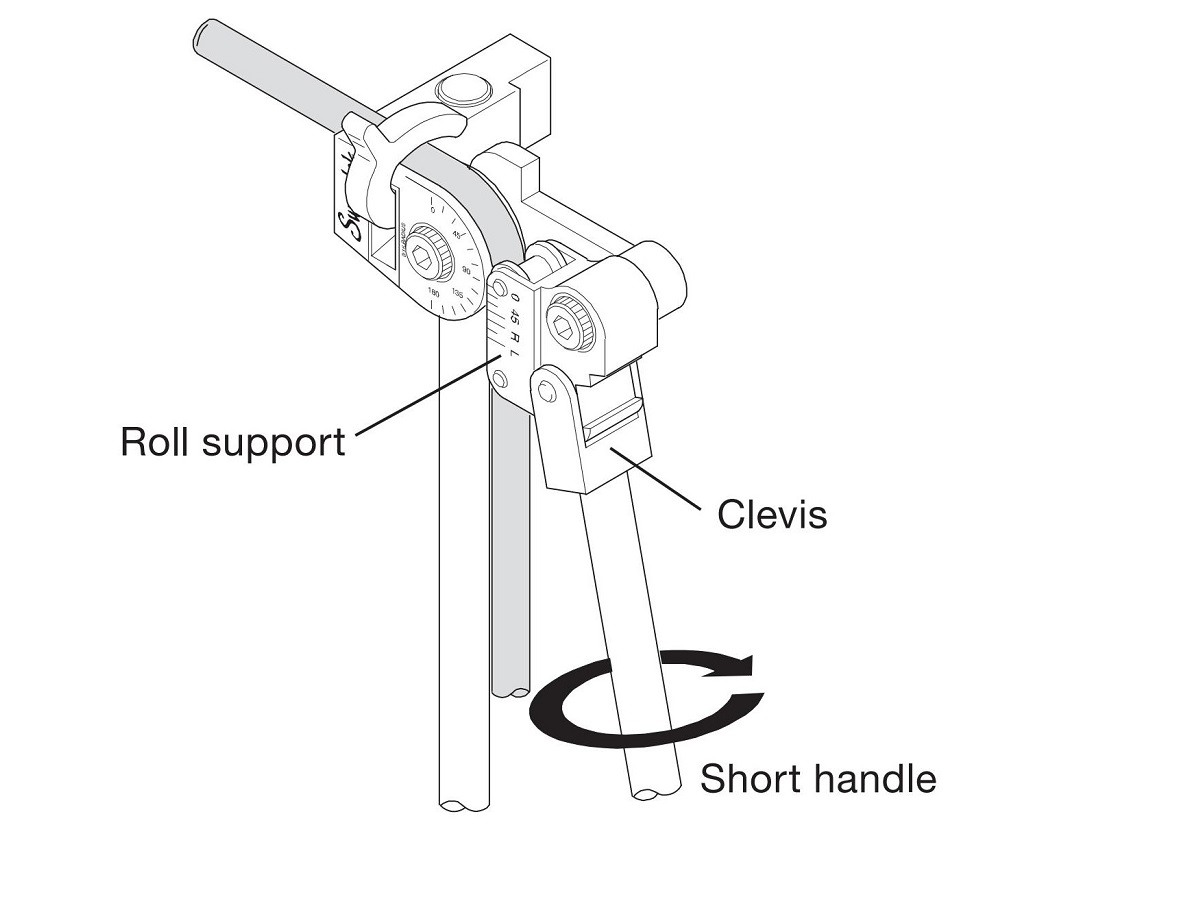
- Opposite Direction Bends: For bends in the opposite direction of the previous bend, align the tube with the raised short handle (Plane A).
- Same Direction Bends:For bends in the same direction as the previous bend, align the tube parallel to the long handle (Plane B).
2.0Measure-Bend Method
Scenario: Make a 90° bend 4 in from the reference mark, followed by a 45° bend 4 in apart.
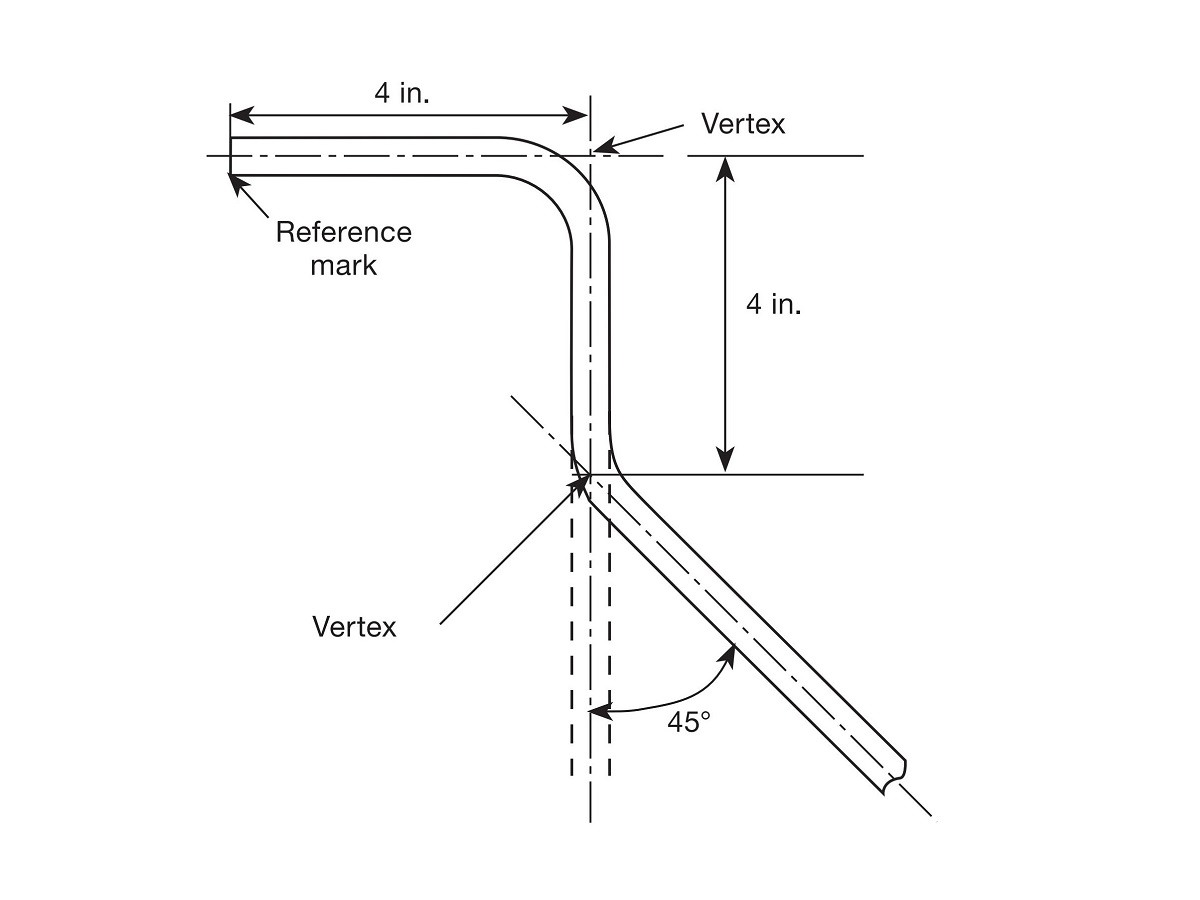
Steps:
- Place a reference mark at the end of the tube.
- Measure 4 in from the mark for the 90° bend.
- Bend to 90° using the bender.
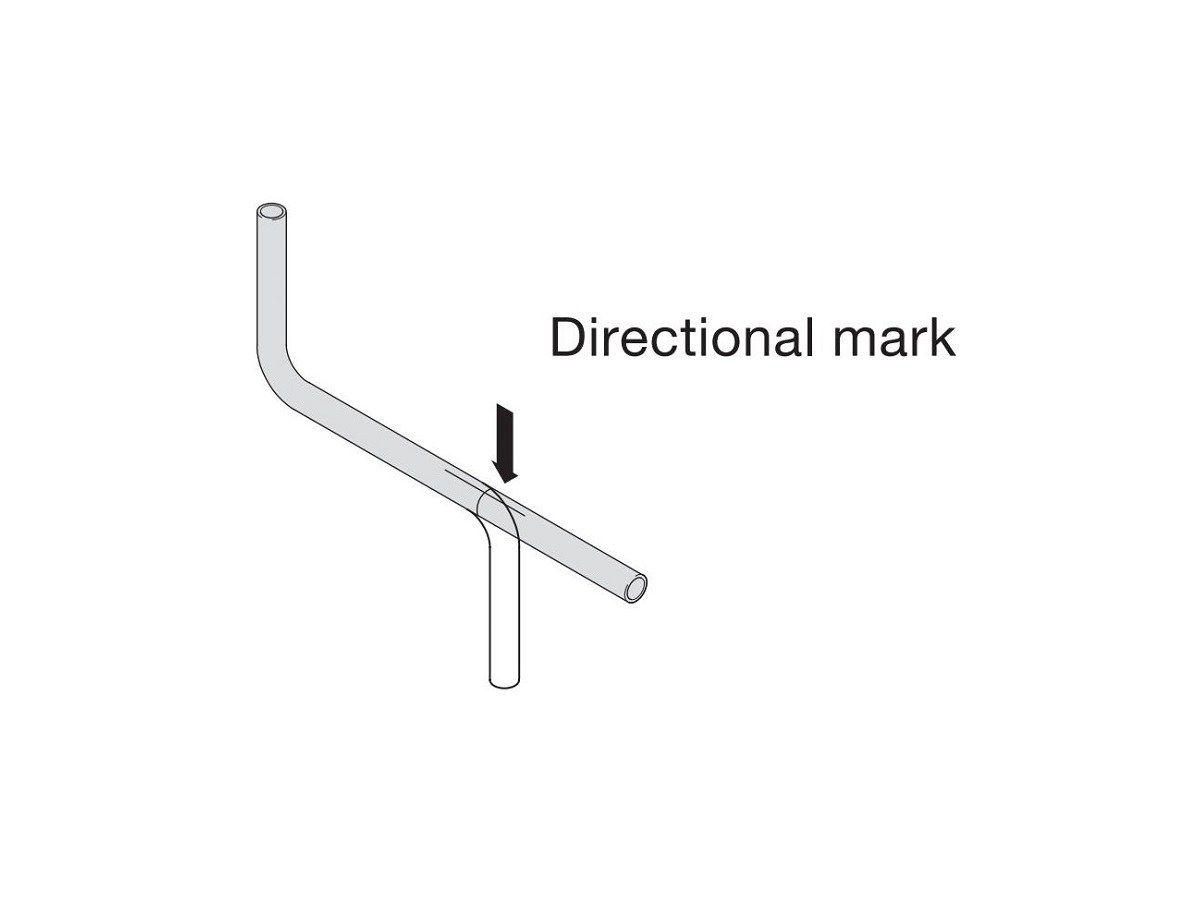
- Measure 4 in from the vertex of the 90° bend and mark for the 45° bend.
- Add a directional mark to indicate the outside of the 45° bend.
- Bend to 45°.
3.0Using the Bender and Making Bends
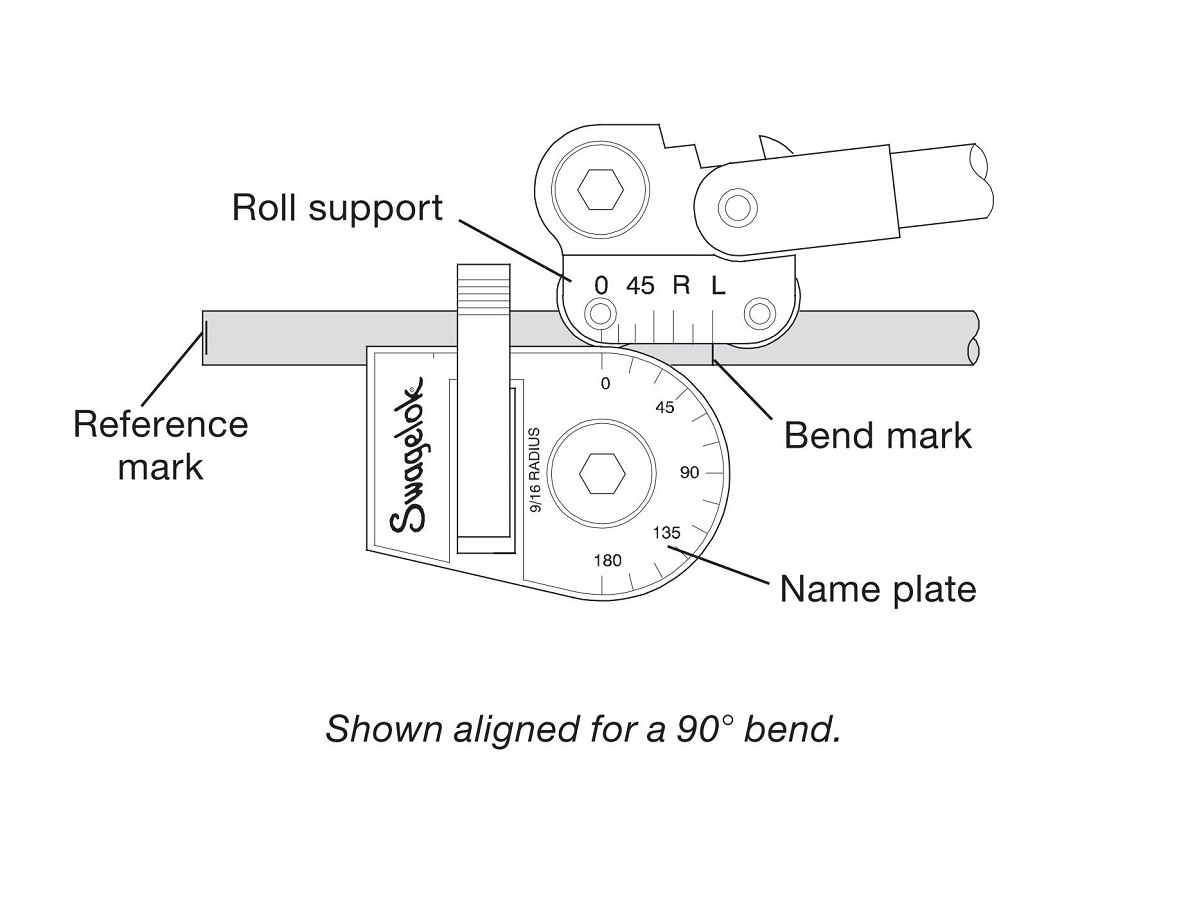
3.1For Bends ≤ 90°
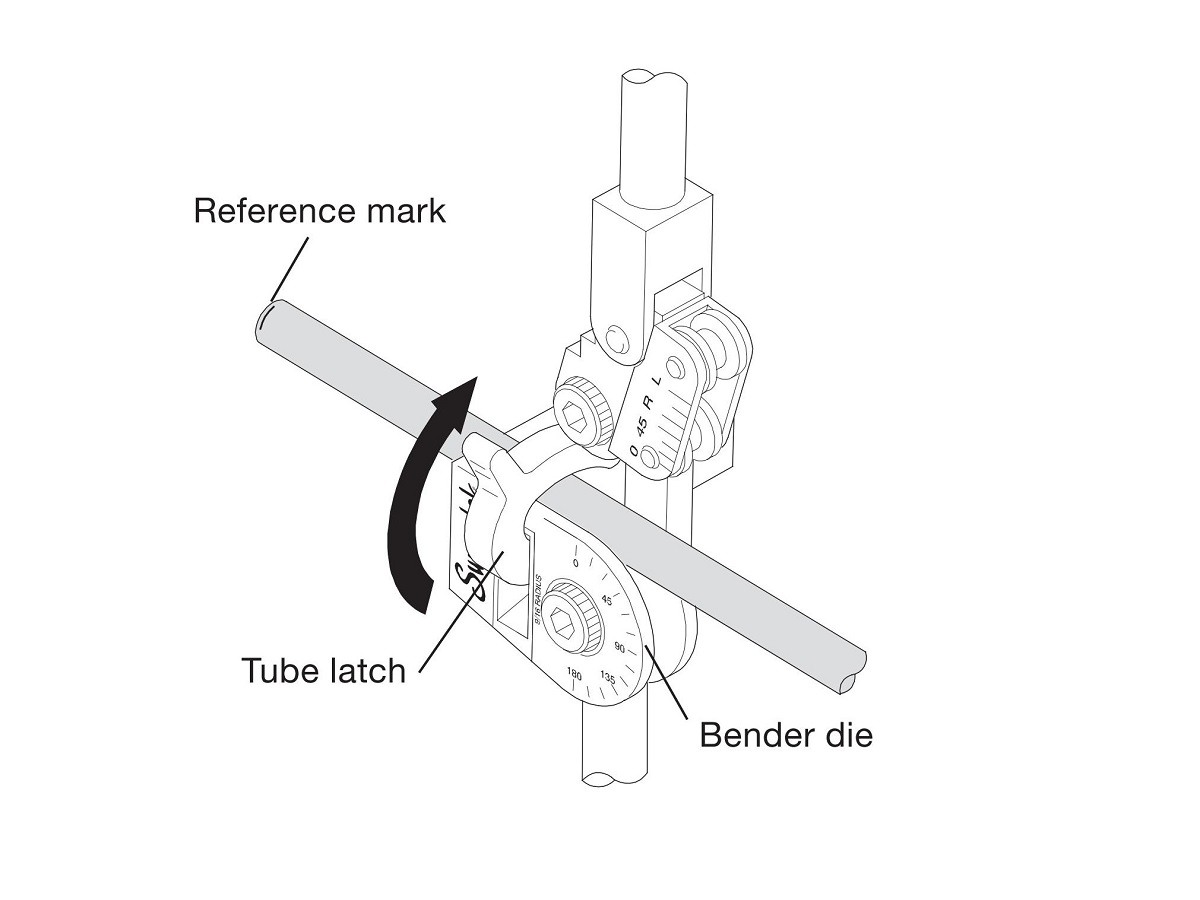
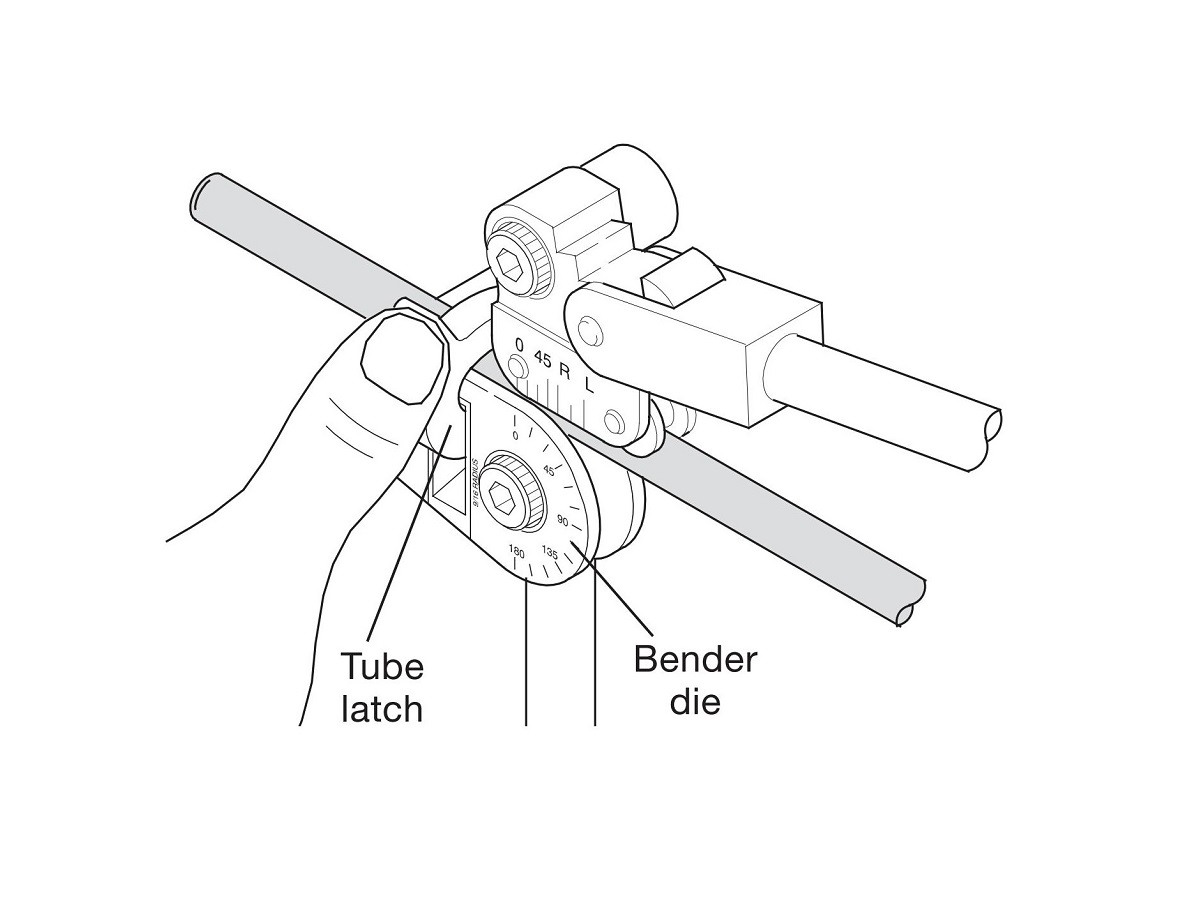
- Align tube with the reference mark to the left of the tube latch.
- Secure the tube gently with the latch.
- Lower the short handle until the roll dies contact the tube.
- Keep the link straight and parallel to the long handle.
- Align the 0° on the roll support with the target angle on the name plate.
- Push the short handle down to bend.
- Release and remove the tube.
3.2For Bends > 90°
- Push the Short Handle to 90°: Slowly push the short handle down until the 0 on the roll support reaches approximately 90° on the nameplate.
- Loosen the Short Handle: Loosen the short handle from the clevis until it can swing freely without moving the roll support.
- Swing the Short Handle Upward: Raise the short handle until it is slightly above perpendicular to the long handle.
- Retighten the Short Handle: Tighten the short handle again to enable continuous right-angle leverage for the remainder of the bend.
- Continue the Bend: Push the short handle until the 0 on the roll support aligns with the desired degree mark on the nameplate.
- Reset the Short Handle: Swing the short handle away until the 0 on the roll support returns to about 90°, then loosen, reposition it parallel to the long handle, and retighten.
- Lift the Short Handle: Move the short handle up and away from the tube.
- Remove the Tube: Pull the tube latch off and lift the tube out of the bender groove.

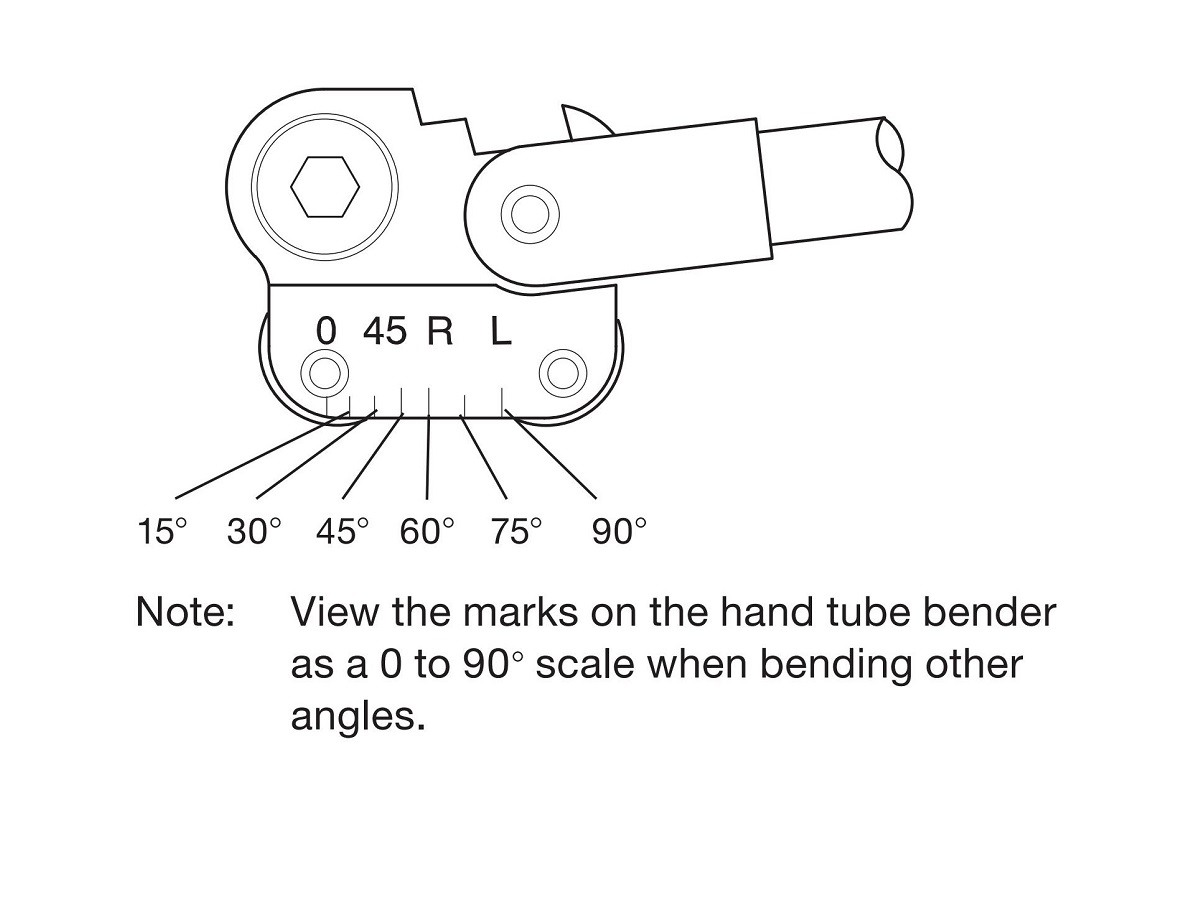
3.3Reverse Bends
- Align 90° bends with the “R” mark on the roll support.
- For other angles, use the scale between 0 and R as a guide.
4.0Compensating for Springback
- What is Springback?Tubes tend to “unbend” slightly after the force is released.
- Typical Compensation:Overbend by 1–3°, depending on the material and wall thickness.
- Tip:Use a protractor or template to verify final angles.
5.0Troubleshooting Common Issues
| Issue | Cause | Solution |
| Wrinkled bend | Bend radius too small | Use a larger radius or thicker tube |
| Flattened bend | Wrong bender size | Match tube OD to correct bender |
| Kinked bend | Excessive latch pressure | Reduce force on softer tubing |
| Scoring or marks | Damaged or dirty bender parts | Clean or replace components |
References:
https://www.superlokworld.com/blog/how-to-bend-stainless-tubing
https://tameson.com/pages/pipe-bender-manual