- 1.0Choosing the Right Tool for Cutting Rebar
- 2.0How to Use a Manual Rebar Cutter (Emergency / Small-Diameter Applications)
- 3.0How to Use a Cutoff Saw (On-Site Standard Method)
- 4.0How to Use a Rebar Cutting Machine (Batch Processing)
- 5.0How to Use a Metal Bandsaw (Precision / Batch Stacking)
- 6.0Safety First: Essential Operating Guidelines
- 7.0Troubleshooting: Common Issues and Solutions
- 8.0Conclusion
- 9.0FAQ: Common Questions About Rebar Cutting
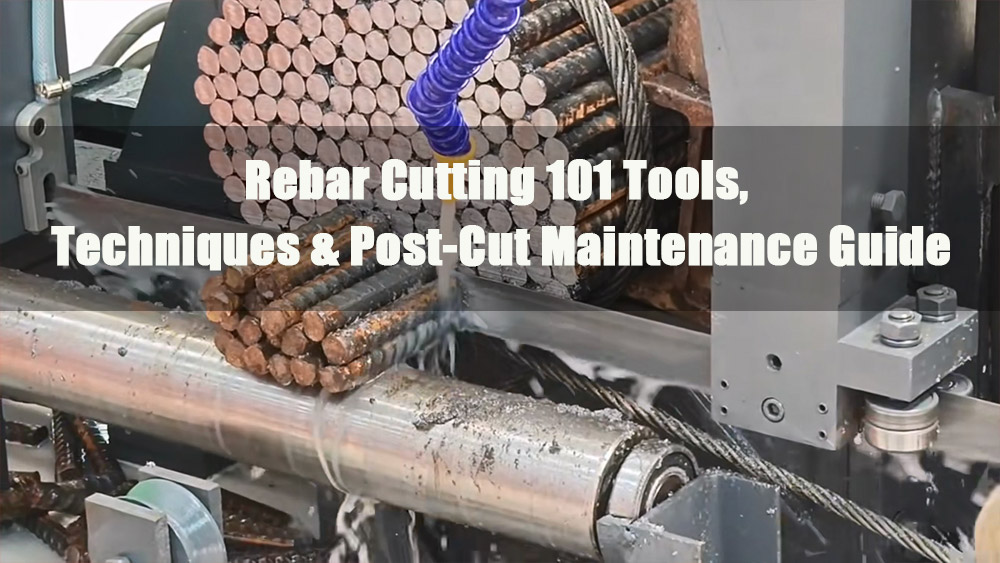
Cutting rebar is a fundamental process in construction, machinery manufacturing, and other industries. The key is to select the right tool based on rebar diameter, production volume, precision requirements, and jobsite conditions—while following proper procedures to ensure cutting efficiency, cut quality, and operator safety.
1.0Choosing the Right Tool for Cutting Rebar
Different tools vary greatly in efficiency and application. Selecting the correct one for your needs is critical to avoid low productivity or poor-quality cuts.
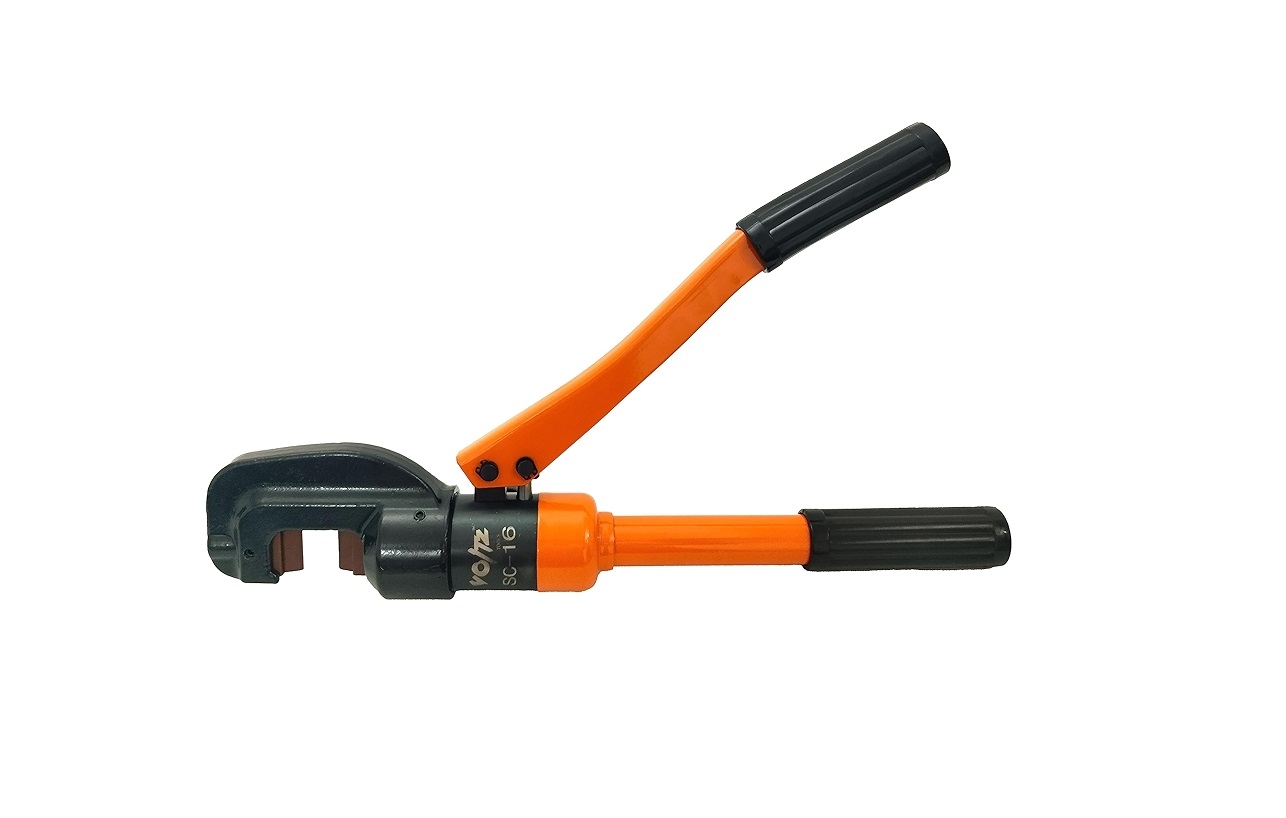
1.1Manual Rebar Cutting Tools (Emergency / Small-Diameter Applications)
- Core tools: Manual rebar cutter (jaw opening ≤ 18mm), heavy-duty bolt cutters
- Best for: Plain or deformed bars ≤ 16mm, single/occasional cuts, or emergency jobs without power
- Advantages: Portable, no power required, easy to operate
- Limitations: Labor-intensive, slow (30–60 seconds per cut), not suitable for large-diameter rebar
1.2Portable Electric Cutters (On-Site Flexibility)
- Core tools: Cutoff saw (with 350mm abrasive wheel), angle grinder (with 125mm cutting disc)
- Best for: Rebar ≤ 25mm, on-site length adjustments, or scattered processing tasks
- Advantages: Mobile, fast cutting (5–10 seconds per bar), low equipment cost
- Limitations: Rough edges (require post-cut grinding), high noise (100–120 dB), generates sparks and heat
1.3Rebar Cutting Machines (High-Volume Processing)
- Core tools: Tabletop or stand-mounted hydraulic rebar cutters (max capacity ≤ 60mm)
- Best for: Batch cutting (≥ 50 bars/hour), large-diameter or high-strength rebar (e.g., HRB400/HRB500), typical in rebar yards or precast plants
- Advantages: Extremely fast (1–2 seconds per bar), smooth cuts, high automation
- Limitations: Large and fixed (requires dedicated space), not suited for non-round rebar profiles
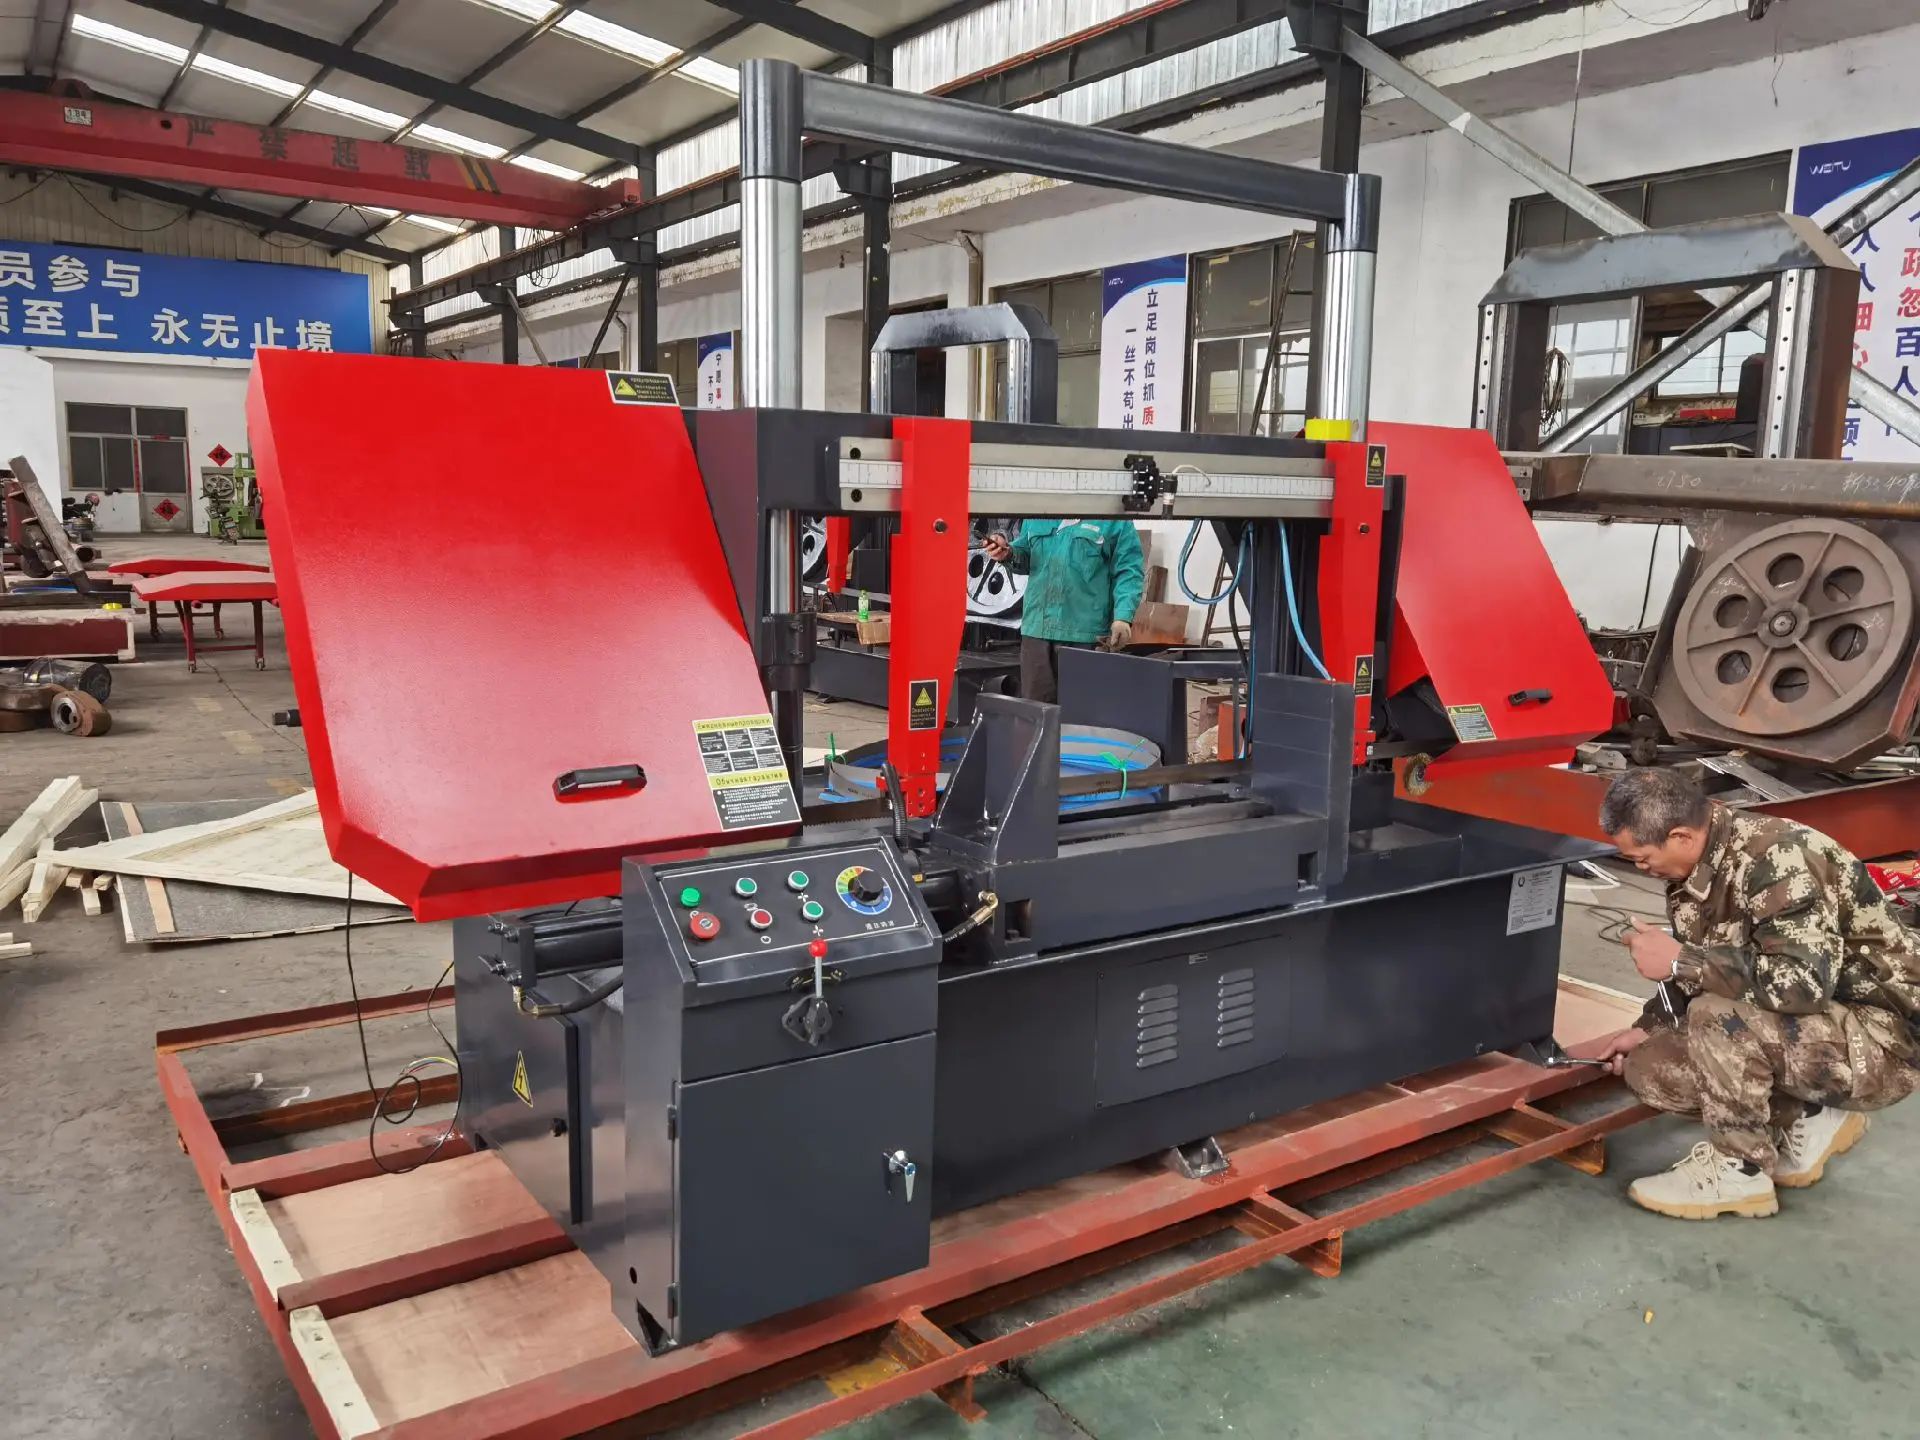
1.4Metal Bandsaws (Precision / Large-Diameter Applications)
- Core tools: Horizontal or vertical metal bandsaws (blade width: 27–41mm; tooth pitch: 3–6mm)
- Best for: Large-diameter rebar (≥ 30mm), alloy rebar, or tasks requiring high precision (perpendicularity error ≤ 0.1mm)
- Advantages: Low cutting stress (avoids rebar deformation), clean cuts (no post-processing needed), handles irregular cross-sections
- Limitations: Slow (15–30 seconds per cut), higher equipment cost, requires coolant, not ideal for quick on-site work
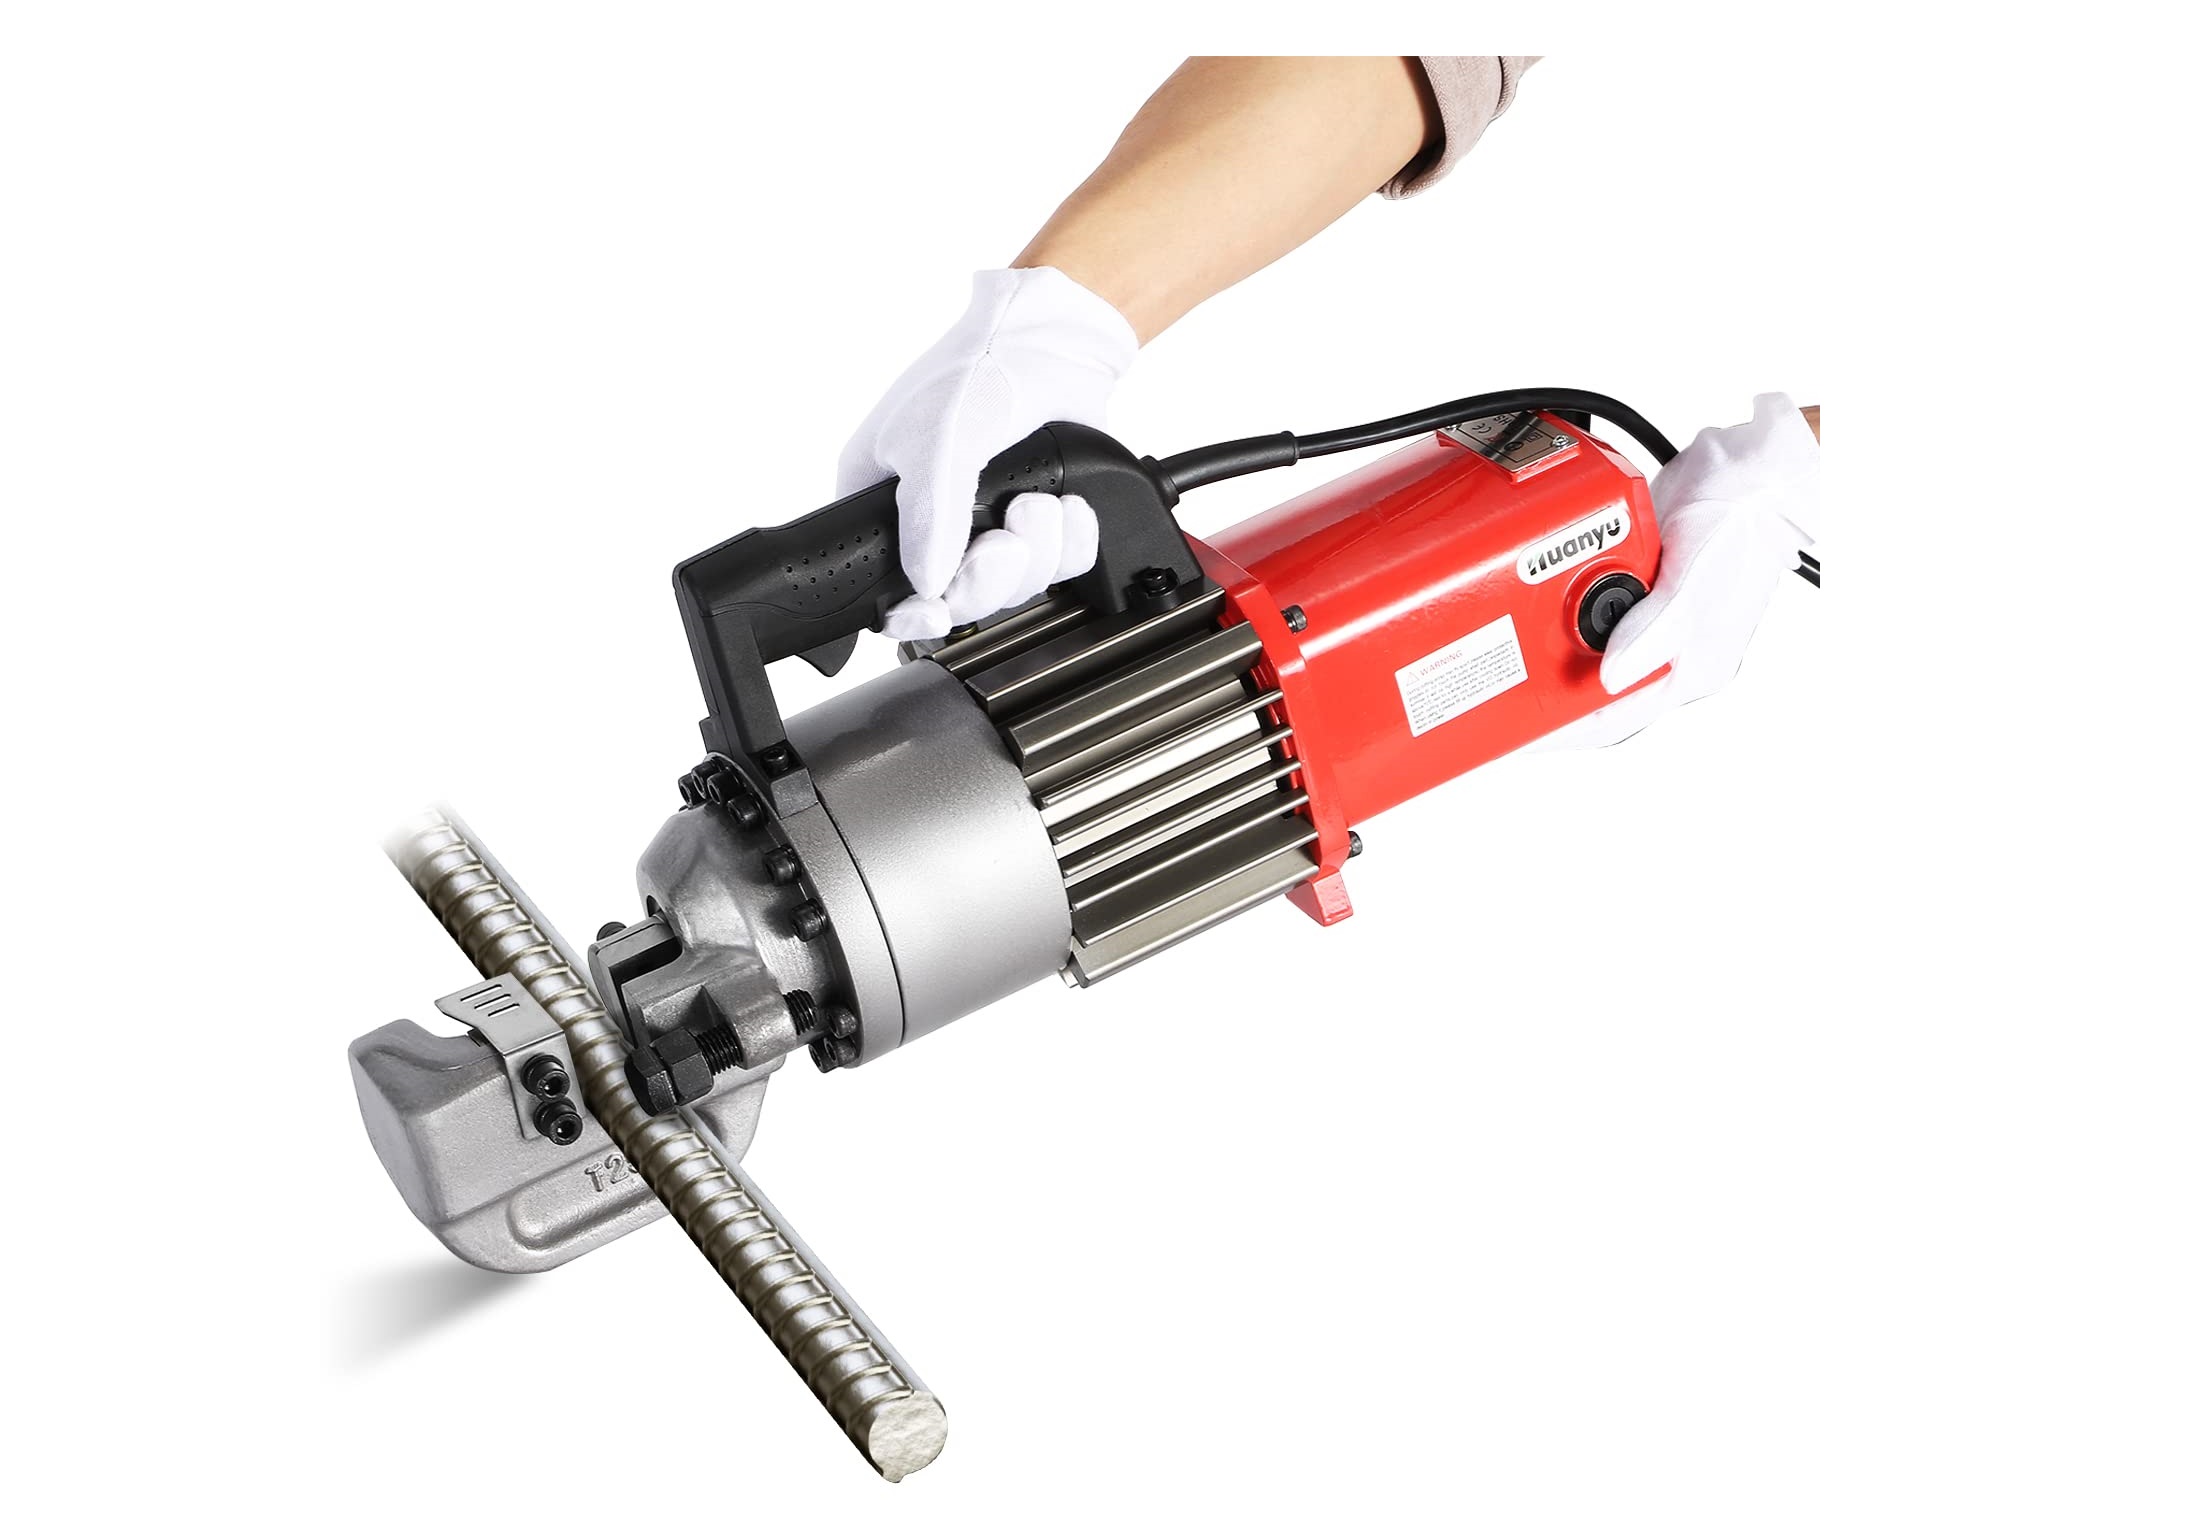
2.0How to Use a Manual Rebar Cutter (Emergency / Small-Diameter Applications)
Best for plain or deformed rebar up to 16mm in diameter—especially when no power is available.
2.1Preparation and Positioning
- Measure the rebar length and mark the cut line clearly with a marker.
- Place the rebar into the cutter’s jaws, aligning the marked line with the jaw blades. Ensure the rebar axis is perpendicular to the jaws to avoid angled cuts.
2.2Applying Force
- Grip both cutter handles firmly and apply steady, even pressure (avoid sudden, excessive force—this may bend the handles or cause the rebar to snap unpredictably).
- For thicker rebar (14–16mm), apply pressure in 2–3 stages: press slightly, pause briefly, then continue until the rebar breaks smoothly.
2.3Post-Cutting Steps
- Remove the cut rebar segment and clean burrs from the cut edge using a wire brush (prevents hand scratches during handling).
- Inspect the cutter jaws for wear, dullness, or chipping. Sharpen the blades with a grinding wheel if needed to maintain cutting efficiency.
3.0How to Use a Cutoff Saw (On-Site Standard Method)
Best for rebar up to 25mm in diameter—widely used for flexible on-site cutting.
3.1Pre-Check and Preparation
- Inspect the power cord for insulation damage; confirm the saw is properly grounded (to prevent electric shock).
- Check the abrasive wheel for cracks, chips, or wear; tighten the flange nut to 5–8 N·m to avoid eccentric rotation.
- Clear flammable materials (e.g., paint cans, acetylene cylinders) within 1.5m of the work area; set up a V-clamp to secure the rebar.
3.2Securing and Marking
- Place the rebar into the V-clamp, adjusting its position so the cut line aligns with the abrasive wheel’s path.
- Tighten the clamp until the rebar cannot shift horizontally (prevents cut deviation during operation).
3.3Starting the Cut
- Hold the saw’s main handle (for power control) and auxiliary handle (for stability) firmly. Switch on the saw and wait for the wheel to reach full speed (≈ 2800 r/min, 3 seconds of idle time to confirm stability).
- Feed the wheel into the rebar at a steady rate (5–8 mm/s); do not force the saw (avoids wheel overheating or breakage).
- Slow the feed rate when the cut reaches 1/5 of the rebar diameter (prevents the rebar from snapping abruptly). Stop immediately if sparks appear abnormal (e.g., sudden brightening or uneven distribution).
3.4Post-Cutting Cleanup
- Switch off the power and wait for the abrasive wheel to stop completely (≈ 10 seconds) before touching the rebar.
- Deburr the cut edge with a file or wire brush; collect metal chips from the work area (prevents slips). Inspect the wheel—replace it if wear exceeds 1/3 of its original thickness.
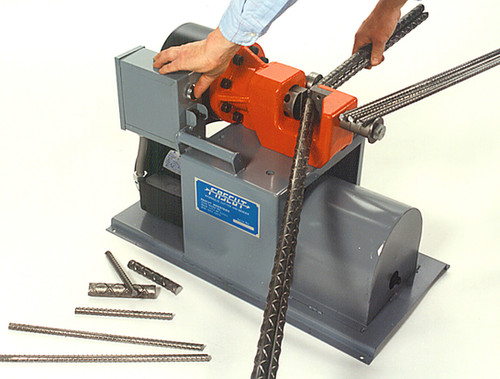
4.0How to Use a Rebar Cutting Machine (Batch Processing)
Best for plain or high-strength rebar (e.g., HRB400/HRB500) with diameters ≥ 20mm—ideal for high-volume tasks.
4.1Machine Setup
- Check the hydraulic oil level (must reach 2/3 of the tank’s scale) and temperature (≤ 45°C; low oil or high temperature reduces cutting pressure).
- Run a no-load test: activate the machine to complete 2 full blade cycles, ensuring smooth motion without jamming or unusual noise.
- Calibrate the stop gauge using a standard-length rebar sample (error ± 0.5mm) to ensure consistent cut lengths.
- Adjust the blade stroke: set the maximum downward distance to (rebar diameter + 2mm) to avoid excessive blade wear.
4.2Batch Cutting
- Feed the rebar into the machine until it touches the stop gauge. If the rebar is bent (deflection > L/500, where L = rebar length), straighten it first to ensure perpendicularity with the blade.
- Press the foot switch to activate the blade; the blade will automatically return to its original position after cutting.
- Conduct quality checks: inspect 3 random rebars per 50 cuts for length accuracy (allowable error ± 1mm). Recalibrate the stop gauge if deviations occur.
- Collect finished rebars on a dedicated rack (avoids collision-induced deformation).
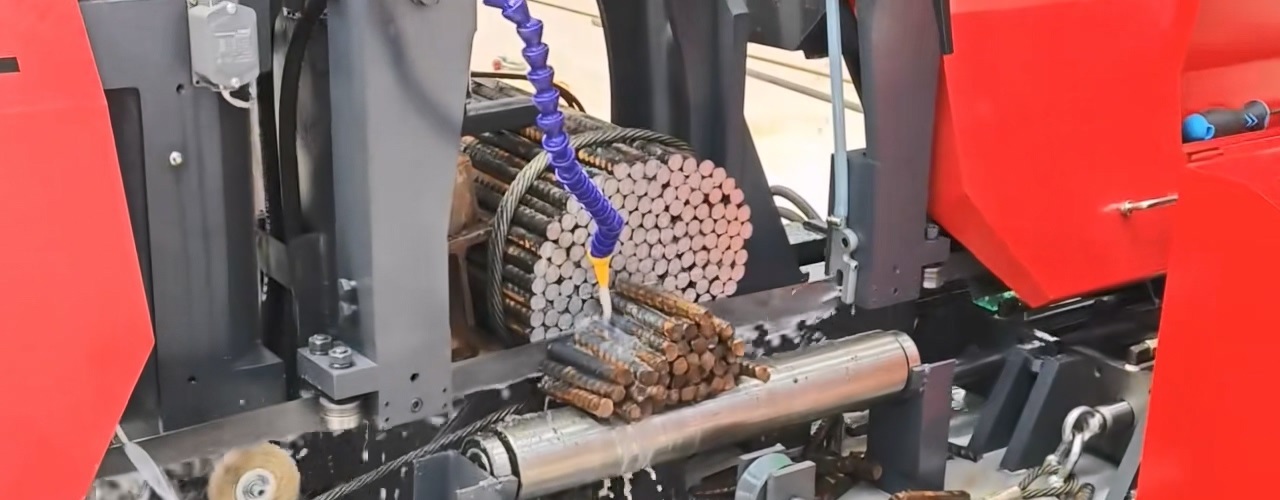
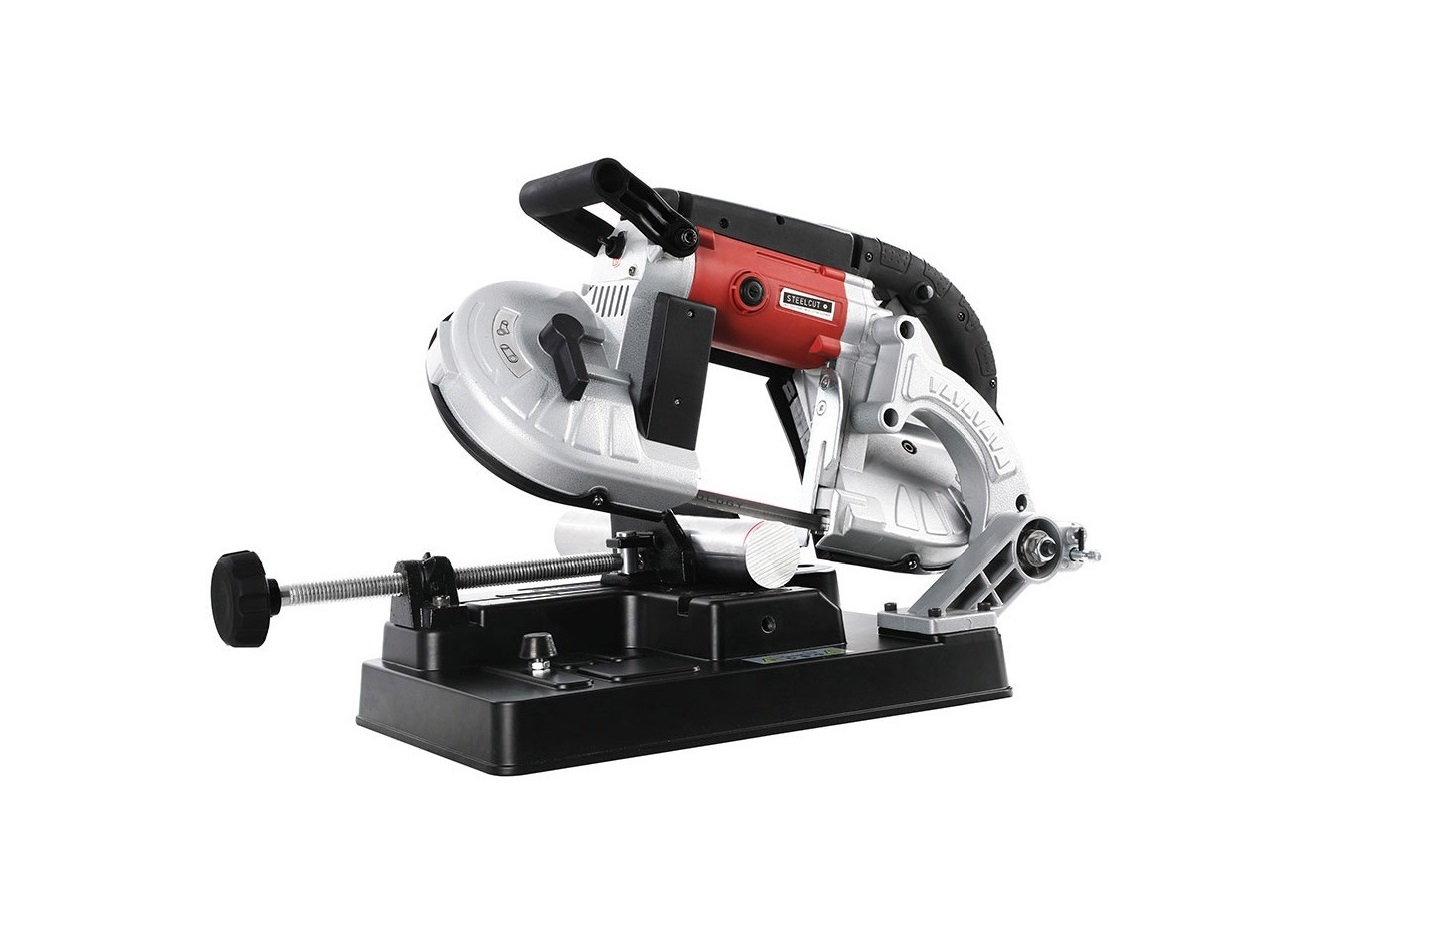
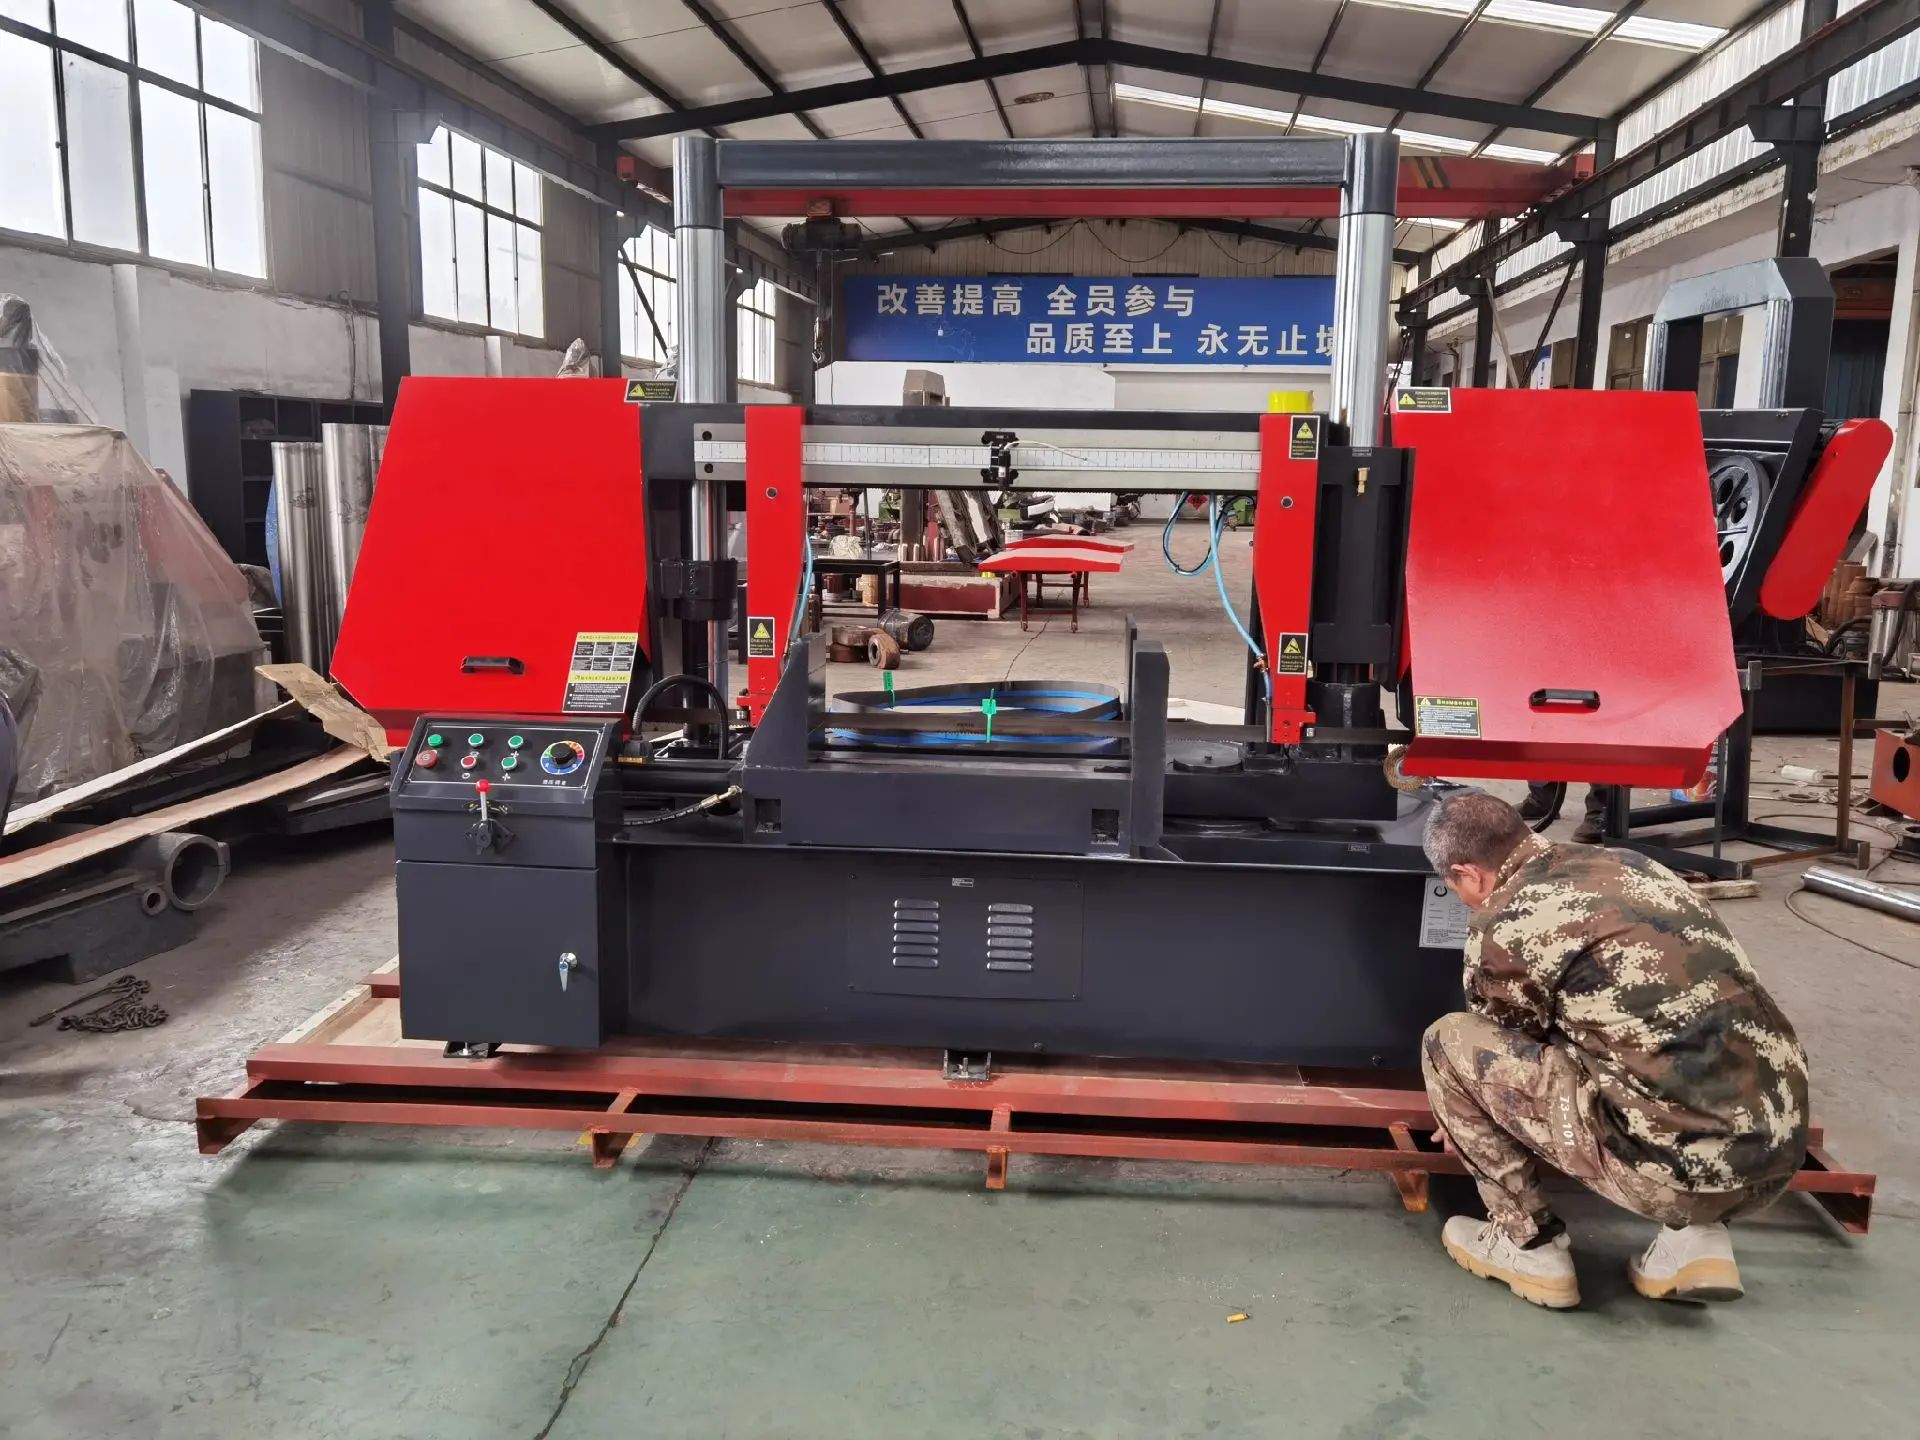
5.0How to Use a Metal Bandsaw (Precision / Batch Stacking)
Best for large-diameter (≥ 30mm) or alloy rebar—ideal for precision cuts or batch stacking operations.
5.1Machine Preparation
- Select the correct blade: High-Speed Steel (HSS) blades for standard rebar (Q235B); carbide-tipped blades (WC-Co ≥ 94%) for alloy rebar (HRB500E).
- Match the blade’s tooth pitch to the rebar size or stack height (e.g., 3mm pitch for Φ30–50mm rebars; 4.5mm pitch for Φ50–80mm rebars or stacks).
- Install a widened V-block (width ≥ 200mm) and side stops to secure stacked rebars (prevents lateral shifting).
5.2Parameter Adjustment
- Set the blade tension to 25–30 N/mm²; increase by 10–15% for stacked cutting (enhances blade rigidity to avoid deformation).
- Adjust the cutting speed: 6–10 m/min for standard rebar stacks; 4–6 m/min for alloy rebar (reduces cutting load and blade wear).
- Optimize the coolant system: increase concentration to 10–12% and flow rate to ≥ 8 L/min; add a 分流 nozzle to ensure even coolant coverage on all cut edges (prevents overheating and material sticking).
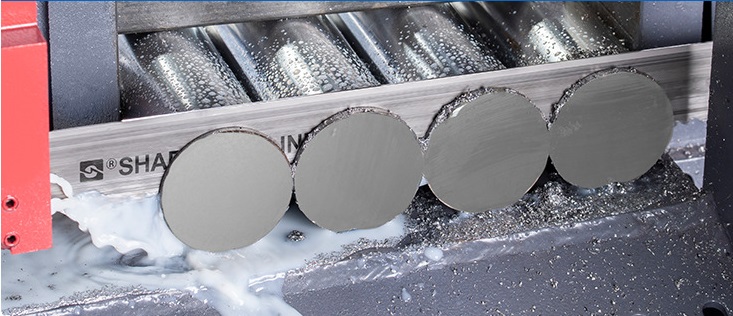
5.3Batch Cutting Procedure
- Stack rebars of the same diameter and material only (avoids uneven cutting force). Clamp the stack with an initial pressure of 5–8 MPa, check for alignment, then increase to 12–15 MPa (ensures no slippage).
- Install multi-point support rollers (spacing ≤ 1.5m) for rebars longer than 2m (prevents sagging and cut deviation).
- Perform a trial cut (5mm depth): stop the machine, check the cut’s perpendicularity (≤ 0.1°) and flatness (error ≤ 0.05mm). Adjust the clamp or blade tension if needed before starting batch cuts.
- Monitor the blade during operation: stop and grind minor chips with a fine grinding wheel; replace the blade if chipping depth exceeds 1mm.
5.4Final Steps
- Conduct random inspections: check 3 stack groups per batch (1 top and 1 bottom rebar per group) for length accuracy (± 1mm) and cut quality.
- Shut off the coolant system, release the clamp, and remove the cut rebars. Blow off coolant residue with a high-pressure air gun, deburr edges, and sort rebars by specification.
6.0Safety First: Essential Operating Guidelines
6.1Personal Protective Equipment (PPE)
- Always wearimpact-resistant safety goggles (protects against flying chips and sparks) and cut-resistant gloves (prevents scratches and vibration-related injuries).
- Useearplugs or earmuffs when noise exceeds 85 dB (e.g., cutoff saw or bandsaw operation).
- Tie back long hair and avoid loose clothing/jewelry (prevents entanglement with moving parts).
6.2Equipment Restrictions
- Do not use woodworking or masonry blades for rebar (insufficient hardness—prone to breakage and flying debris).
- Do not cut quenched rebar (e.g., prestressed rebar, hardness > HRC30) with hydraulic rebar cutters (risk of blade chipping or machine damage).
- Do not cut alloy rebar with a bandsaw without coolant (causes rapid blade overheating and failure).
6.3Emergency Procedures
- Blade breakage: Stop the machine immediately, move at least 5m away (avoids flying fragments), and clean up only after all moving parts have stopped.
- Electrical leakage: Shut off the main power supply, disconnect the cord with insulated tools, and test the grounding system (resistance ≤ 4Ω) before restarting.
- Hand cuts: Rinse the wound with physiological saline, disinfect with iodine, and seek medical attention for deep cuts (to receive a tetanus vaccine).
7.0Troubleshooting: Common Issues and Solutions
| Problem | Likely Cause | Solution |
| Cut not perpendicular (> 0.5°) | Loose clamping, misaligned blade, uneven feed | Re-clamp the rebar, calibrate blade alignment, use a speed controller for steady feeding |
| Blade/bandsaw wears too quickly | Wrong blade type, excessive speed, poor coolant | Replace with a rebar-specific blade, reduce speed, adjust coolant concentration/flow |
| Rebar deforms after cutting | Dull jaws, excessive cutting force | Sharpen jaws, reduce feed force, inspect rebar material for hardness inconsistencies |
| Bandsaw cutting stalls | Low blade tension, over-tight clamping, low hydraulic pressure | Increase blade tension, reduce clamp pressure, top up hydraulic oil and check pump pressure |
8.0Conclusion
The key to successful rebar cutting is tool-person-task compatibility + standardized procedures:
- Emergency small-diameter cuts → Manual rebar cutter
- Flexible on-site work → Cutoff saw
- High-volume processing → Rebar cutting machine
- Precision/large-diameter/alloy rebar → Metal bandsaw
Regardless of the tool, always perform pre-operation checks, monitor the process closely, and complete post-operation cleanup. Prioritize safety at all times to ensure efficiency, quality, and operator well-being.
9.0FAQ: Common Questions About Rebar Cutting
Q: How do I choose the right cutting tool for my rebar diameter?
A: Match the tool to the rebar size: Use manual cutters for ≤16mm (emergency/small batches); portable electric cutoff saws/angle grinders for ≤25mm (on-site work); hydraulic rebar cutting machines for ≥20mm (high-volume processing); and metal bandsaws for ≥30mm or alloy rebar (precision needs).
Q: What should I do if sparks look abnormal when using a cutoff saw?
A: Stop the machine immediately. Abnormal sparks (e.g., sudden brightening, uneven distribution) usually mean the abrasive wheel is misaligned, worn, or mismatched (e.g., using a woodworking wheel). Check the wheel for cracks, re-tighten the flange nut, and confirm you’re using a metal-specific abrasive wheel before restarting.
Q: Why does my metal bandsaw stall during cutting, and how to fix it?
A: Stalling typically stems from three issues: Low blade tension (increase to 25–32 N/mm², adjusted for stacked cuts); over-tight clamping (reduce pressure to 5–8 MPa for pre-clamping, then 12–15 MPa for cutting); or low hydraulic pressure (top up hydraulic oil and check the pump pressure).
Q: How can I ensure consistent cut lengths when using a rebar cutting machine for batch work?
A: First, calibrate the stop gauge with a standard-length sample (error ±0.5mm). During cutting, ensure each rebar is fully pressed against the stop gauge (no gaps). Every 50 cuts, randomly inspect 3 rebars for length accuracy (allowable error ±1mm)—recalibrate the stop gauge if deviations occur.
Q: Can I cut quenched rebar (e.g., prestressed rebar) with a hydraulic rebar cutter?
A: No. Quenched rebar has high hardness (>HRC30), which will chip the cutter’s blade or damage the hydraulic system. Use a metal bandsaw with a carbide-tipped blade (WC-Co ≥94%) and sufficient coolant for quenched/alloy rebar instead.