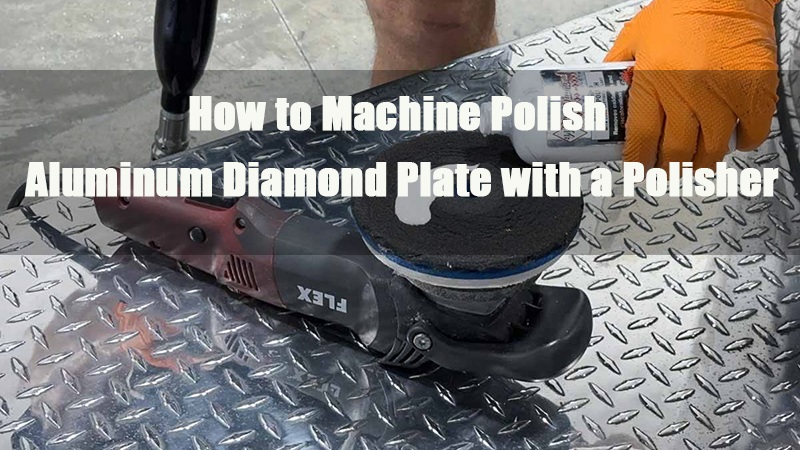
- 1.0Comment polir une plaque diamantée en aluminium à l'aide d'une boule de polissage pour perceuse
- 2.0Comment polir une plaque diamantée en aluminium avec une bille de polissage en tissu
- 3.0Comment protéger une plaque diamantée en aluminium avec un revêtement céramique
- 3.1Pourquoi utiliser un revêtement céramique ?
- 3.2Ce dont vous aurez besoin
- 3.3Comment appliquer un revêtement céramique sur une plaque diamantée en aluminium
- 3.4Étape 1 : Préparation de la surface
- 3.5Étape 2 : Appliquer le revêtement céramique
- 3.6Étape 3 : Temps de flash et polissage
- 3.7Étape 4 : Répétez l'opération sur l'ensemble du panneau
- 3.8Étape 5 : Durcissement et entretien (facultatif mais recommandé)
- 3.9À quoi s'attendre après le revêtement céramique
1.0Comment polir une plaque diamantée en aluminium à l'aide d'une boule de polissage pour perceuse
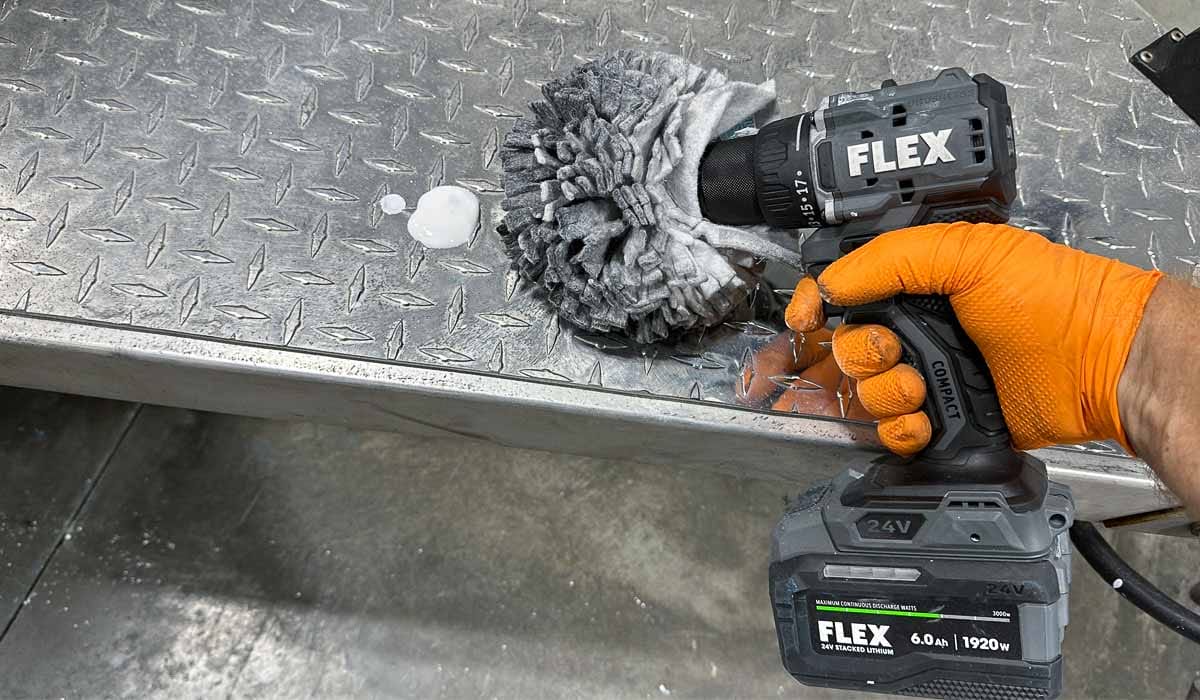
Si les polisseuses rotatives traditionnelles sont efficaces, un accessoire de polissage à billes pour métaux offre une méthode plus simple, plus flexible et très efficace pour polir les plaques de roulement en aluminium. Une simple perceuse domestique (avec ou sans fil) suffit, ce qui la rend idéale pour les espaces restreints, le bricolage, les petits travaux industriels ou les finitions soignées.
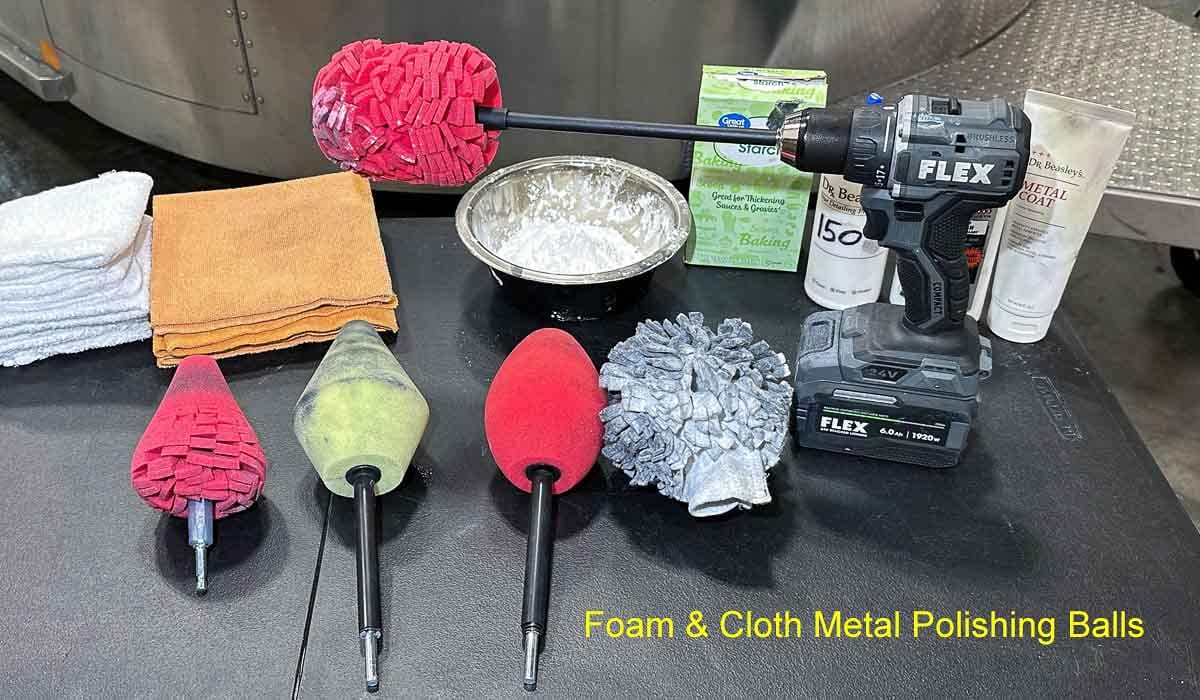
1.1Boules de polissage en mousse ou en tissu : laquelle utiliser ?
| Taper | Caractéristiques | Meilleure utilisation | Avantages et inconvénients |
| Boule de polissage en mousse | Doux et délicat pour les surfaces | Idéal pour un polissage léger ou un entretien de routine | Moins agressif, sans danger pour les finitions délicates |
| Boule de polissage en tissu | Plus abrasif, coupe plus rapidement | Idéal pour éliminer l'oxydation importante ou les rayures plus profondes | Résultats rapides, mais peut laisser de légères traces de tourbillon |
Conseil de pro : Commencez avec une boule de polissage en tissu pour la correction initiale, puis passez à la mousse pour la finition afin de restaurer une brillance semblable à un miroir.
1.2Ce dont vous aurez besoin :
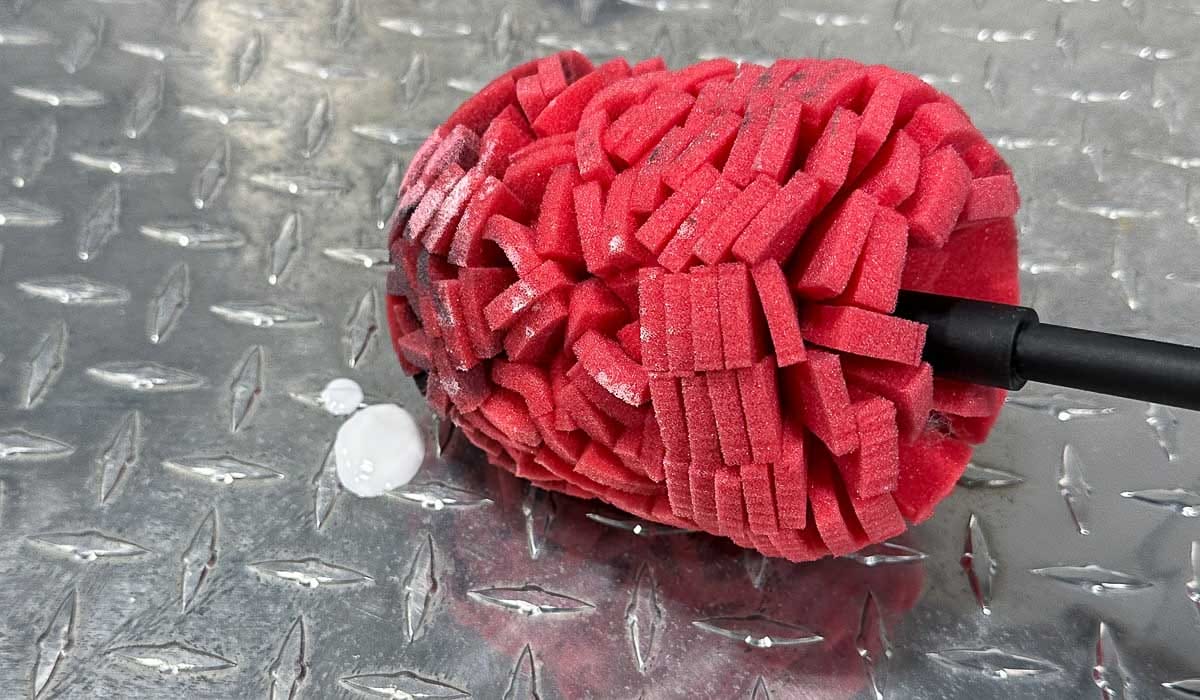
- Mousse ou tissu, boule de polissage en métal
- Perceuse électrique (par exemple, perceuse sans fil FLEX 24 V)
- Produit de polissage métallique spécifique à l'aluminium
- Gants en nitrile
- Serviette en microfibre ou tissu éponge
- Mastic ou protecteur pour métal (facultatif)
- Tampon applicateur en mousse ou en microfibre
- Rondelles de coton et fécule de maïs (pour le nettoyage des résidus)
1.3Comment utiliser une boule de polissage en mousse métallique
Étape 1 : Préparez la surface
Nettoyez soigneusement la plaque diamantée pour éliminer la saleté, la graisse ou la crasse. Séchez-la complètement avant de polir.
Étape 2 : Fixez la boule de polissage
Fixez fermement la bille de polissage en mousse dans le mandrin de votre perceuse. Assurez-vous qu'elle est centrée et stable.
Étape 3 : Appliquer le produit de polissage pour métal
- Appliquez une petite quantité de vernis sur la balle
- Ou polir par points directement sur la surface en aluminium
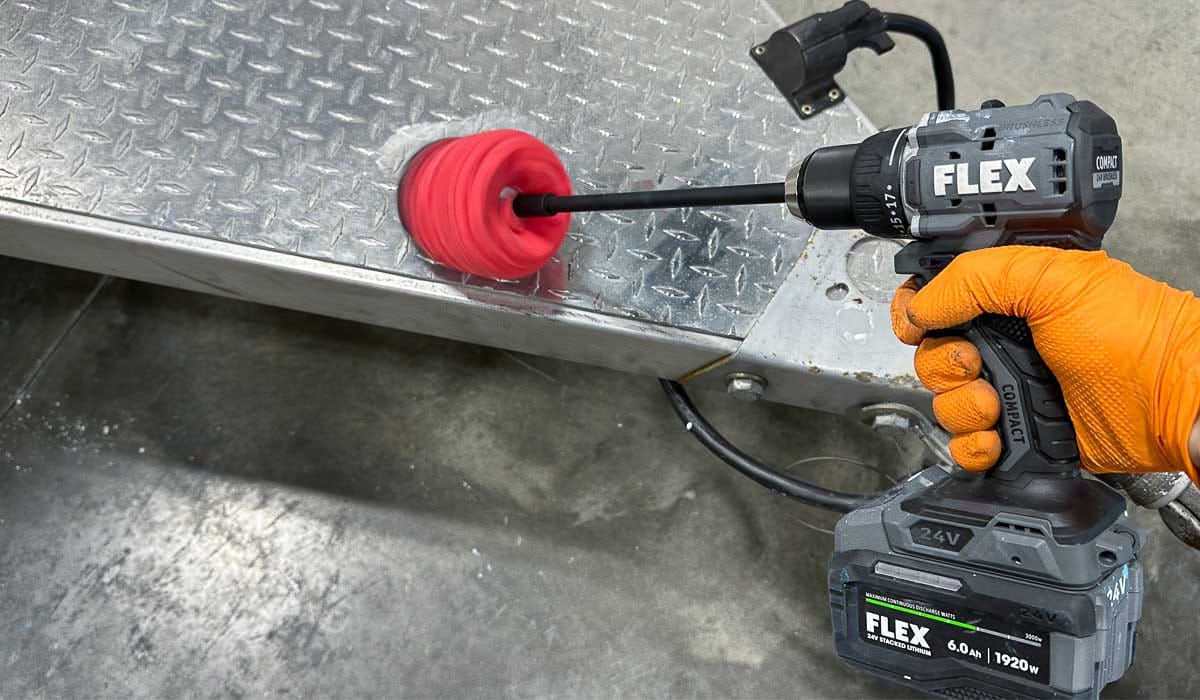
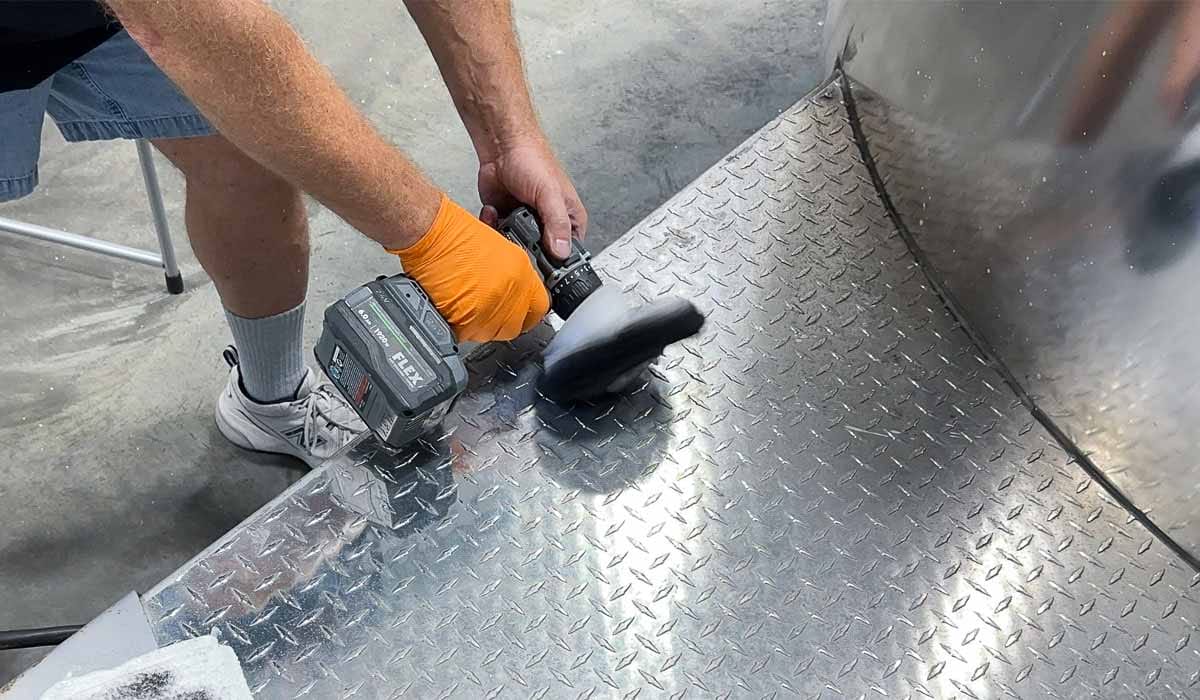
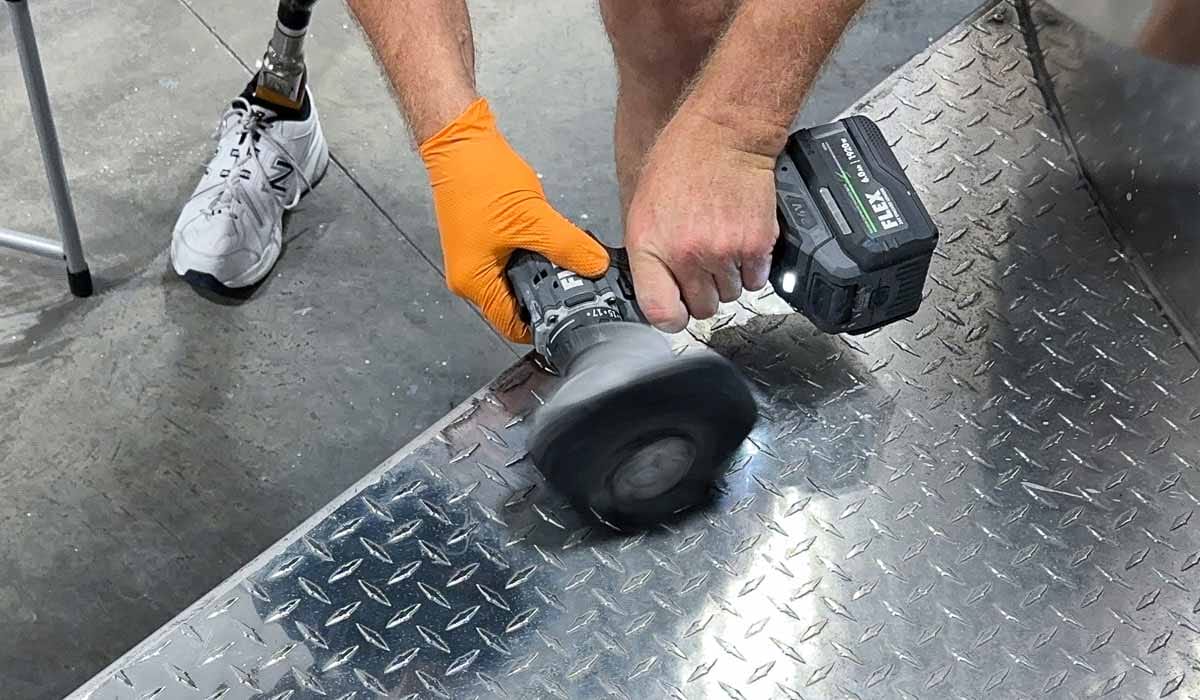
Étape 4 : Commencez lentement et répartissez uniformément
Commencez à basse vitesse pour répartir le vernis uniformément et minimiser les éclaboussures.
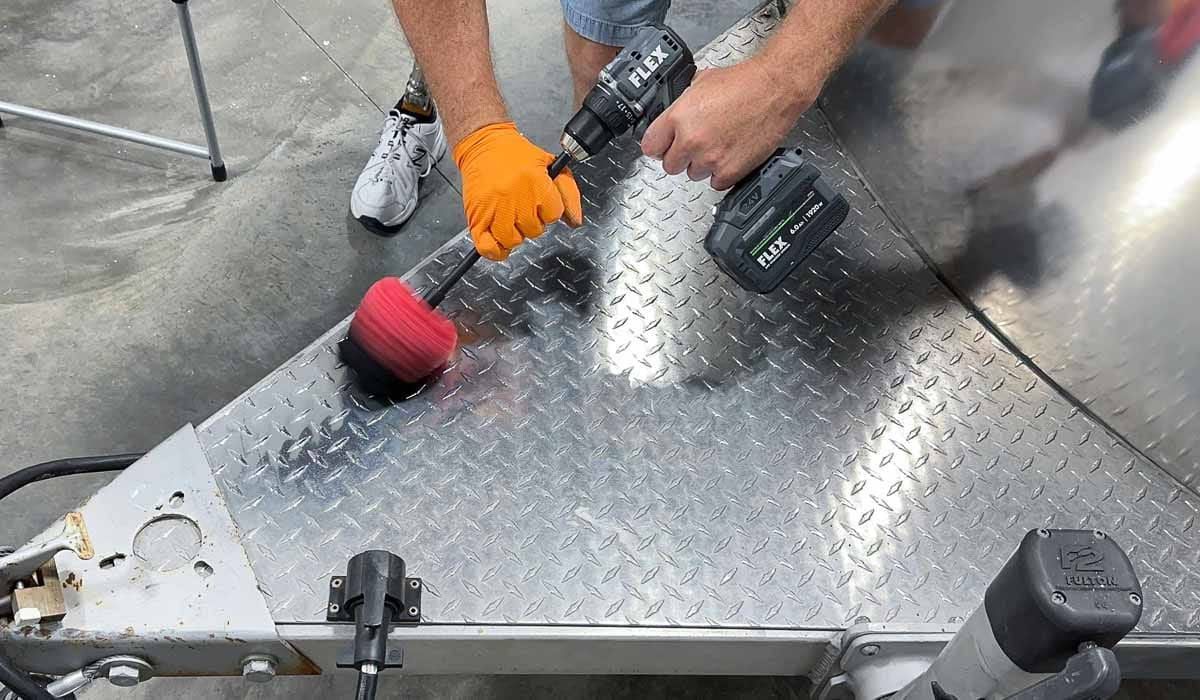
Étape 5 : Polissez doucement en exerçant une pression constante
Augmentez la vitesse à moyenne. Laissez la balle faire le travail : appuyez légèrement et déplacez-vous dans le sens de la texture du diamant.
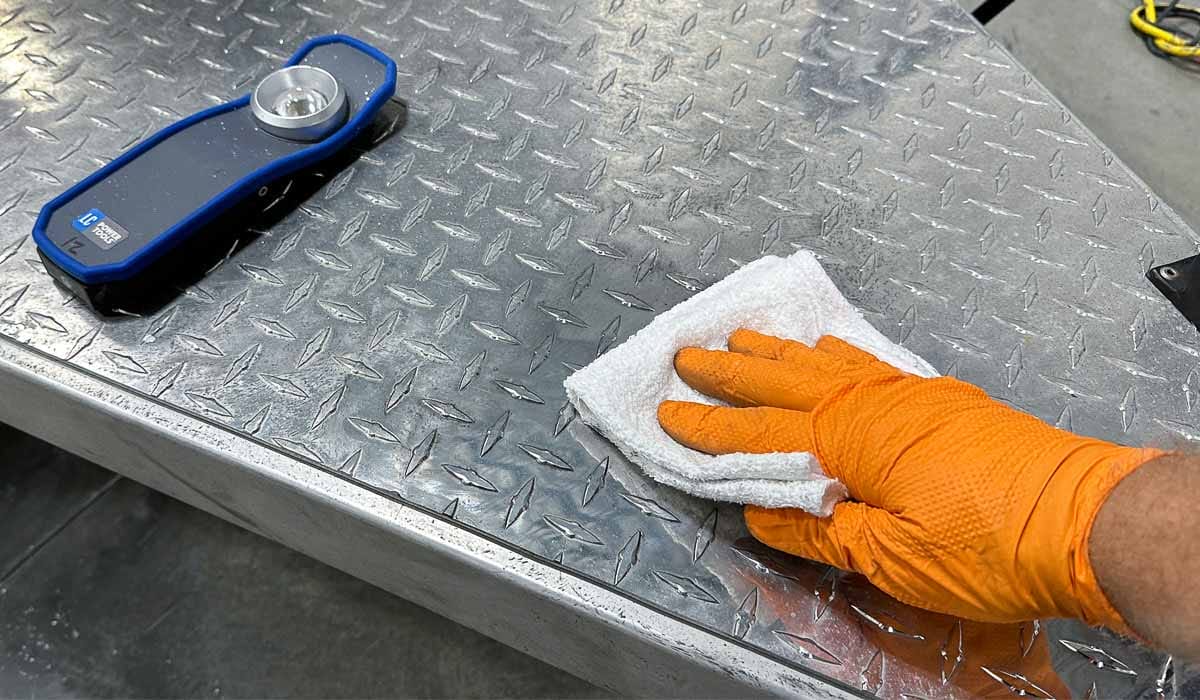
Étape 6 : Essuyez les résidus et inspectez
- Utilisez une serviette en microfibre pour enlever les restes de vernis
- La fécule de maïs peut aider à absorber tout résidu graisseux
- Pas satisfait ? Corrigez à nouveau la zone.
Étape 7 : Superposez au fur et à mesure
Pour passer à la section suivante, superposez légèrement la zone que vous venez de terminer. Cela garantit une brillance uniforme et homogène.
1.4Résultats réels : polissage à la boule de mousse ou à la main
L'utilisation d'une bille de polissage en mousse propulsée par perceuse améliore considérablement l'efficacité et la profondeur du polissage. Le mouvement rotatif pénètre profondément dans les rainures diamantées, éliminant ainsi facilement les tourbillons et les rayures incrustées.
Comparaison rapprochée :
Zone polie à la machine : Plus brillant, moins de défauts
Zone polie à la main : Brillant mais légèrement irrégulier sur les bords
Conseils de pro pour une finition impeccable
- N'appuyez pas trop fort : les billes de polissage fonctionnent mieux avec la vitesse et le contact de surface, pas avec la pression.
- Évitez la surchauffe : l’accumulation de chaleur peut provoquer une oxydation ou faire fondre la mousse
Scellez-le — utilisez un scellant métallique pour aider la brillance à durer plus longtemps
- Remplacez les billes usées : remplacez toutes les billes déformées ou sales pour éviter de rayer la surface
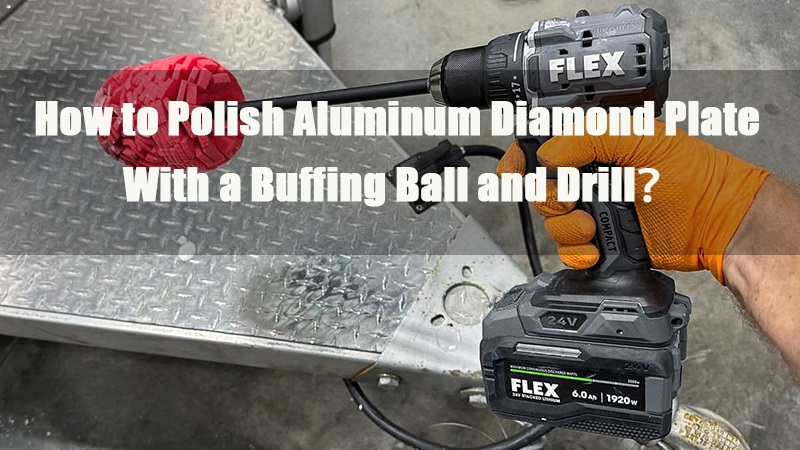
2.0Comment polir une plaque diamantée en aluminium avec une bille de polissage en tissu
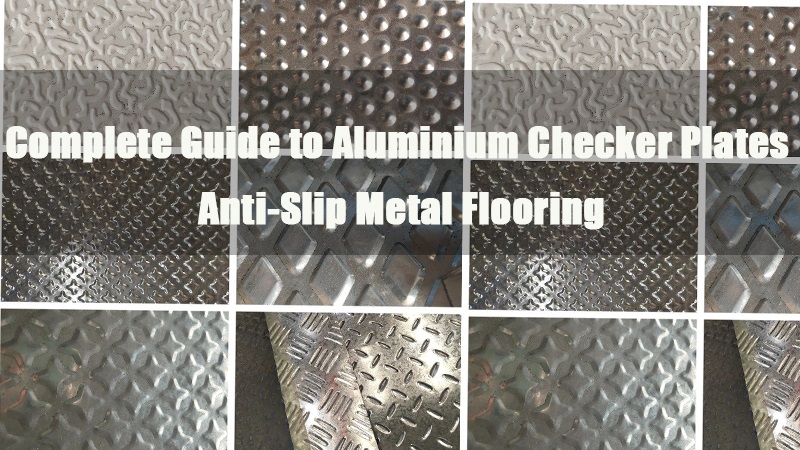
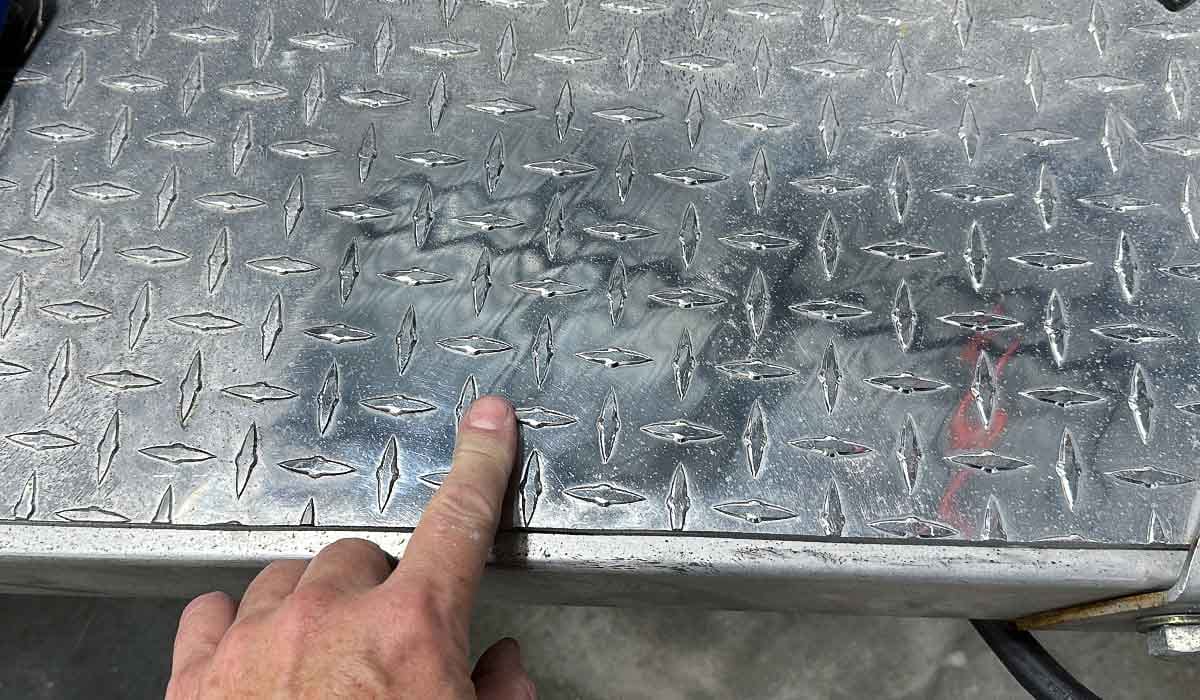
La plaque d'aluminium diamantée, aussi appelée plaque de roulement ou plaque striée, est largement utilisée pour les revêtements de sol, les plateformes de camions et les plateformes industrielles grâce à sa durabilité et à son motif antidérapant. Cependant, avec le temps, l'exposition à l'air et à l'humidité peut ternir son éclat. Utiliser une boule de polissage métallique en tissu avec une perceuse est un moyen rapide et efficace de restaurer son aspect miroir, en particulier sur les grandes surfaces ou les surfaces texturées.
2.1Ce dont vous aurez besoin :
- Boule de polissage en tissu (par exemple, Flitz 5″ Buff Ball)
- Perceuse électrique (avec ou sans fil)
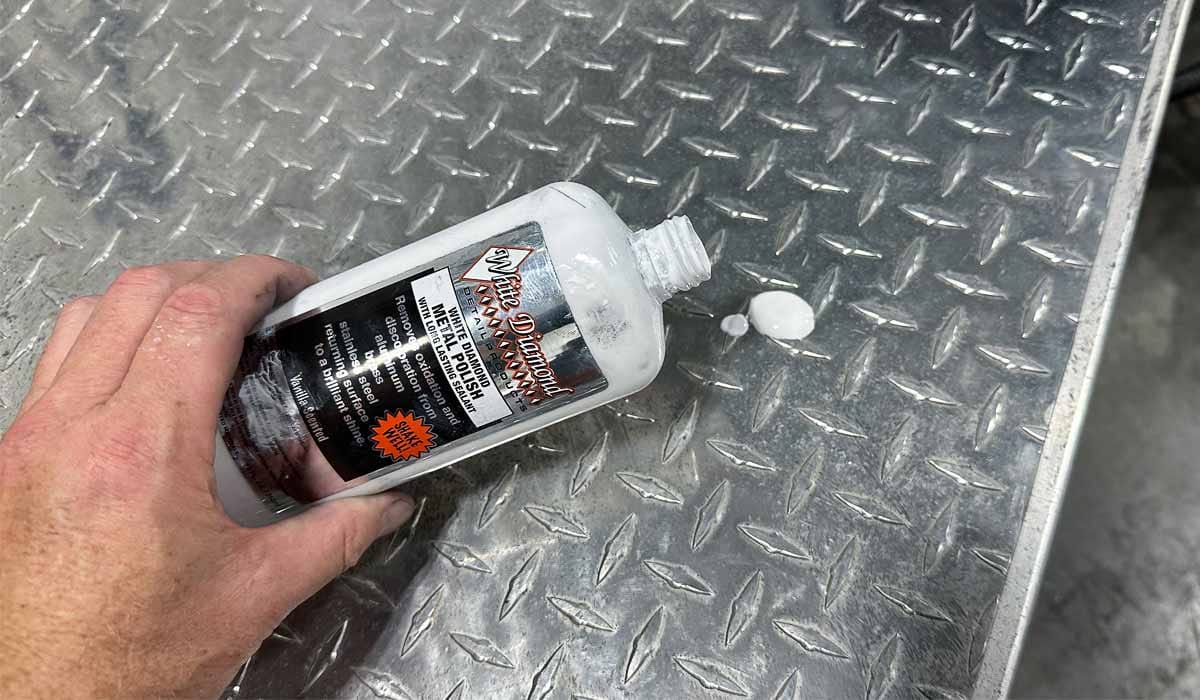
- Produit de polissage pour métaux (par exemple, White Diamond Metal Polish)
- Gants en nitrile (pour la protection des mains)
- Serviette en microfibre ou chiffon doux (pour le nettoyage des résidus)
- Mastic ou protecteur pour métal (facultatif)
- Tampon applicateur en mousse ou en microfibre (facultatif)
- Disques de coton et fécule de maïs (pour enlever les restes de vernis)
2.2Instructions étape par étape
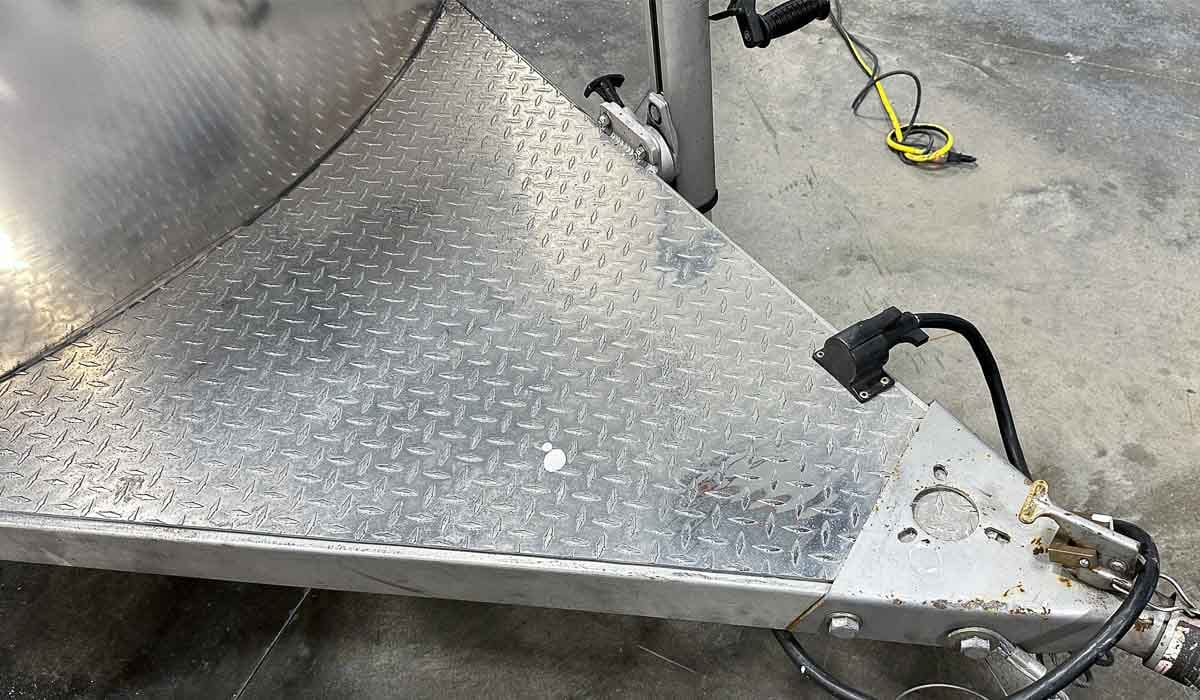
Étape 1 : Nettoyer la surface
Utilisez de l'eau tiède et un nettoyant au pH neutre pour éliminer la saleté et les impuretés. Essuyez. Assurez-vous que la surface est propre et exempte de débris pour éviter les rayures pendant le polissage.
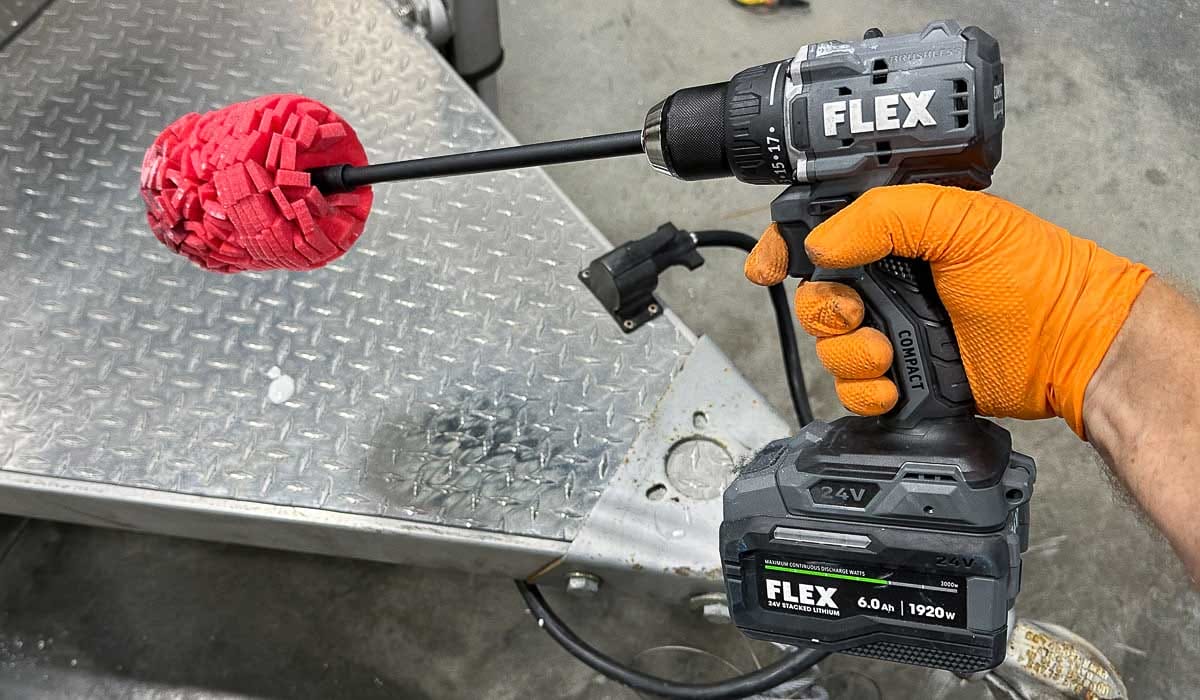
Étape 2 : Fixez la boule de polissage
Fixez fermement la bille de polissage en tissu dans le mandrin de votre perceuse. Vérifiez qu'elle tourne uniformément et qu'elle est bien centrée.
Étape 3 : Appliquer le produit de polissage pour métal
Vous pouvez soit :
- Appliquer une petite quantité de vernis directement sur la surface
- Ou appliquez du vernis sur la boule de polissage elle-même
Étape 4 : Commencez lentement, contrôlez la rotation
Appuyez doucement la bille sur l'aluminium et commencez à faible vitesse. Augmentez progressivement la vitesse de perçage pour répartir uniformément le vernis.
Étape 5 : Polissez soigneusement
Travaillez lentement sur la surface, en insistant sur les zones fortement oxydées. Passez environ 1 minute par section, en chevauchant légèrement les zones pour une brillance uniforme.
Étape 6 : modifiez les angles selon vos besoins
En raison de la texture en relief, polissez sous plusieurs angles pour garantir que les rainures et les crêtes sont entièrement traitées.
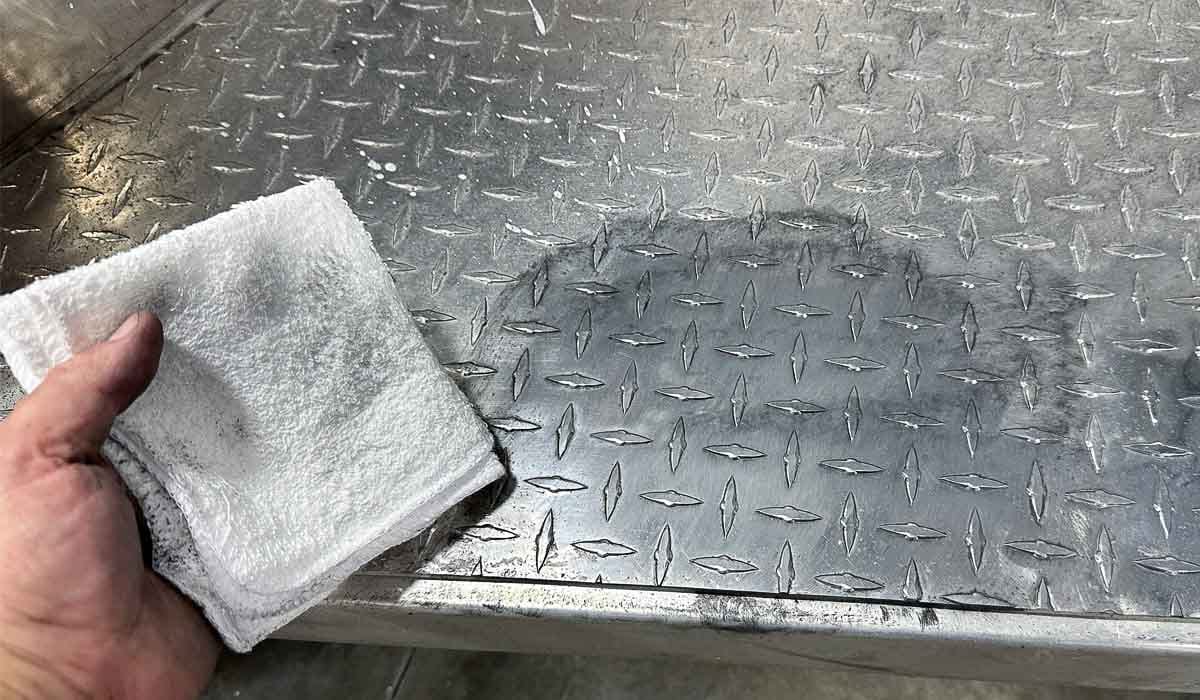
Étape 7 : Éliminer les résidus
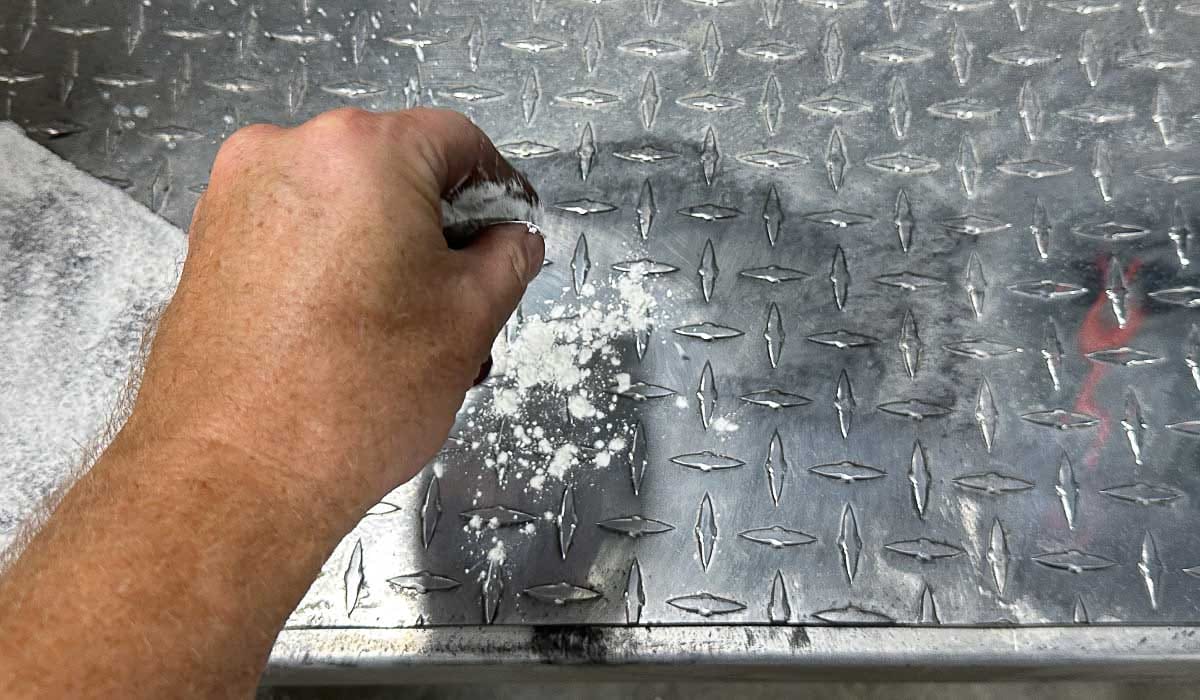
Saupoudrez une petite quantité de fécule de maïs sur le reste du vernis.
Essuyez avec un chiffon en coton ou une serviette en microfibre pour éliminer les résidus sans rayer.
Repolir légèrement si nécessaire pour plus de brillance.
Étape 8 : Inspectez votre travail
Vérifiez les résultats :
- Si la surface semble brillante et réfléchissante avec des rayures minimales, passez à la section suivante.
- Si l’oxydation persiste, réappliquez du vernis ou passez à un composé plus résistant.
2.3Démo : Polissage avec la Flitz Buff Ball
Lors de cette démonstration, une bille de polissage en tissu Flitz de 12,7 cm a été associée au produit de polissage pour métaux White Diamond afin de restaurer une plaque diamantée en aluminium fortement oxydée. Les étapes clés comprenaient :
Appliquer le vernis → Commencer lentement → Augmenter la vitesse → Polissage multi-angles → Fécule de maïs pour les résidus → Terminer avec une lingette en microfibre
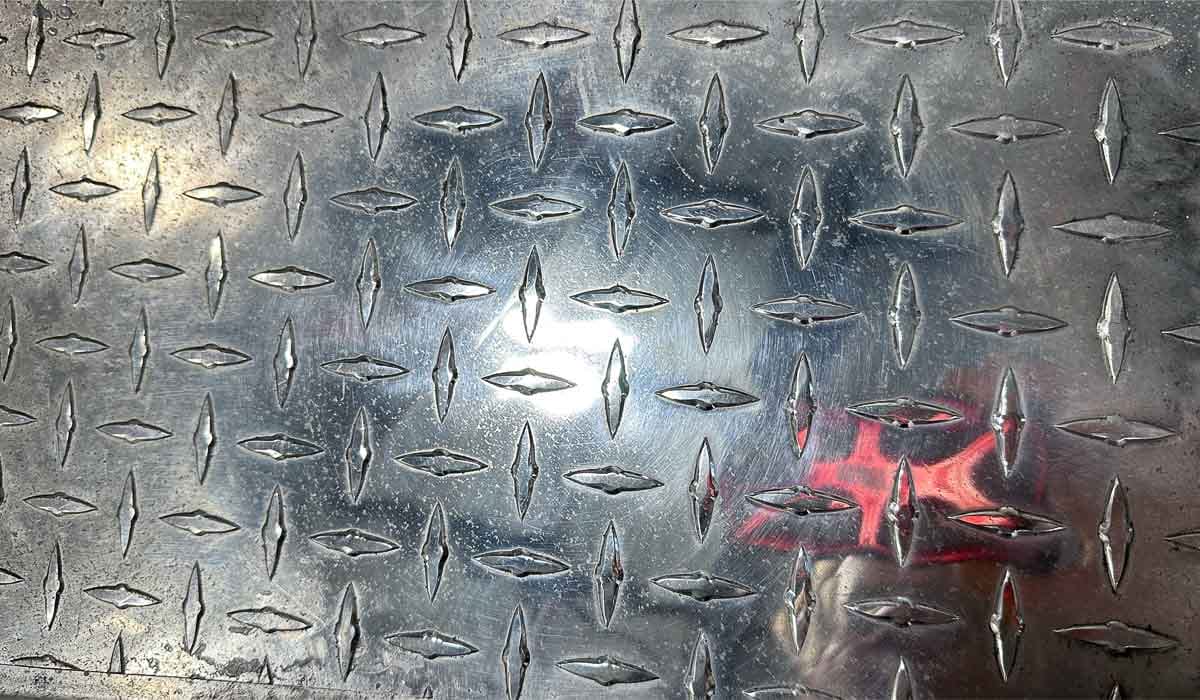
Résultat: Une clarté époustouflante. Le métal a retrouvé son éclat d'origine et, dans les zones plus lisses, les reflets étaient suffisamment nets pour reproduire le contour d'un sac d'appareil photo, presque chromé.
2.4Pourquoi utiliser une boule de polissage en tissu ?
| Avantage | Détails |
| Haute durabilité | Plus résistant à l'usure que la mousse, idéal pour les travaux plus longs |
| Puissance de coupe supérieure | Efficace pour éliminer l'oxydation profonde, même dans les rainures |
| Rentable | Réutilisable et compatible avec divers métaux |
| Compatible avec les perceuses | Pas besoin d'outils spéciaux, juste une perceuse standard |
Conseils de pro
- Ne surchargez pas le vernis : l'excès peut éclabousser
- Travaillez par sections pour des résultats cohérents
- Utilisez un produit d'étanchéité pour prolonger la brillance et éviter la réoxydation
- Portez des gants pour éviter le contact de la peau avec le vernis
- Évitez de polir à sec ou d'appuyer trop fort, car cela peut provoquer des dommages dus à la chaleur ou des rayures.
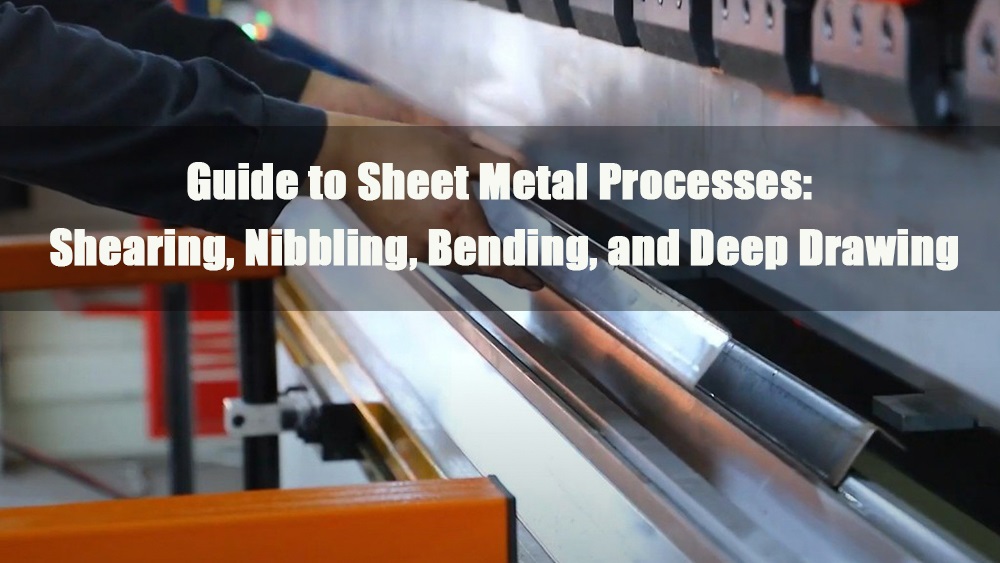
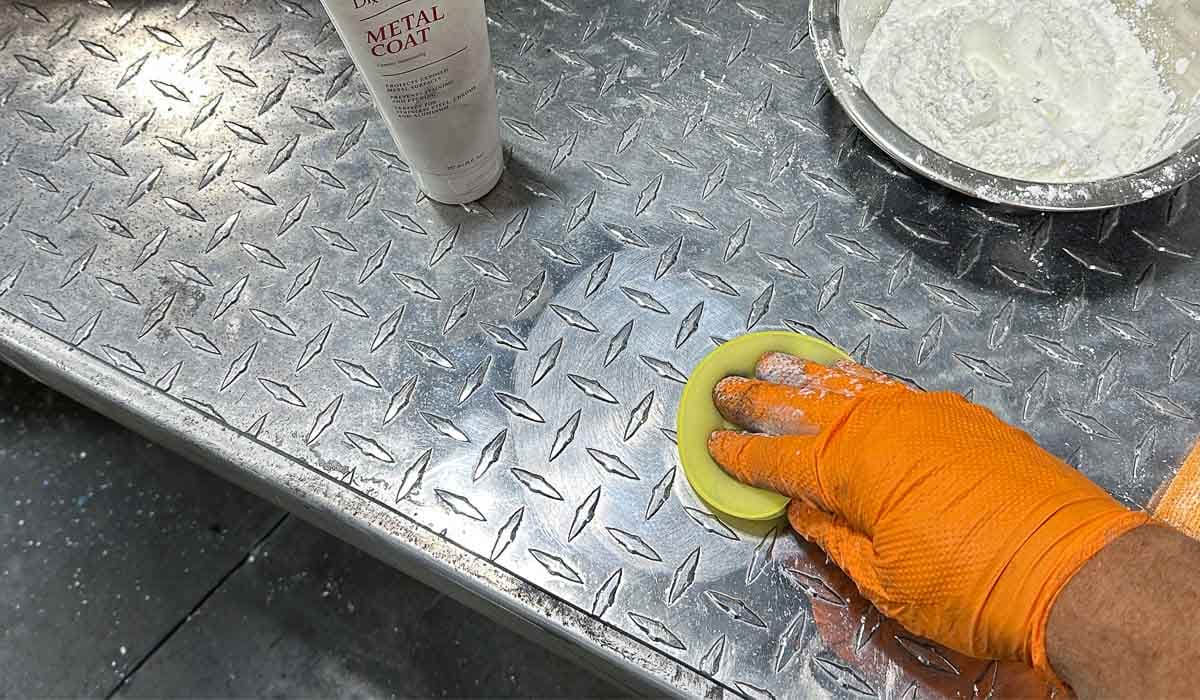
3.0Comment protéger une plaque diamantée en aluminium avec un revêtement céramique
Après avoir poli votre plaque diamantée en aluminium, l'application d'un revêtement céramique spécialement conçu pour le métal est la meilleure solution pour préserver son éclat. Ce revêtement forme un bouclier invisible sur la surface de l'aluminium, offrant imperméabilité, résistance aux UV et protection contre l'oxydation et les rayures, prolongeant ainsi la durée de vie et l'éclat de votre finition métallique.
3.1Pourquoi utiliser un revêtement céramique ?
| Fonctionnalité | Avantage |
| Protection chimique | Protège contre les taches d'eau, le sel et l'oxydation |
| Amélioration de la brillance | Renforce la brillance et améliore la clarté des surfaces polies |
| Entretien facile | Réduit l'adhérence de la saleté et de la graisse |
| Intervalles plus longs entre les polissages | Augmente la durabilité et la résistance aux rayures pour une protection prolongée |
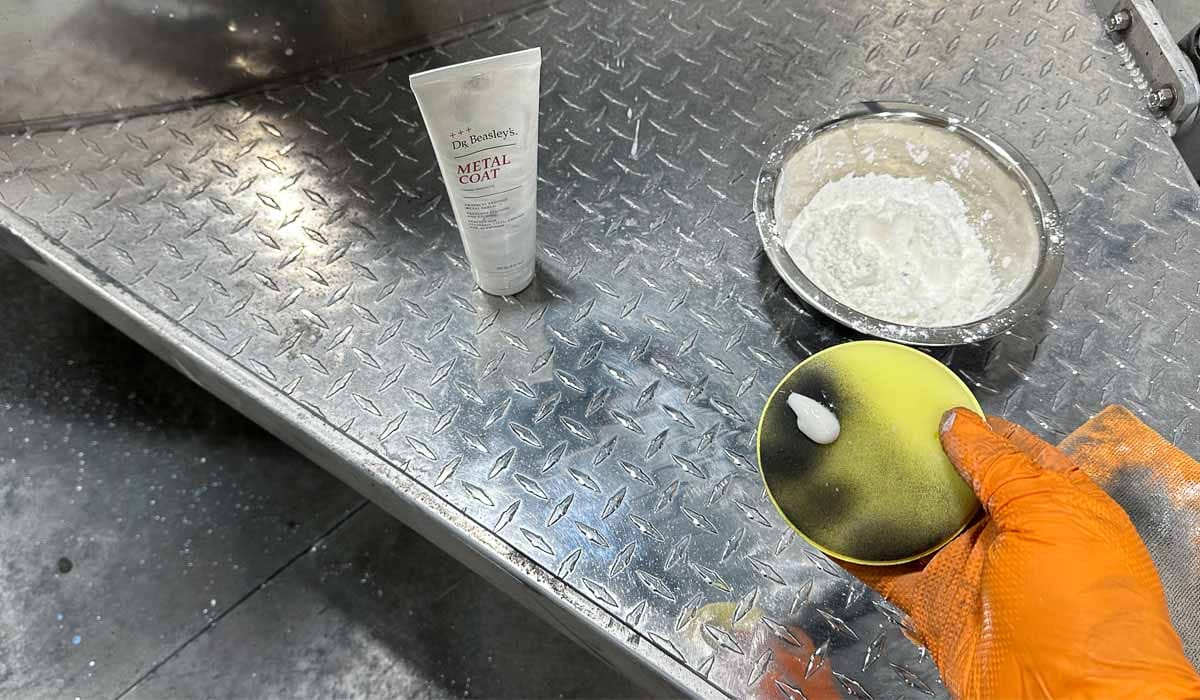
3.2Ce dont vous aurez besoin
- Revêtement céramique spécifique au métal
- Tampon applicateur en mousse ou en microfibre
- Serviettes en microfibre propres et sèches
- Nettoyant pour panneaux ou résidus (à base d'isopropyle)
- Gants en nitrile pour la protection des mains
3.3Comment appliquer un revêtement céramique sur une plaque diamantée en aluminium
3.4Étape 1 : Préparation de la surface
Avant d'appliquer le revêtement, il est essentiel d'éliminer les restes d'huiles de polissage, de cires ou de produits d'étanchéité, en particulier si vous avez utilisé un produit de polissage avec protection intégrée comme Diamant blanc.
Utilisez un service dédié essuyage du panneau ou de l'alcool isopropylique dilué.
Essuyez toute la surface en aluminium pour éliminer les huiles et neutraliser l’électricité statique.
Si un produit de polissage avec un produit d’étanchéité a été utilisé, soyez minutieux : tout résidu restant peut affecter la liaison.
3.5Étape 2 : Appliquer le revêtement céramique
- Utilisez un tampon applicateur en mousse ou en microfibre propre.
- Appliquez quelques gouttes de revêtement céramique sur le tampon.
- Travaillez en petites sections (pas plus grandes que 16″ x 16″).
- Appliquer en effectuant un léger mouvement de hachures croisées superposées.
- Massez le revêtement uniformément sur la surface pour remplir les micropores et les rainures texturées.
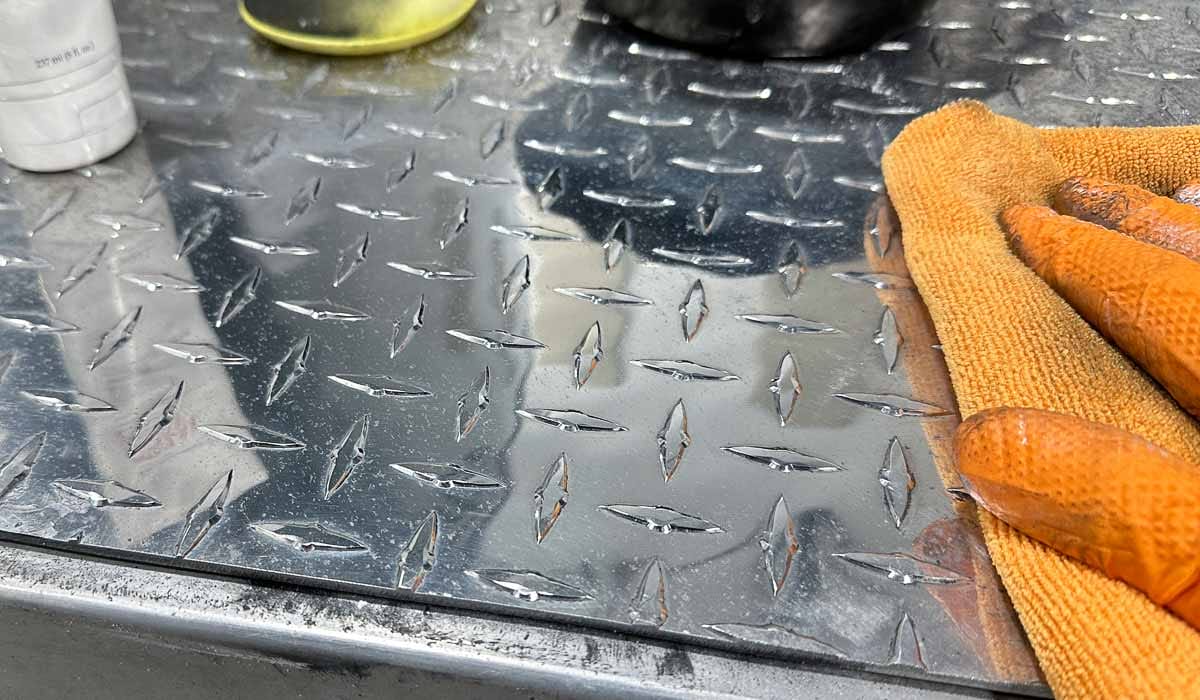
3.6Étape 3 : Temps de flash et polissage
- Laissez reposer le revêtement pendant 1 à 3 minutes(vérifiez les instructions de votre produit).
- À l’aide d’une serviette en microfibre propre et sèche, essuyez délicatement l’excédent de produit.
- Polissez jusqu'à ce qu'il ne reste plus de traces ni de voile.
3.7Étape 4 : Répétez l'opération sur l'ensemble du panneau
- Continuez section par section, en chevauchant légèrement chaque nouvelle zone.
- Cela garantit une couverture complète sans résultats irréguliers ou irréguliers.
3.8Étape 5 : Durcissement et entretien (facultatif mais recommandé)
- Une fois le revêtement terminé, laissez le panneau sécher pendant au moins 12 heures dans un endroit propre et aéré, à l’abri de l’humidité ou de la poussière.
- Évitez de vous laver à l'eau pendant 24 heures et évitez tout savon ou produit chimique pour 7 jours.
- Pour un durcissement plus rapide, utilisez un durcissement IR lampe si disponible.
3.9À quoi s'attendre après le revêtement céramique
Une fois durcie, la plaque de diamant en aluminium aura :
- Brillance améliorée – Des reflets plus profonds et une finition plus nette et plus vibrante
- Surface lisse– Sensation douce et raffinée sous la main
- Protection complète– Même les rainures diamantées encastrées seront revêtues
- Résistance aux empreintes digitales et aux taches– Facilite grandement la maintenance future
Références
www.drbeasleys.com/blog/2024/10/29/how-to-polish-aluminum-diamond-plate